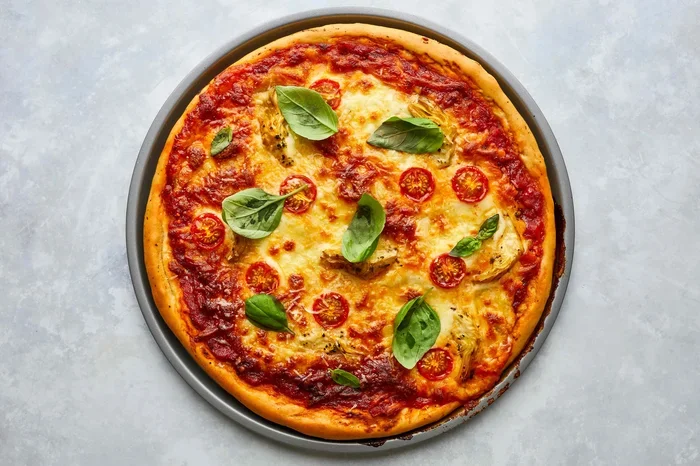
What Temperature Should The Oven Be For Homemade Pizza
The best oven temperature for homemade pizza is typically between 450°F and 500°F (230°C to 260°C). This range mimics a traditional pizza oven and helps create a crispy crust with perfectly melted cheese. Preheating your oven for at least 30 minutes ensures even heat distribution. Using a pizza stone or steel can significantly improve your results. Whether you prefer a thin Neapolitan-style crust or a thick deep-dish, the right oven temperature for pizza makes all the difference.
Key Takeaways
- Ideal Temperature Range: Most homemade pizza bakes best between 450°F and 500°F.
- Preheat Is Essential: Always preheat for at least 30 minutes before baking.
- Pizza Stone Matters: A preheated pizza stone helps achieve a crispy crust.
- Rack Position Counts: Place the rack in the lower third of the oven for best results.
- Watch the Clock: Most pizzas bake in 8 to 12 minutes at the right temperature.
- Convection Can Help: A convection setting promotes even browning and faster cooking.
- Adjust for Your Style: Thin crust needs higher heat; thick crust needs slightly lower temperatures.
📑 Table of Contents
- What Temperature Should The Oven Be For Homemade Pizza: A Complete Guide
- How to Preheat Your Oven for Perfect Pizza
- Pizza Stone vs. Baking Sheet: Which Works Better?
- Oven Rack Position and Its Impact on Pizza
- Common Mistakes People Make When Baking Pizza at Home
- Pro Tips for Restaurant-Quality Pizza at Home
- Conclusion
What Temperature Should The Oven Be For Homemade Pizza: A Complete Guide
Making great pizza at home starts with one simple decision: your oven temperature. Many people assume that any setting will work, but the truth is that the oven temperature for pizza can make or break your final result. A too-low setting leads to a soggy, pale crust, while excessive heat can burn the outside before the inside cooks through.
So what is the sweet spot? What Temperature Should The Oven Be For Homemade Pizza depends on a few factors, but most home cooks find that 450°F to 500°F works best. This range closely mimics the intense heat of a traditional wood-fired oven, just at a more manageable level for home kitchens. When you get the pizza baking temperature right, everything else falls into place.
Why Temperature Matters So Much
Temperature controls everything in pizza baking. It affects how quickly the dough rises in the oven, how the cheese melts, and how the crust develops its signature texture. When you bake pizza at home at the right heat, the dough cooks fast enough to stay chewy inside while turning golden and crispy on the outside.
Here is why pizza baking temperature matters so much:
- Crust texture: High heat creates a crisp exterior while keeping the inside soft and airy.
- Cheese melt: The right temperature ensures cheese melts evenly without turning greasy or burnt.
- Topping cooking: Vegetables and meats cook properly when the oven is hot enough.
- Browning: The Maillard reaction, which creates that golden-brown color, happens best at high temperatures.
When you nail the pizza oven settings, you get a balanced bite with a crunchy bottom, a chewy middle, and perfectly melted toppings on top. Getting the temperature wrong throws off this entire balance and leaves you with disappointing results.
The Sweet Spot: 450°F to 500°F
For most homemade pizza styles, 450°F to 500°F is the recommended range. This is hot enough to bake a thin-crust pizza in about 8 to 12 minutes. It is also the temperature at which a pizza stone or pizza steel reaches its peak performance and starts crisping the dough beautifully.
If your oven runs cool, you may need to push toward 500°F. If it runs hot or you prefer a thicker crust, 450°F might be your better option. The key is to know your oven and adjust accordingly. Every oven is different, and understanding yours is a big part of mastering homemade pizza.
How Different Pizza Styles Need Different Heat
Not all pizza is created equal, and neither should your pizza bake settings be. Different styles call for different approaches and temperatures:
- Neapolitan-style pizza: Traditionally baked at extremely high temperatures, around 800°F to 900°F in a wood-fired oven. At home, you can mimic this by maxing out your oven at 500°F to 550°F and using a pizza stone. The result will not be identical to a Naples pizzeria, but it comes closer than you might expect.
- New York-style pizza: This classic thin crust bakes well at 475°F to 500°F. The slightly lower fat content in the dough allows it to crisp up nicely at these temperatures.
- Thick-crust or deep-dish pizza: These styles benefit from a slightly lower temperature, around 400°F to 425°F. The thicker dough needs more time to cook through, so a lower, slower approach works better.
- Chicago-style deep dish: Bake at 425°F for 25 to 30 minutes. The longer cook time allows the thick dough to rise and the cheese to bubble without burning.
- Frozen or store-bought pizza: Follow the package instructions, but generally 425°F to 450°F works well. These pizzas are designed for home ovens and need slightly less heat than fresh dough.
Understanding these differences helps you set the right oven temperature for pizza every single time. No more guessing or settling for mediocre results. Whether you are aiming for a Neapolitan pizza temperature experience at home or a classic American thick slice, matching the heat to the style is the first step toward pizza perfection.
How to Preheat Your Oven for Perfect Pizza
Preheating is just as important as the temperature itself. Many people throw their pizza in the oven before it has fully heated up, and this is the number one reason home-baked pizza falls flat. A properly preheated oven ensures that the dough starts cooking immediately, which is essential for a good crust with the right pizza crust temperature from the very first second.
How Long Should You Preheat?
Most experts recommend preheating your oven for at least 30 minutes before baking pizza. This might seem like a long time, but it gives the oven walls, the racks, and any baking tools inside enough time to absorb and radiate heat evenly throughout the cooking chamber.
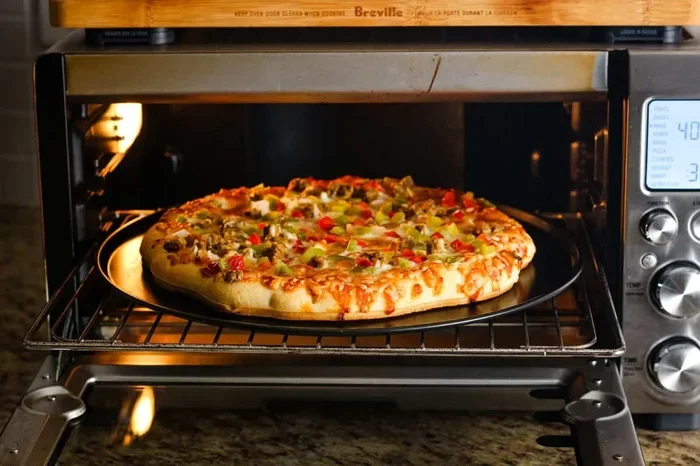
If you are using a pizza stone or pizza steel, you should preheat for a full 45 to 60 minutes. These tools need extra time to reach their maximum heat capacity. Placing cold dough on a stone that has not fully heated will result in a soggy bottom and a disappointing crust. Think of it like a cast iron skillet. You would never toss cold food on a cold skillet and expect a good sear. The same logic applies to pizza dough baking on a stone.
Here is a simple preheating checklist to follow every time:
- Place your pizza stone or steel on the middle or lower rack.
- Set your oven to the desired oven temperature for pizza.
- Close the door and let it heat for at least 30 minutes.
- Use an oven thermometer to verify the actual temperature inside.
- Once the oven is ready, slide the pizza onto the hot stone quickly.
Using an Oven Thermometer for Accuracy
Here is a fact that surprises many home cooks: most oven dials are inaccurate. Your oven might say it is 500°F, but the actual temperature inside could be 450°F or 550°F. This difference matters a lot when you are baking pizza at high heat.
A simple pizza oven thermometer costs just a few dollars and takes the guesswork out of the process. Place it inside your oven during preheating and check the reading before you bake. This small tool can transform your homemade pizza results overnight. Some ovens also have hot spots, meaning certain areas are hotter than others. Knowing where these spots are helps you position your pizza correctly and avoid uneven baking.
The Role of the Pizza Stone During Preheating
A pizza stone acts as a heat battery. It absorbs heat over a long preheating period and then releases that heat directly into the bottom of your pizza dough. This is what gives you that crispy, lightly charred crust that separates great homemade pizza from average pizza.
Without a stone, your pizza sits on a metal rack and bakes more slowly from the bottom. The crust becomes softer and less defined. If you want to improve your pizza stone temperature and overall baking results, a preheated stone is the easiest upgrade you can make. It is a small investment that pays off every single time you bake.
Pizza Stone vs. Baking Sheet: Which Works Better?
The surface you bake your pizza on has a huge impact on the final result. Two common options are a pizza stone and a standard baking sheet. Each has its strengths, and knowing when to use which can elevate your bake pizza at home experience significantly.
Benefits of a Pizza Stone
A pizza stone is made from porous ceramic or cordierite material. It draws moisture away from the dough as it bakes, which creates a crispier bottom crust. This mimics the effect of a brick oven floor, and it is the reason so many pizza lovers swear by stones for achieving crispy pizza crust at home.
Additional benefits of using a pizza stone include:
- Better heat retention: A stone stays hot even when you open the oven door briefly.
- Even heat distribution: The porous material spreads heat across the entire surface of the pizza.
- Crispier crust: Moisture is pulled away from the dough, preventing sogginess on the bottom.
- Natural non-stick surface: Flour and cornmeal prevent the dough from sticking to the stone.
For the best oven temperature for pizza results, always preheat your stone for at least 45 minutes before baking. The stone needs to be fully saturated with heat to deliver that perfect crispy base.
When to Use a Baking Sheet Instead
A pizza baking sheet is a perfectly valid option, especially if you do not own a pizza stone. Baking sheets are lighter, easier to handle, and more affordable. They also work well for thicker crust styles that do not need an ultra-crispy bottom.
Here is when a baking sheet makes sense:
- You are baking a thick or deep-dish pizza that does not need extreme crispiness on the bottom.
- You want a quick, no-fuss option for weeknight pizza nights.
- You are using store-bought dough or frozen pizza that does not require a stone.
- You do not have space to store a pizza stone in your kitchen.
The trade-off is that a baking sheet does not crisp the crust as effectively. The bottom will be softer and less defined compared to a stone-baked pizza. However, for casual weeknight cooking, a baking sheet works just fine and gets the job done.
Pizza Steel: The Upgrade Option
If you want to take your homemade pizza to the next level, consider a pizza steel. A steel conducts heat faster and more efficiently than a stone. It reaches higher temperatures more quickly and produces an even crispier crust with a beautiful leopard-spot pattern on the dough.
Pizza steels are more expensive than stones, but they also last longer and perform better. Many serious home pizza makers consider a steel to be the ultimate tool for achieving crispy pizza crust at home. If you bake pizza regularly, a steel is worth the investment. It transforms the pizza dough baking experience and brings you one step closer to professional-quality results.
Oven Rack Position and Its Impact on Pizza
Where you place the oven rack changes everything about how your pizza bakes. This is a detail that many people overlook, but it directly affects crust crispiness, cheese browning, and overall cooking time. Getting the oven rack position for pizza right is a simple tweak that can make a dramatic difference.
Why the Lower Rack Wins
For most pizza styles, the lower third of the oven is the best position. Here is why: heat rises, so the top of the oven is hotter than the bottom. Placing your pizza on the lower rack means the bottom of the dough gets intense direct heat from the oven floor and the pizza stone or baking surface beneath it.
This direct heat is what creates a crispy, well-browned bottom crust. If you place the pizza too high, the top cooks too fast while the bottom stays pale and soft. The pizza cheese melting and topping cooking also suffer when the rack position is wrong. The bottom of the pizza needs that direct radiant heat to develop properly.
What Happens If You Use the Wrong Rack
Using the wrong rack position can lead to several common problems that are easy to avoid:
- Burnt cheese, raw crust: If the rack is too high, the top browns quickly while the bottom stays undercooked and pale.
- Pale, soft crust: If the rack is too high and the oven is not hot enough, the bottom never gets the direct heat it needs to crisp up.
- Uneven cooking: Middle rack positions can work for some pizzas, but they do not provide the same bottom heat as the lower rack.
For the best oven rack position for pizza, always use the lowest rack available. If your pizza is browning too quickly on top, you can move it to the middle rack for the last two minutes of baking. This gives you control over both the bottom and top cooking without sacrificing crust quality.
Common Mistakes People Make When Baking Pizza at Home
Even with the right oven temperature for pizza, mistakes can ruin your results. Learning what to avoid is just as important as knowing the right settings. Here are the most common errors home pizza makers make and how to fix them.
Not Preheating Long Enough
This is the most common mistake home pizza makers make. A cold or lukewarm stone or baking surface means the dough sits and absorbs moisture instead of crisping up. Always preheat for at least 30 minutes, and 45 to 60 minutes if you are using a stone or steel.
Think of it like a cast iron skillet. You would never toss cold food on a cold skillet and expect a good sear. The same logic applies to pizza dough baking on a preheated surface. Patience during preheating pays off in crispier, more flavorful pizza every time.
Overloading Your Pizza With Toppings
It is tempting to pile on toppings, but too many ingredients create problems. Excess moisture from vegetables, meats, and cheese steams the dough and prevents the crust from crisping. This is especially true at lower pizza baking temperatures where the oven cannot evaporate the extra moisture quickly enough.
Keep your toppings light and balanced. Use a thin layer of sauce, a moderate amount of cheese, and just enough toppings to add flavor without weighing down the dough. Less is often more when it comes to homemade pizza. A simple margherita with fresh basil, mozzarella, and tomato sauce will always outperform an overloaded pizza with soggy crust.
Opening the Oven Door Too Often
Every time you open the oven door, you lose heat. This can drop the pizza crust temperature by 25°F or more, which slows down baking and affects crust quality. Resist the urge to peek too often.
Instead, watch your pizza through the oven window. Check it after about 5 minutes, and then only open the door when it is time to rotate or remove the pizza. This small habit makes a big difference in your final results and helps maintain the consistent pizza oven settings you worked hard to achieve.
Using Cold Dough Straight from the Fridge
Cold dough does not stretch well and bakes unevenly. Always let your dough come to room temperature before you shape and bake it. This usually takes about 30 to 60 minutes out of the refrigerator.
Room-temperature dough is more elastic, stretches more easily, and bakes more evenly. It also reacts better to the high oven temperature for pizza, rising and puffing up in the oven the way it should. Cold dough straight from the fridge will give you a dense, uneven crust that nobody wants to eat.
Pro Tips for Restaurant-Quality Pizza at Home
Want your homemade pizza to taste like it came from a professional pizzeria? These pro tips will help you get closer to that goal every time you turn on the oven and bake pizza at home.
Use a Pizza Peel for Easy Transfer
A pizza peel is a flat, paddle-shaped tool used to slide pizza onto and off of a hot stone. You can dust it with flour or cornmeal to prevent sticking. It makes transferring pizza to the hot stone much easier and safer than trying to use your hands or a cutting board. Pizza peels are inexpensive and available at most kitchen supply stores.
If you do not have a peel, a flat baking sheet turned upside down works in a pinch. Just dust it well with flour or cornmeal before adding the dough. The key is to move quickly and confidently so the dough does not stick or lose its shape during transfer.
Rotate Your Pizza Midway Through Baking
Most home ovens have hot spots. To ensure even baking, rotate your pizza 180 degrees halfway through the cook time. This simple step prevents one side from burning while the other stays pale and undercooked.
Use a pair of oven mitts and a pizza peel or large spatula to rotate the pizza quickly. The less time the door is open, the better your pizza bake settings will perform. A quick half-turn takes only a few seconds but can dramatically improve the overall appearance and texture of your pizza.
Let the Dough Rest Before Baking
After you shape your pizza, let it rest on the peel for a minute or two before sliding it onto the stone. This brief rest allows the dough to relax and hold its shape better. It also gives the flour time to absorb moisture, which reduces sticking and makes the transfer smoother.
Do not let the dough rest too long, though. If it sits for more than 10 minutes, it may start to stick to the peel. Work quickly and confidently when transferring your pizza to the hot stone. This small timing detail is one of the secrets to consistent, professional-looking homemade pizza.
Add Fresh Herbs and Drizzles After Baking
Delicate ingredients like fresh basil, arugula, and olive oil can burn easily in a hot oven. Add these after the pizza comes out of the oven. A drizzle of high-quality olive oil and a handful of fresh basil right after baking adds bright, fresh flavor that complements the crispy, hot pizza underneath.
This is a trick that professional pizzerias use, and it works beautifully for bake pizza at home as well. The contrast between the hot, crispy pizza and the cool, fresh toppings creates a more complex and satisfying eating experience. It is a small step that makes a big difference in the final presentation and flavor.
Experiment With Different Flour Types
The type of flour you use in your dough affects how it behaves at high temperatures. Bread flour, with its higher protein content, creates a chewier, more structured crust that holds up well in a hot oven. All-purpose flour produces a softer, more tender crust. For the best Neapolitan pizza temperature results at home, bread flour is the preferred choice among pizza enthusiasts.
You can also try a blend of bread flour and a small amount of whole wheat flour for added flavor and texture. Experimenting with different flours is one of the most fun parts of making homemade pizza. Each flour type brings its own character to the crust, and finding your favorite combination is part of the joy of pizza making at home.
Consider the Broiler for Extra Browning
If your pizza top is not browning enough while the bottom is perfectly crispy, try using the pizza broiler setting for the last one to two minutes of baking. Switch your oven to broil and watch the pizza closely. The intense top-down heat will give the cheese and toppings a beautiful golden-brown finish without overcooking the bottom.
This technique works especially well for pizza cheese melting and getting those attractive charred spots on the toppings. Just be very careful when using the broiler, as pizza can go from perfectly browned to burnt in seconds. Stay by the oven and check frequently.
Try Convection for Even Cooking
A convection oven for pizza can be a game-changer. The fan circulates hot air around the pizza, promoting even browning on all sides and reducing hot spots. If your oven has a convection setting, try using it at a temperature 25°F lower than you normally would. The circulating air cooks the pizza faster and more evenly, which is especially helpful for thicker crusts that need consistent heat throughout.
However, convection is not always better for thin, delicate pizzas. The strong fan can sometimes blow the crust around or dry it out too quickly. Experiment with both conventional and convection settings to find what works best for your pizza cooking time and preferred style.
Conclusion
Getting the oven temperature for homemade pizza right is the foundation of great pizza at home. The ideal range of 450°F to 500°F works for most styles, from thin Neapolitan-inspired crusts to thicker American-style pies. The key is to preheat properly, use the right tools, and avoid common mistakes that can hold you back from achieving your best results.
Remember that what temperature should the oven be for homemade pizza is not just a number. It is the starting point for a process that includes preheating time, rack position, dough preparation, and topping choices. When all of these elements come together, the results are genuinely impressive and taste far better than delivery ever could.
Start with the basics: preheat for at least 30 minutes, use a pizza stone if you have one, place the rack in the lower third, and bake for 8 to 12 minutes. From there, you can experiment with different temperatures, dough recipes, and topping combinations to find your personal perfect pizza. The beauty of homemade pizza is that you control every variable, and that is exactly what makes it so rewarding.
So fire up your oven, preheat that stone, and bake your next pizza with confidence. The right oven temperature for pizza transforms a simple meal into something truly special. Your kitchen will smell like a pizzeria, your crust will be crispy and golden, and you will never want to go back to store-bought frozen pizza again.
Frequently Asked Questions
Can I bake pizza at 400°F?
Yes, you can bake pizza at 400°F, but it will take longer and the crust will be softer. This temperature works well for thick-crust or deep-dish pizza that needs more time to cook through. For thin-crust pizza, 400°F may not be hot enough to achieve the crispy texture you want.
How long should I bake homemade pizza at 450°F?
At 450°F, most homemade pizzas bake in 10 to 14 minutes. Thin-crust pizzas may be done closer to 8 to 10 minutes, while thicker crusts may need the full 14 minutes. Keep an eye on the cheese and crust color to determine the perfect timing for your specific pizza.
Is 500°F too hot for a home oven?
No, 500°F is not too hot for a home oven. In fact, it is the ideal temperature for achieving crispy, restaurant-quality pizza at home. Most home ovens can safely reach and maintain 500°F. Just make sure to preheat for at least 30 minutes and use an oven thermometer to verify the temperature.
Should I use the broiler to finish my pizza?
Using the broiler for the last one to two minutes of baking can give your pizza a beautiful golden-brown finish on top. This technique is especially helpful if your oven has trouble browning the cheese and toppings evenly. Just watch the pizza closely, as the broiler can burn toppings very quickly.
Can I use a convection oven for pizza?
Yes, a convection oven works well for pizza and can produce more even results. Try reducing the temperature by 25°F when using convection mode, as the circulating air cooks food faster. Convection is particularly helpful for thicker pizzas that need consistent heat throughout the baking process.
Do I really need a pizza stone to make good homemade pizza?
A pizza stone is not strictly necessary, but it makes a significant difference in crust quality. The stone absorbs moisture from the dough and creates a crispy bottom that is hard to achieve with a baking sheet alone. If you do not have a stone, a baking sheet or even an inverted baking pan can work in a pinch.