How To Light An Old Gas Oven With Our Proven Method
Learning how to light an old gas oven is easier than you think. This guide walks you through every step with safety and simplicity in mind. You will discover the proven method for igniting your oven burner, fixing common problems, and keeping your gas appliance running smoothly. Whether your oven uses a pilot light or a manual igniter, we have you covered. Read on to light your old gas oven with confidence today.
There is something satisfying about keeping an old gas oven running well. These ovens have been around for decades, and many people still love them. They heat up fast, cook evenly, and often last longer than newer models. But one thing can trip you up: how to light an old gas oven when you have not done it before.
Maybe you just moved into a home with an older stove. Perhaps your oven’s igniter stopped working, and you need a backup plan. Whatever the reason, lighting an old gas oven does not have to be scary. With the right steps and a little patience, you can get that oven burner going in minutes.
In this guide, we will walk you through our proven method. We will cover safety basics, the lighting process itself, common problems, and maintenance tips. By the end, you will feel confident every time you need to light your old gas oven. Let us get started.
Key Takeaways
- Know Your Oven Type: Understanding whether your old gas oven uses a pilot light or an electronic igniter makes the lighting process much simpler and safer.
- Safety Comes First: Always check for gas leaks, ventilate your kitchen, and follow proper steps before attempting to light any gas appliance.
- Follow Our Proven Method: The step-by-step process of turning the gas valve, pressing the igniter button, and holding the knob ensures a successful flame every time.
- Troubleshoot Common Issues: Clogged burner ports, faulty igniters, and weak gas supply are the most common problems, and each has a clear fix.
- Regular Maintenance Matters: Cleaning your oven burner and checking the gas supply line regularly prevents future lighting problems.
- Know When to Call a Pro: If you smell gas, see visible damage, or cannot get a flame after trying all steps, a licensed technician is your best choice.
📑 Table of Contents
Understanding How Your Old Gas Oven Works
Before you touch any knob or button, it helps to understand what is happening inside your oven. Old gas ovens work in a fairly simple way. Gas flows from a supply line into the oven burner. When you ignite the gas, a flame heats the oven cavity. The control knob lets you adjust the gas flow and flame size.
Most old gas ovens use one of two ignition systems. The first is a pilot light. This is a small, constantly burning flame inside the oven. The second is a manual igniter, which creates a spark when you turn the knob. Some older models even use a thermocouple system that relies on heat to keep the gas valve open.
Pilot Light Systems
A pilot light is a small flame that stays on all the time. You can usually see it near the bottom of the oven. When you turn the oven on, gas flows into the burner area. The pilot light then ignites the gas, creating a cooking flame. These systems are very reliable but use a small amount of gas continuously.
If your oven has a pilot light, you may notice a small blue flame even when the oven is off. This is normal. The pilot light is always burning. Lighting an old gas oven with a pilot light system means making sure the pilot flame is lit and the gas flows correctly to the main burner.
Manual Igniter Systems
Manual igniter systems use a spark to light the gas. When you turn the knob to the ignite position, a piezo igniter creates a small electrical spark. This spark lights the gas as it comes out of the burner ports. These systems do not need a constantly burning pilot light, which makes them slightly more energy efficient.
Some manual igniters use a push-button igniter, while others require you to hold the knob in a specific position. Either way, the process is straightforward once you know what to do. Understanding your oven’s ignition type is the first step in lighting an old gas oven the right way.
Safety First: Preparing To Light Your Gas Oven
Safety is the most important part of lighting an old gas oven. Gas appliances can be dangerous if handled incorrectly. Before you do anything, take a moment to prepare your space and check for potential hazards. A few minutes of caution can prevent serious problems.
Check for Gas Leaks
Always check for gas leaks before lighting your oven. The easiest way is to use your nose. Natural gas and propane both have a sulfur-like smell added to them so you can detect leaks. If you smell gas near your oven, do not attempt to light it.
Instead, open windows and doors to ventilate the area. Leave the house if the smell is strong. Contact your gas company or a licensed technician immediately. Gas leak safety should always come before any oven lighting attempt.
Ventilate Your Kitchen
Good ventilation matters when working with any gas appliance. Open a window or turn on your range hood before lighting your oven. This ensures fresh air flows through the space and any stray gas can disperse safely. Oven ventilation is a simple step that makes a big difference in safety.
Gather Your Tools
You do not need many tools to light an old gas oven. A long-handled lighter or match works best. A flashlight can help you see inside the oven if it is dark. Keep a damp cloth nearby in case of small flare-ups. Having these items ready before you start makes the process smoother and safer.
Wear Safety Gear
While it may seem excessive, wearing oven mitts and avoiding loose clothing is wise. Loose sleeves or aprons can catch fire near an open flame. Keep children and pets away from the oven while you are lighting it. Simple oven safety habits protect you and your family.
Step-by-Step: How To Light An Old Gas Oven With Our Proven Method
Now we get to the core of the guide. Our proven method for how to light an old gas oven works for most models. Follow these steps carefully and in order. Do not rush through the process. Each step builds on the one before it.
Step 1: Turn Off the Gas Supply
Start by making sure the gas supply is off. Locate the gas valve on the line that connects to your oven. Turn the valve to the off position. This prevents gas from flowing while you prepare the oven. Gas valve safety is the foundation of the entire process.
Wait a few moments after turning the valve off. This gives any gas that may have built up time to clear out. You can smell the air to confirm there is no gas present before moving to the next step.
Step 2: Remove the Oven Grate and Burner Cap
Take out the oven grates and any burner caps covering the oven ports. These parts are usually easy to lift off. Set them aside on a clean surface. Removing them gives you clear access to the oven burner and the ignition area.
Look inside the oven cavity. You should see the burner tube or port. There may also be a small panel or cover over the igniter area. Remove any covers gently so you do not damage the components.
Step 3: Inspect the Burner Ports
Take a close look at the burner ports. These are the small holes where gas comes out. Over time, food debris, grease, and crumbs can clog these ports. Clogged burner ports are one of the most common reasons an old gas oven fails to light.
Use a thin needle, toothpick, or small brush to clean out any debris. Blow gently across the ports to remove loose particles. Clean ports allow gas to flow evenly, which creates a steady and reliable flame. This simple step can solve many lighting problems.
Step 4: Turn the Gas Valve Back On
Once the burner ports are clean, turn the gas valve back on. Go slowly and listen for the sound of gas flowing. You may hear a faint hissing sound. That is normal. If you smell gas strongly at this point, turn the valve off again and check for leaks.
Wait about 10 to 15 seconds after turning the valve on. This allows gas to build up in the burner area. Waiting is an important part of lighting an old gas oven that many people skip. It ensures there is enough gas for a clean ignition.
Step 5: Position the Oven Knob and Ignite
Now comes the moment of ignition. Turn the oven knob to the ignite or light position. If your oven has a piezo igniter, press the igniter button repeatedly while holding the knob in position. You should see a spark near the burner.
For pilot light systems, hold the oven knob in the light position for about 30 seconds. This allows the pilot flame to heat the thermocouple, which keeps the gas valve open. Once you see a flame, release the knob slowly.
Step 6: Adjust the Flame
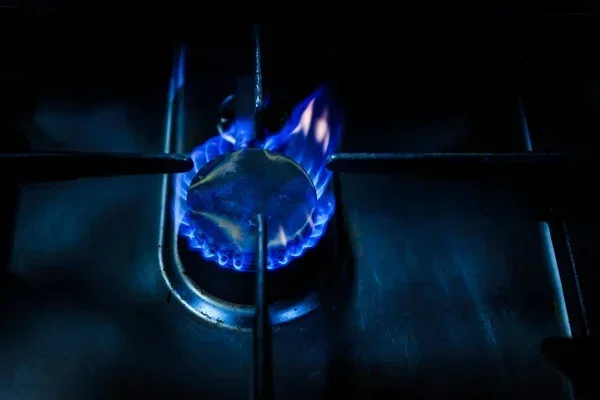
Once the oven is lit, check the flame. A healthy flame should be blue with a small yellow tip. A blue flame means the gas is burning efficiently. If the flame is yellow or orange, the gas may not be burning cleanly. This can produce carbon monoxide, which is dangerous.
Adjust the oven knob to find the right flame size. For most cooking tasks, a medium blue flame works well. Flame adjustment is an important part of oven maintenance and safe operation. If the flame goes out, repeat the process from step 4.
Step 7: Replace the Burner Components
After the oven is lit and the flame looks good, replace the burner cap and grate. Make sure everything sits securely in place. A loose burner cap can cause uneven flames or reignite problems. Double-check that all parts are seated correctly before you start cooking.
Common Problems When Lighting An Old Gas Oven
Even with the best method, things can go wrong. Old gas ovens have been around a long time, and wear and tear is expected. Knowing the common problems helps you troubleshoot quickly and avoid frustration.
The Oven Will Not Light At All
If your oven will not light, the first thing to check is the gas supply. Is the gas valve fully open? Is there gas in the line? Sometimes the gas supply to the house gets turned off during maintenance or an emergency. Check with your gas provider if you are unsure.
Next, inspect the igniter. If you have a piezo igniter, the battery or mechanism may be worn out. You can test this by pressing the igniter button and listening for a clicking sound. No click means the igniter may need replacement. Igniter replacement is a common fix for old gas ovens that refuse to light.
The Igniter Sparks But No Flame
If you see sparks but no flame appears, the burner ports may be blocked. Go back to step 3 of our method and clean the ports thoroughly. Another cause could be a weak gas supply. If the gas pressure is too low, the gas may not reach the burner area in sufficient amounts.
A faulty gas valve can also cause this problem. The valve may be stuck or worn. In this case, a professional technician should inspect and replace the valve. Never try to repair a gas valve yourself unless you are a licensed professional.
The Flame Goes Out Immediately
A flame that goes out right after lighting usually points to a thermocouple issue. The thermocouple is a safety device that shuts off the gas if the pilot light goes out. If the thermocouple is dirty or misaligned, it may cut off the gas too early.
Try cleaning the thermocouple with fine sandpaper. Make sure it is positioned correctly near the pilot flame. If cleaning does not work, the thermocouple may need replacement. This is an affordable part and easy to install in most old gas ovens.
Weak or Uneven Flame
A weak or uneven flame often comes from clogged burner ports or a partially blocked gas line. Clean the ports thoroughly and check for kinks in the gas supply line. A kinked line restricts gas flow and creates an uneven flame.
Weak oven flame can also indicate low gas pressure from the main supply. If multiple gas appliances in your home are running at the same time, they may be sharing the available gas pressure. Try turning off other gas appliances and see if the flame improves.
Maintaining Your Old Gas Oven For Reliable Ignition
Regular maintenance keeps your old gas oven running safely and efficiently. A little care goes a long way toward preventing lighting problems. Here are some simple habits that make a real difference.
Clean the Oven Burner Regularly
Food spills and grease buildup are the enemies of a clean oven burner. After every use, wipe up any spills inside the oven. Once a month, remove the burner cap and ports, and clean them thoroughly. A clean burner ensures even gas flow and a consistent flame.
Use warm soapy water and a soft brush to clean burner parts. Avoid harsh chemicals that can damage the metal. Dry everything completely before reassembling. Moisture left on the burner can cause rust over time.
Check the Gas Supply Line
Inspect the gas supply line every few months. Look for cracks, kinks, or signs of wear. A damaged gas line is a serious safety hazard. If you find any damage, turn off the gas supply and call a professional immediately.
Also check the connection points where the gas line meets the oven. Use a soapy water solution to test for leaks. Apply the solution to the connections and look for bubbles. Bubbles indicate a gas leak that needs immediate attention.
Replace Worn Parts Promptly
Old gas ovens have parts that wear out over time. The igniter, thermocouple, and gas valve are the most common components that need replacement. Do not wait until a part completely fails to replace it. Proactive oven maintenance saves you from unexpected breakdowns.
Most replacement parts are affordable and easy to find. Check your oven model number and order the correct part from a trusted supplier. If you are not comfortable replacing parts yourself, a licensed technician can handle the job quickly.
Keep the Oven Interior Clean
A clean oven interior improves performance and safety. Remove any food debris, grease, or crumbs from the bottom of the oven cavity regularly. Use an oven-safe cleaning solution and a non-abrasive sponge. A clean oven heats more evenly and reduces the risk of grease fires.
When To Call A Professional
There are times when lighting an old gas oven is not a DIY job. Knowing when to call a professional keeps you and your family safe. Gas appliances require careful handling, and some problems need expert attention.
Call a professional if you smell gas and cannot find the source. If the gas valve appears damaged or stuck, do not try to force it. A licensed gas technician has the training and tools to handle complex gas system issues safely.
Also call a pro if you have tried all the troubleshooting steps and your oven still will not light. Persistent lighting problems may indicate a deeper issue with the gas supply, ignition system, or internal components. A professional can diagnose and fix the problem without risk.
Finally, schedule a professional inspection every one to two years. A technician can check the entire gas system, clean hard-to-reach areas, and spot potential problems before they become serious. Regular professional maintenance extends the life of your old gas oven and keeps it running safely.
Conclusion
How to light an old gas oven does not have to be a daunting task. With our proven method, you now have a clear, step-by-step process to follow. You know how to check for safety hazards, clean the burner, turn the gas valve, and ignite the oven properly. You also know the common problems and how to fix them.
Regular maintenance keeps your old gas oven in great shape for years to come. Clean the burner, inspect the gas line, and replace worn parts when needed. And remember, when in doubt, always call a professional. Safety should always be your top priority when working with any gas appliance.
Now that you have the knowledge and confidence, go ahead and light your old gas oven with ease. Your oven has served you well, and with a little care, it will keep cooking delicious meals for many more years. Happy cooking!
Frequently Asked Questions
Can I light an old gas oven without an igniter button?
Yes, you can. If your old gas oven does not have an electronic igniter button, it likely uses a pilot light system. Simply light a long match or lighter and hold it near the burner port while turning the oven knob to the on position. The pilot flame will ignite the gas flowing to the burner.
Why does my old gas oven smell gas when I try to light it?
A slight gas smell when you first turn the valve is normal. Gas builds up in the burner area before ignition. However, if the smell is strong or lingers, turn the valve off immediately. Ventilate the area and check for leaks before trying again. A persistent gas smell could indicate a damaged gas line or valve.
How often should I clean my old gas oven burner?
You should clean your oven burner at least once a month if you use the oven frequently. For occasional users, every two to three months works well. Regular cleaning prevents clogged burner ports, which are the most common cause of lighting problems in old gas ovens.
Is it safe to use an old gas oven?
Yes, old gas ovens are generally safe when properly maintained. Regular inspections, cleaning, and timely part replacements keep them in good working condition. However, if your oven is very old and shows signs of damage, rust, or gas leaks, have a professional assess it before continued use.
What should I do if the oven flame is yellow instead of blue?
A yellow flame means the gas is not burning completely. This can produce carbon monoxide, which is dangerous. First, clean the burner ports to remove any blockages. If the flame stays yellow after cleaning, check the air shutter on the burner and adjust it. If the problem persists, call a professional technician to inspect the gas pressure and burner setup.
Can I convert an old gas oven from propane to natural gas?
Yes, but it requires a proper conversion kit and professional installation. Propane and natural gas have different pressure levels and orifice sizes. Using the wrong gas type without conversion can damage the oven and create safety hazards. Always hire a licensed technician for any gas conversion work.