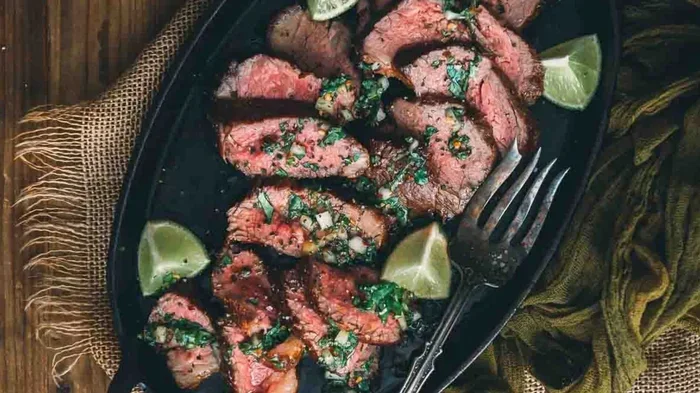
Sear Tri Tip Before Or After Oven Best Method Revealed
Searing tri tip before or after oven cooking changes everything about your roast’s flavor, texture, and juiciness. The reverse sear method and traditional sear-first approach each offer unique benefits for your tri tip steak. This guide reveals the best method so you get a golden crust and perfectly pink interior every single time.
There is nothing quite like a perfectly cooked tri tip roast sitting on your dinner table. The golden-brown crust. The juicy, pink center. The aroma that fills the whole kitchen. But here is the question that has sparked countless debates among home cooks and pitmasters alike: should you sear tri tip before or after oven cooking? The answer might surprise you.
Whether you are a seasoned grill master or a beginner just starting out in the kitchen, this question matters a lot. The way you sear your tri tip affects the flavor, texture, and overall quality of the final dish. In this article, we will break down both methods step by step. You will learn exactly when to sear, why it matters, and how to get restaurant-quality results at home.
The sear tri tip before or after oven debate comes down to science and personal preference. Both approaches work. But one might work better for your specific cut, your equipment, and your desired outcome. Let us dive into the details and find out which method deserves a spot in your cooking routine.
Key Takeaways
- Sear Before Oven: Creates a deep brown crust quickly and locks in juices during the oven phase.
- Sear After Oven: Gives you more control over internal temperature and avoids overcooking the edges.
- Reverse Sear Wins for Thick Cuts: Oven-first then sear produces the most even doneness throughout.
- Use a Meat Thermometer: Always check internal temperature to hit your perfect level of doneness.
- Rest Your Meat: Letting tri tip rest after cooking keeps those juices locked inside the roast.
- Cast Iron is King: A hot cast iron skillet delivers the best sear marks and flavor crust.
- Fat Cap Matters: Rendering the fat cap first adds incredible flavor and crispiness to your roast.
📑 Table of Contents
- What Is Tri Tip and Why Does Searing Matter?
- Sear Tri Tip Before Oven: The Traditional Method
- Sear Tri Tip After Oven: The Reverse Sear Method
- Comparison Table: Sear Before vs. Sear After Oven
- Which Method Should You Choose?
- The Science Behind the Sear
- Common Mistakes to Avoid
- Pro Tips for Oven-Baked Tri Tip Perfection
- Frequently Asked Questions
- Final Thoughts on Searing Tri Tip Before or After the Oven
What Is Tri Tip and Why Does Searing Matter?
Before we get into the sear timing, let us talk about what tri tip actually is. The tri tip is a cut of beef that comes from the bottom sirloin. It is a triangular-shaped roast that typically weighs between one and a half and two and a half pounds. This cut is popular in California BBQ culture and has gained fans all across the country.
What makes tri tip special is its unique grain structure. The muscle fibers run in different directions throughout the roast, which means how you slice it matters just as much as how you cook it. But beyond the slicing technique, the cooking method plays a huge role in the final result.
Searing is the process of cooking the surface of the meat at very high heat. This creates a process called the Maillard reaction. That is a fancy term for the chemical reaction between amino acids and sugars that produces the brown, flavorful crust on your meat. The sear does not seal in juices, despite what many people believe. But it does add incredible depth of flavor and a satisfying texture contrast.
When you sear tri tip before or after oven cooking, you are controlling when and how that Maillard reaction happens. And that timing changes the entire outcome of your roast.
Sear Tri Tip Before Oven: The Traditional Method
How the Sear-First Method Works
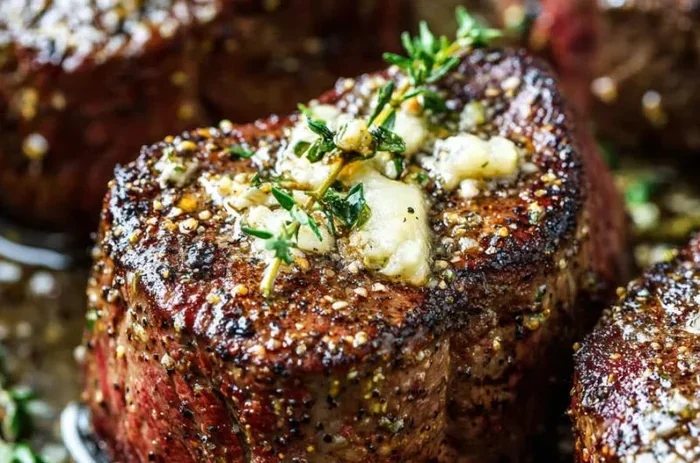
The traditional approach starts with a hot pan or grill. You place your seasoned tri tip directly into a screaming hot cast iron skillet or onto a smoking hot grill grate. You sear each side for about two to three minutes until you get a deep brown crust. Then you transfer the roast into a preheated oven to finish cooking through.
This method is fast and straightforward. It gives you those beautiful sear marks and a rich, caramelized exterior right from the start. Many home cooks prefer this approach because it feels intuitive and delivers immediate gratification.
Benefits of Searing Before the Oven
- Quick Flavor Development: The high heat creates a complex crust full of savory, roasted flavors in just minutes.
- Great for Thin Cuts: If your tri tip is on the thinner side, this method works well because the oven finish is short.
- Easy to Execute: You do not need to plan as far ahead. Sear, then oven. Simple and effective.
- Better for Broiler Finishing: If you use your oven broiler instead, the sear-first method pairs naturally with top-down heat.
Drawbacks to Watch Out For
The sear-first method is not perfect, though. One common issue is uneven cooking. When you start with a hard sear, the outer layers of the meat heat up quickly. By the time the center reaches your target temperature, the outer edges may be overcooked. This can lead to a gray band of meat just beneath the crust.
Another concern is moisture loss. A hot sear drives moisture out of the surface. If you leave the roast in the oven too long, that moisture does not come back. The result can be a slightly drier roast than you were hoping for.
Step-by-Step Sear-First Instructions
- Remove your tri tip from the refrigerator 30 to 45 minutes before cooking. Let it come to room temperature.
- Pat the roast dry with paper towels. Moisture is the enemy of a good sear.
- Season generously with salt, pepper, garlic powder, and any other spices you like.
- Heat a cast iron skillet over high heat until it is smoking hot. Add a high-smoke-point oil like avocado oil.
- Place the tri tip in the skillet and do not move it for two to three minutes. Let the crust form.
- Flip and sear the other sides, about two minutes per side.
- Transfer the skillet directly into a preheated oven set to 375°F (190°C).
- Cook until a meat thermometer reads 130°F (54°C) for medium-rare. This usually takes 15 to 25 minutes.
- Remove from the oven and let the roast rest for at least 10 minutes before slicing.
Quick Tip: If you do not have a cast iron skillet, use the heaviest oven-safe pan you own. The heavier the pan, the more heat it retains, and the better your sear will be.
Sear Tri Tip After Oven: The Reverse Sear Method
How the Reverse Sear Works
The reverse sear flips the traditional method on its head. You start by cooking the tri tip in a low-temperature oven until it reaches about 10 to 15 degrees below your target internal temperature. Then you take it out and give it a hard, fast sear in a blazing hot skillet or on a grill. This is the method that has gained a huge following in the BBQ and steak communities.
The reverse sear works beautifully with tri tip roast because of the cut’s thickness and fat content. The slow oven phase gently brings the meat up to temperature evenly throughout. Then the final sear adds that gorgeous crust without overcooking the center.
Benefits of Searing After the Oven
- Perfect Edge-to-Edge Doneness: The low and slow oven cook eliminates the gray band problem entirely.
- More Control Over Internal Temperature: You can pull the roast out of the oven at exactly the right moment.
- Better Resting Period: The roast rests after the oven and before the sear, which helps redistribute juices.
- Ideal for Thick Cuts: If your tri tip is two inches thick or more, this method gives the most consistent results.
- Less Moisture Loss During Cooking: The gentle oven phase preserves more of the meat’s natural juices.
Drawbacks to Consider
The reverse sear takes more time. You are looking at roughly 20 to 30 minutes in the oven depending on the thickness of your roast. It also requires more attention to temperature monitoring. If you do not use a thermometer, you risk undercooking or overcooking the meat.
There is also a slight risk of the surface drying out during the long oven phase. However, this is easily managed by not cooking at too high a temperature and by making sure your roast has a good fat cap.
Step-by-Step Reverse Sear Instructions
- Remove the tri tip from the fridge at least 30 minutes before cooking.
- Pat it completely dry and season well with salt and your favorite rub.
- Place the roast on a wire rack set over a sheet pan. This allows air to circulate around the meat.
- Preheat your oven to 225°F (107°C). This low temperature is key to even cooking.
- Insert a kitchen thermometer into the thickest part of the roast.
- Cook until the internal temperature reaches 115°F to 120°F (46°C to 49°C) for medium-rare.
- Remove from the oven and let it rest for five minutes while you heat your skillet.
- Heat a cast iron skillet to maximum temperature with avocado oil or clarified butter.
- Sear the tri tip on all sides for 45 to 60 seconds per side. You want a deep, dark crust.
- Rest the roast for 10 minutes before slicing against the grain.
Expert Insight: Pitmaster Aaron Franklin often talks about how the reverse sear gives him the most control over his beef roasts. The slow oven phase creates an incredibly even temperature gradient from edge to center. Then the final sear is purely about flavor and texture.
Comparison Table: Sear Before vs. Sear After Oven
Let us put the two methods side by side so you can see the differences clearly.
| Factor | Sear Before Oven | Sear After Oven |
|---|---|---|
| Cooking Time | Faster overall (30 to 40 minutes) | Slower overall (45 to 60 minutes) |
| Crust Quality | Good, slightly thicker crust | Excellent, deep golden-brown crust |
| Evenness of Doneness | Some gray band near the surface | Perfectly even from edge to edge |
| Moisture Retention | Moderate | Excellent |
| Difficulty Level | Easy, beginner-friendly | Intermediate, requires a thermometer |
| Best For | Thinner cuts, quick weeknight dinners | Thick cuts, special occasions |
| Resting Time | 10 minutes minimum | 10 to 15 minutes recommended |
Which Method Should You Choose?
Choose Sear-First If…
You are short on time and want dinner on the table quickly. The sear-first method gets your tri tip steak from raw to plated in under 45 minutes. It is also a great choice if your tri tip is on the thinner side, around one to one and a half inches thick. In that case, the oven phase is short enough that you do not run into the gray band problem.
The sear-first approach also works well when you are using a broiler instead of a conventional oven. The top-down heat from the broiler combines nicely with the pre-seared surface to create an all-around browned roast.
Choose Reverse Sear If…
You want the absolute best results and you are willing to invest a little more time. The reverse sear is the go-to method for thick cuts of beef. If your tri tip is two inches or thicker, this method will give you the most even, juicy, and flavorful result.
The reverse sear is also ideal when you are cooking for guests or for a special occasion. The extra time and attention pay off with a roast that looks and tastes like it came from a high-end steakhouse.
The Science Behind the Sear
Understanding why searing matters helps you make better decisions about timing. The Maillard reaction, which we mentioned earlier, occurs when proteins and sugars in the meat are exposed to high heat. This reaction creates hundreds of new flavor compounds that give seared meat its characteristic roasted, savory taste.
Temperature is the key player here. The Maillard reaction kicks in around 280°F (138°C) and accelerates rapidly above 300°F (149°C). This is why a ripping hot skillet or grill grate is essential. A lukewarm pan simply cannot achieve the same level of browning and flavor development.
When you sear tri tip before or after oven cooking, you are deciding when that Maillard reaction takes place. Before the oven means the crust forms first and the inside gently cooks. After the oven means the inside cooks gently first and the crust forms at the very end. Both paths lead to delicious results, but the texture and flavor profiles differ in subtle but meaningful ways.
The fat cap on your tri tip also plays an important role. Rendering the fat cap before or during cooking adds flavor and helps conduct heat evenly through the roast. Some cooks prefer to start with the fat cap down in the skillet during the sear phase. This renders the fat and creates a crispy, flavorful exterior layer.
Common Mistakes to Avoid
Even the best method can go wrong if you make avoidable mistakes. Here are the most common errors people make when cooking tri tip:
- Skipping the Dry Pat: Wet meat steams instead of sears. Always pat your roast completely dry before it hits the hot pan.
- Cold Meat Goes Straight to Heat: A cold roast shocks the pan and cooks unevenly. Always bring it to room temperature first.
- Not Using a Thermometer: Guessing doneness leads to overcooked or undercooked meat. A digital meat thermometer is your best friend.
- Cutting Too Soon: Cutting into the roast immediately after cooking releases all those precious juices. Always rest your meat.
- Slicing With the Grain: Tri tip has multiple grain directions. Find where the grain changes and slice accordingly for maximum tenderness.
- Overcrowding the Pan: If you sear multiple pieces at once, the pan temperature drops and you lose that hard sear.
Quick Tips for the Perfect Sear:
- Heat your pan until it is just smoking before adding the roast.
- Do not move the meat during the initial sear. Let the crust develop undisturbed.
- Use a high-smoke-point oil. Olive oil burns too quickly at searing temperatures.
- Add a tablespoon of butter and crushed garlic during the final sear for extra flavor.
- If using a grill, preheat it to high heat and clean the grates thoroughly first.
Pro Tips for Oven-Baked Tri Tip Perfection
Beyond the sear timing, a few extra tips can elevate your oven-baked tri tip from good to great. These small adjustments make a big difference in the final product.
First, consider using a wire rack instead of placing the roast directly on a baking sheet. A wire rack allows hot air to circulate around the entire roast during the oven phase. This promotes more even cooking and better crust formation during the final sear.
Second, let your skillet heat up for a full five minutes before adding the meat. Many people rush this step. A properly preheated skillet gives you better sear marks and a more developed crust. Listen for that slight sizzle when the meat hits the pan. That is the sound of a good sear happening.
Third, do not forget about the resting period. After cooking, wrap your tri tip loosely in aluminum foil and let it sit for at least 10 minutes. During this time, the internal temperature will rise by about 5 degrees as the residual heat continues cooking the center. This carryover cooking is important to factor in when checking your target temperature.
Finally, always slice against the grain. Tri tip has a unique grain that shifts direction partway through the roast. Look for where the muscle fibers change direction and adjust your slicing angle accordingly. This single step makes the difference between tender, juicy slices and tough, chewy ones.
Chef’s Tip: For extra smoke flavor, add a few wood chips to your cast iron skillet during the final sear. Hickory and cherry wood chips pair beautifully with beef tri tip and add a subtle smoky depth to the crust.
Frequently Asked Questions
Should I sear tri tip before or after the oven for the juiciest result?
The reverse sear method, where you sear after the oven, generally produces the juiciest results. This is because the low-temperature oven phase gently cooks the meat without driving out too much moisture. The final sear is quick and only affects the outer surface, preserving the juicy interior.
Can I sear tri tip on a grill instead of in a skillet?
Absolutely. Grilling works wonderfully for both sear-first and reverse sear methods. For the sear-first approach, use a hot grill grate and sear each side for two to three minutes. For the reverse sear, finish the tri tip on the hottest part of the grill for a hard sear on all sides. Grilling adds a wonderful smoky flavor that complements the beef beautifully.
What internal temperature should I aim for when cooking tri tip?
For medium-rare, pull your tri tip at 130°F (54°C) and let it rest. The temperature will rise to about 135°F during resting. For medium, aim for 140°F (60°C) before resting. Always use a reliable meat thermometer inserted into the thickest part of the roast for the most accurate reading.
How long should I let my tri tip rest after cooking?
Let your tri tip rest for at least 10 minutes and up to 15 minutes. During this resting period, the juices redistribute throughout the meat. If you cut too soon, those juices run out onto the cutting board instead of staying in the slice. Tent the roast loosely with foil to keep it warm while it rests.
Is the reverse sear method only for tri tip, or can I use it for other cuts?
The reverse sear works beautifully for many thick cuts of beef, including ribeye, strip steak, pork chops, and even whole chickens. Any cut that is at least one and a half inches thick benefits from the gentle oven phase followed by a hard sear. The method gives you incredible control over internal temperature and produces a stunning crust every time.
What is the best seasoning for oven-baked tri tip?
A simple blend of coarse salt, black pepper, garlic powder, and smoked paprika works wonders on tri tip. Some cooks like to add onion powder, cumin, or a touch of brown sugar for a sweet and savory rub. If you prefer a more classic approach, a dry rub with salt, pepper, and fresh rosemary or thyme brings out the natural beef flavor beautifully.
Final Thoughts on Searing Tri Tip Before or After the Oven
The debate over whether to sear tri tip before or after oven cooking does not have a single right answer. Both methods produce delicious results when done correctly. The sear-first method is fast, easy, and perfect for weeknight dinners. The reverse sear takes a little more time but delivers unmatched evenness and a stunning crust.
Your choice depends on your schedule, your equipment, and the thickness of your cut. If you are in a hurry, go with the traditional sear-first approach. If you want to impress guests or are working with a thick roast, the reverse sear is your best bet.
What matters most is that you cook with confidence and pay attention to the details. Use a good meat thermometer. Pat your meat dry. Let it rest. Slice against the grain. Follow these principles and your tri tip roast will turn out amazing every single time.
So the next time you are standing in front of a hot skillet wondering when to sear, you will know exactly what to do. Trust the process, enjoy the cooking, and savor every bite of that perfectly seared tri tip. Happy cooking!