How To Reheat Ribs In Oven In Foil For Perfect Results
Reheating ribs in oven in foil is the best way to keep your leftover ribs moist, tender, and full of flavor. This method uses low heat and foil wrapping to gently warm the meat without drying it out. You’ll learn the exact temperature, timing, and pro tips to get restaurant-quality results at home. Whether you have bone-in pork ribs or beef ribs, this guide covers everything you need. Follow our simple steps and never waste a delicious rack of ribs again.
Key Takeaways
- Low and slow is the way to go: Reheating at 250°F keeps ribs tender and juicy.
- Foil trapping moisture: Wrapping ribs in foil creates steam that prevents drying out.
- Add liquid for extra flavor: A splash of apple juice or broth enhances taste and texture.
- Internal temperature matters: Always check that ribs reach 165°F for safe eating.
- Unwrap for crispiness: Remove foil for the last 10 minutes to get a slight bark.
- Timing varies by rib type: Baby back ribs reheat faster than larger spare ribs.
- Avoid high heat: Cranking the oven will dry out the meat and ruin the texture.
📑 Table of Contents
- Why Reheat Ribs In Oven In Foil Is The Best Method
- What You Need To Reheat Ribs In The Oven
- Step-By-Step Guide To Reheat Ribs In Oven In Foil
- Tips For The Best Reheated Ribs Every Time
- Common Mistakes To Avoid When Reheating Ribs
- Foil Reheating Vs Other Methods Compared
- How Long Do Reheated Ribs Last In The Fridge
- Final Thoughts On Reheating Ribs In Foil
Why Reheat Ribs In Oven In Foil Is The Best Method
There is nothing quite like the taste of leftover ribs. Whether you ordered too much at your favorite BBQ spot or saved some from a family dinner, reheat ribs in oven in foil is hands down the best way to bring them back to life. The oven and foil combo works like magic. It locks in moisture and keeps the meat tender. You get results that feel almost as good as the first time around.
Why does this method work so well? Aluminum foil acts as a mini oven inside your oven. It traps heat and steam around the ribs. This gentle environment warms the meat evenly. It also prevents the surface from drying out. Compare this to microwaving, which often leaves ribs rubbery and unevenly heated. The foil method gives you control and consistency every single time.
The key principle behind this technique is simple. Low and slow heat is your best friend. High temperatures will cook the edges too fast and leave the center cold. They will also squeeze out the juices you worked so hard to preserve. By keeping the temperature low, you let the heat penetrate gently. The result is ribs that taste freshly cooked, not leftover and tired.
If you love leftover ribs, this guide is for you. We will walk you through every step. You will learn the right temperature, timing, and tricks that make all the difference. By the end, you will feel confident reheating any type of rib in your oven with foil. Let us get into it.
The Science Behind Reheating Ribs In Foil
Understanding a little bit of the science helps you appreciate why this method works so well. When you wrap ribs in aluminum foil, you create a sealed environment. Heat circulates around the meat. Steam builds up inside the foil packet. This steam does two important things. First, it gently warms the meat fibers. Second, it keeps the natural juices locked inside the rib meat.
Ribs are made of collagen, fat, and muscle fibers. These components react differently to heat. Collagen breaks down slowly at low temperatures. This is what makes ribs tender and juicy. When you use high heat, the collagen contracts too fast. It squeezes out moisture and makes the meat tough. That is exactly why reheat ribs in oven in foil at a low temperature. You want that slow collagen breakdown to happen gently.
The foil also prevents what chefs call “surface dehydration.” Without a barrier, the hot oven air pulls moisture away from the outer layer of the meat. The surface dries out and becomes tough. The foil creates a humid microclimate. It shields the ribs from direct dry heat. This is why your reheated ribs come out soft and succulent instead of hard and chewy.
What You Need To Reheat Ribs In The Oven
Before you start, make sure you have everything ready. The good news is you do not need fancy equipment. A few basic kitchen items will do the trick perfectly. Here is your checklist.
Equipment Checklist
- Aluminum foil: Heavy-duty foil works best. It holds up better against heat and moisture.
- Oven-safe baking dish or sheet pan: A rimmed sheet pan works great for catching any drips.
- Meat thermometer: This is essential. You need to check the internal temperature for food safety.
- Liquid for moisture: Apple juice, broth, or even water works well.
- Oven mitts: Simple but important for handling hot foil packets safely.
Choosing The Right Ribs For Reheating
Not all ribs reheat the same way. Bone-in pork ribs are the most common leftover type. They hold moisture well and reheat beautifully in foil. Baby back ribs are thinner and cook faster. They usually need less time in the oven. Spare ribs are thicker and meatier. They may need a few extra minutes to heat through completely.
Beef ribs are another popular option. They have more fat content, which helps them stay moist during reheating. The extra fat acts as a natural buffer against drying out. Whether you have BBQ ribs, smoked ribs, or grilled ribs, the foil method works for all of them. The key is adjusting your timing based on the thickness and type of rib you are reheating.
Step-By-Step Guide To Reheat Ribs In Oven In Foil
Now for the part you have been waiting for. Here is the full process for reheat ribs in oven in foil like a pro. Follow these steps carefully and you will get amazing results every time.
Step 1: Preheat Your Oven
Set your oven to 250°F. This low temperature is the foundation of the entire method. It gives the heat enough time to penetrate deep into the meat without cooking the outer layer too fast. If you skip this step and put cold ribs into a hot oven, the edges will overcook while the center stays cold. Patience is key here.
Step 2: Prepare The Ribs
Take your leftover ribs out of the refrigerator. Let them sit at room temperature for about 15 to 20 minutes. This small step helps the ribs heat more evenly. While you wait, tear off a sheet of heavy-duty aluminum foil. You want enough foil to wrap the ribs completely with some overlap.
If your ribs have any remaining sauce, you can drizzle a little extra on top. The sauce will caramelize slightly and add flavor. If your ribs are dry, add about two tablespoons of apple juice or broth to the foil before wrapping. This liquid creates extra steam inside the packet. It infuses the meat with moisture as it reheats.
Step 3: Wrap The Ribs Tightly In Foil
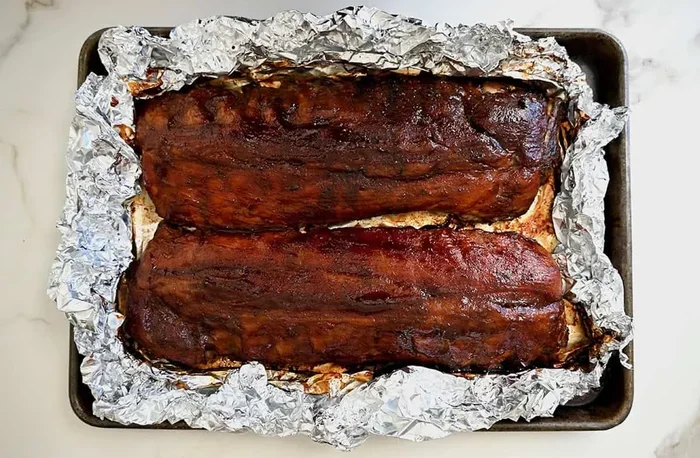
Place the ribs on the foil, meat side up. Fold the foil over the ribs and fold the edges to create a sealed packet. You do not need to make it airtight. You just want to trap most of the steam inside. Think of it as creating a little tent for your ribs. The foil should feel snug but not crushed.
For extra protection against leaks, you can use a double layer of foil. This is especially helpful if your ribs have a lot of sauce or glaze. Sticky drips can make the foil harder to seal with a single layer. Double wrapping gives you peace of mind and a better seal.
Step 4: Place In The Oven And Wait
Put the foil-wrapped ribs on a baking sheet or in an oven-safe dish. Place them in the center of the oven. Reheat ribs in oven in foil for about 20 to 30 minutes for baby back ribs. For spare ribs or larger cuts, go with 30 to 40 minutes. The exact time depends on how many racks you are reheating and how cold they are from the fridge.
Here is a helpful reference:
- Baby back ribs (1 rack): 20 to 25 minutes at 250°F
- Spare ribs (1 rack): 30 to 40 minutes at 250°F
- Multiple racks: Add 5 to 10 extra minutes
- Frozen ribs: Thaw first, then follow the same timing
Step 5: Check The Internal Temperature
This step is non-negotiable. Use your meat thermometer to check the internal temperature of the thickest part of the rib. You want the ribs to reach 165°F for safe consumption. If they are not there yet, keep them in the oven for another 5 to 10 minutes. Check again until you hit the target temperature.
Do not rely on time alone. Every oven is different. The thickness of your ribs varies. The starting temperature matters too. A meat thermometer takes all the guesswork out of the equation. It is the single most important tool for reheating ribs perfectly.
Step 6: Unwrap And Finish For Crispiness
Once your ribs hit 165°F, carefully remove the foil packet from the oven. Use oven mitts because the steam will be very hot. Open the foil away from your face to avoid the steam burn. Now here is the secret to getting a slightly crispy exterior. Leave the ribs uncovered on the baking sheet and put them back in the oven for 5 to 10 minutes at 250°F.
This brief unwrapped phase does wonders. It lets the surface dry out just enough to develop a light bark. It also gives the sauce a chance to thicken and stick to the meat. Your reheated ribs will look and feel almost like they just came off the smoker or grill. This final step is what separates good reheated ribs from great ones.
Tips For The Best Reheated Ribs Every Time
Want to take your reheated ribs to the next level? These practical tips make a huge difference. They are simple but they add up to a big improvement in flavor and texture.
Add A Little Liquid For Extra Moisture
Before you wrap the ribs in foil, add a small amount of liquid to the pan. Apple juice is a classic choice because it complements the smoky, sweet flavors of BBQ ribs. You can also use beef broth for beef ribs or even a splash of cola for a unique twist. The liquid creates extra steam inside the foil. This steam bathes the meat and keeps it incredibly moist.
Just be careful not to add too much liquid. You do not want the ribs sitting in a pool of liquid. That will make them soggy instead of tender. Two tablespoons is usually the sweet spot. Just enough to generate steam without pooling at the bottom.
Brush On Extra Sauce At The End
If your original ribs had sauce, consider adding a fresh layer at the end. The sauce on reheated ribs can sometimes taste a bit flat after being heated again. A light brush of fresh sauce during the last few minutes of reheating adds brightness and flavor. It also helps create a glossy, sticky glaze on the outside of the ribs.
Let The Ribs Rest Before Serving
Once you take the ribs out of the oven, let them rest for 3 to 5 minutes. This resting period allows the juices to redistribute throughout the meat. If you cut into them right away, the juices will run out and the meat will be drier. A short rest makes a noticeable difference in tenderness and juiciness.
Use Parchment Paper Under The Foil
This is a small trick that saves a lot of cleanup. Line your baking sheet with parchment paper before placing the foil-wrapped ribs on top. The parchment prevents any sauce or drips from sticking to the pan. It also makes the foil easier to remove without tearing. Cleanup becomes a breeze when you use this simple layer.
Common Mistakes To Avoid When Reheating Ribs
Even with the best intentions, it is easy to make mistakes when reheating ribs. Here are the most common ones and how to avoid them.
Using Too High A Temperature
This is the number one mistake people make. They crank the oven up to 350°F or higher because they want the ribs to heat faster. The problem is that high heat dries out the meat before the center has a chance to warm up. Reheat ribs in oven in foil at 250°F. It takes a little longer but the results are worth the wait. Your ribs will be tender and juicy instead of dried out and tough.
Skipping The Thermometer
Guessing the internal temperature is a risky move. You might think the ribs are done, but the center could still be too cold. On the other hand, you might overheat them trying to be safe. A meat thermometer removes all uncertainty. It gives you a precise reading so you know exactly when the ribs are ready. Every single time.
Wrapping The Foil Too Tightly
You want a good seal, but do not crush the ribs inside the foil. Tight wrapping compresses the meat and squeezes out juices. Leave some room inside the foil so the ribs can expand slightly as they heat up. Think of it as wrapping them gently, like tucking them into a cozy blanket.
Reheating Ribs More Than Once
Reheating ribs a second time significantly degrades the quality. The meat loses more moisture each time it goes through the heating and cooling cycle. If you have a large batch of leftover ribs, reheat only what you plan to eat. Store the rest properly in the refrigerator and enjoy them fresh the next day.
Foil Reheating Vs Other Methods Compared
There are several ways to reheat leftover ribs. Let us compare the foil oven method with other popular approaches. This table shows you why reheat ribs in oven in foil comes out on top.
| Method | Moisture Retention | Texture | Ease | Best For |
|---|---|---|---|---|
| Foil In Oven | Excellent | Tender and juicy | Easy | All types of ribs |
| Microwave | Poor | Rubbery and uneven | Very Easy | Quick small portions |
| Grill Or Smoker | Good | Crispy and smoky | Moderate | Outdoor cooking enthusiasts |
| Skillet On Stovetop | Fair | Slightly crispy bottom | Moderate | Small batches only |
| Oven Without Foil | Fair | Drier surface | Easy | When crispiness is priority |
As you can see, the foil oven method offers the best balance of moisture, texture, and ease. It is the most reliable way to get consistent results. The microwave is fast but sacrifices quality. The grill adds great flavor but requires more effort and skill. For most people reheating ribs at home, reheat ribs in oven in foil is the clear winner.
How Long Do Reheated Ribs Last In The Fridge
Proper storage is just as important as proper reheating. If you do not store your ribs correctly, even the best reheating technique will not save them. Leftover ribs should be stored in the refrigerator within two hours of cooking. Place them in an airtight container or wrap them tightly in plastic wrap.
Properly stored leftover ribs last 3 to 4 days in the refrigerator. If you need to keep them longer, freeze them. Frozen ribs can last up to 3 months in the freezer. When you are ready to eat them, thaw them in the refrigerator overnight before reheating. Never thaw ribs at room temperature. That creates a breeding ground for bacteria and affects the texture of the meat.
Label your containers with the date so you always know how long the ribs have been stored. Following these storage tips ensures that your reheated ribs are not only delicious but also safe to eat.
Final Thoughts On Reheating Ribs In Foil
Reheat ribs in oven in foil is one of the simplest and most effective ways to enjoy leftover ribs. The method is forgiving, requires minimal equipment, and delivers outstanding results. You do not need to be a professional chef to get it right. Just follow the steps, keep the temperature low, and use your meat thermometer.
The beauty of this technique is in the details. The foil traps moisture. The low heat gently warms the meat. The final unwrapped phase adds just enough crispiness to make the ribs feel fresh. Every element works together to create a reheating process that preserves and even enhances the flavor of your ribs.
Next time you have leftover ribs, do not settle for a soggy microwave meal. Take the extra 30 minutes and use the foil oven method. Your taste buds will thank you. The ribs will taste almost as good as the first time around, and sometimes even better. That is the power of reheating ribs in oven in foil done right. Enjoy every bite and make the most of your leftovers.
Frequently Asked Questions
Can I reheat ribs in foil at 350°F instead of 250°F?
You can, but 250°F is highly recommended for the best results. Higher temperatures dry out the meat faster and can cause the edges to overcook while the center stays cold. The low and slow approach at 250°F ensures even heating and keeps the ribs tender and juicy throughout.
How do I know when reheated ribs are done?
Use a meat thermometer to check the internal temperature. The ribs should reach 165°F in the thickest part. You can also check by pressing the meat gently. It should feel hot throughout and have some give, not be cold or rubbery in the center.
Can I reheat frozen ribs in foil in the oven?
Yes, but you need to add extra time. Frozen ribs should be thawed in the refrigerator overnight for the best results. If you reheat them frozen, increase the time by about 15 to 20 minutes and check the internal temperature carefully to make sure the center is fully heated through.
Do I need to add liquid when wrapping ribs in foil?
Adding liquid is optional but highly recommended. A couple of tablespoons of apple juice, broth, or water creates extra steam inside the foil packet. This steam keeps the ribs moist and adds a subtle layer of flavor. It makes a noticeable difference, especially if your ribs are already on the drier side.
Can I use parchment paper instead of foil?
Parchment paper alone does not trap steam as effectively as foil. For the best results, use both. Place parchment paper on the baking sheet, then wrap the ribs in foil. The parchment protects the pan and makes cleanup easier, while the foil creates the steam environment that keeps ribs tender.
What is the best way to store leftover ribs before reheating?
Store leftover ribs in an airtight container in the refrigerator within two hours of cooking. They will keep well for 3 to 4 days. For longer storage, wrap them tightly in plastic wrap and foil, then freeze. Always reheat ribs from the refrigerator, not from frozen, for the most even heating and best texture.
=== CONCLUSION ===
Reheat ribs in oven in foil is a simple technique that transforms leftover ribs into a delicious meal. By keeping the temperature low at 250°F, wrapping the ribs tightly in foil, and adding a little liquid for moisture, you preserve the tenderness and flavor of the original cook. The process takes about 20 to 40 minutes depending on the type of ribs, and the final unwrapped step adds a satisfying crispiness to the surface.
Remember to always use a meat thermometer and aim for an internal temperature of 165°F. Avoid common mistakes like using too high heat or skipping the resting period. With the tips and steps outlined in this guide, you now have everything you need to reheat ribs perfectly every single time. Your leftover ribs deserve a second chance, and the foil oven method gives them exactly that. Try it next time and taste the difference for yourself.