Fat Side Up Or Down In Oven Find The Best Position
Placing meat fat side up or down in oven changes everything about your roast. The position affects how fat renders, how crispy the skin gets, and how juicy the meat stays. This guide breaks down the best approach for every cut so you get flavorful, evenly cooked meat every single time.
You have spent hours picking the perfect cut of meat. You seasoned it lovingly. You preheated the oven just right. But then you pause at the oven door and wonder one thing: should the fat go up or down? This tiny decision can completely change your roast. The position of the fat affects everything from crispiness to juiciness to how the meat browns.
Many home cooks guess at this. Some learned it from a grandparent. Others read a blog post years ago and never questioned it. The truth is, there is a science behind fat side up or down in oven cooking. And once you understand it, you will never second-guess yourself again. This guide walks you through exactly what happens, why it matters, and how to get the best results every time.
Whether you are roasting a whole chicken, a pork shoulder, or a beef brisket, the position of the fat plays a big role. Let us break it all down in simple, practical terms so you can cook with confidence starting today.
Key Takeaways
- Fat side up lets fat melt over the meat: This keeps lean cuts moist and adds rich flavor throughout cooking.
- Fat side down creates a crispy exterior: The fat renders directly onto the pan, giving you a beautiful crust and crispy skin.
- Different meats need different positions: Chicken, beef, pork, and lamb all benefit from specific fat placement strategies.
- Oven temperature matters: High heat crisps fat faster, while low heat renders it slowly for tender results.
- Rack position affects cooking: Placing the tray on the right oven rack ensures even heat distribution and proper fat drainage.
- Avoid common mistakes: Not scoring fat, skipping the meat thermometer, and ignoring oven hot spots can ruin your roast.
- Resting meat is essential: Letting the roast sit after cooking redistributes juices for a succulent final result.
📑 Table of Contents
- What Happens When You Cook Meat Fat Side Up Vs Fat Side Down
- The Science Behind Fat Rendering In The Oven
- Best Practices For Different Meats
- Common Mistakes People Make With Fat Positioning
- Expert Tips For Perfect Oven Roasting
- Quick Tips For Getting It Right Every Time
- Final Verdict: Which Position Is Best
What Happens When You Cook Meat Fat Side Up Vs Fat Side Down
The direction you place your meat in the oven changes how heat interacts with the fat layer. This might seem like a small detail. But it has a huge impact on texture, flavor, and overall cooking results. Let us look at both positions closely.
Fat Side Up: What To Expect
When you place the meat with the fat facing up, the fat layer sits closest to the top heat source. As the oven heats, the fat begins to melt slowly. It drips down and over the meat as it cooks. This creates a self-basting effect. The meat stays moist and picks up a rich, savory flavor from the rendered fat.
This position works especially well for larger roasts. Think beef brisket, pork shoulder, or a whole turkey. The fat melts gradually and keeps the interior tender. You also get a nice even layer of rendered fat coating the surface, which helps with browning.
One thing to watch for: the fat cap may not get as crispy when placed face up. The top stays soft and rendered rather than crunchy. If you love crispy skin or a crackling exterior, you might want to consider flipping the meat partway through cooking.
Fat Side Down: What To Expect
Placing the fat side down means the fat layer sits directly on the baking tray or rack. The heat from below melts the fat quickly. It renders out into the pan, leaving behind a beautifully crispy exterior on the meat itself.
This method is fantastic for achieving a crunchy, golden crust. Chicken skin becomes crispy and golden when cooked fat side down first. Beef roasts develop a gorgeous brown crust that locks in juices. The fat also drips away from the meat, which can be helpful if you are watching your fat intake.
The downside is that the meat can dry out faster without the fat basting it from above. You need to keep a closer eye on cooking time and internal temperature. Using a meat thermometer becomes essential with this approach.
The Science Behind Fat Rendering In The Oven
Understanding why fat behaves the way it does in an oven helps you make smarter cooking choices. Fat rendering is a simple but fascinating process.
What Is Fat Rendering?
Fat rendering happens when heat breaks down the solid fat into liquid oil. This process starts around 130 to 140 degrees Fahrenheit. The fat melts slowly and releases its stored flavor. As it melts, it bastes the meat from within or from above, depending on the position.
The speed of rendering depends on several factors. Oven temperature is the biggest one. Higher temperatures render fat faster but can also cause the exterior to burn before the interior cooks through. Lower temperatures render fat slowly and evenly, giving you tender, flavorful results.
How Fat Affects Cooking Time
Fat acts as an insulator. A thick fat cap slows down heat transfer to the meat. This means roasts with more fat may need slightly longer cooking times. But the payoff is worth it. The fat keeps the meat juicy and adds incredible depth of flavor.
When you cook fat side down, the fat renders into the pan faster. The meat is exposed to direct heat sooner. This can shorten cooking time slightly. But it also means the meat loses moisture more quickly. Balancing these factors is the key to a perfect roast.
Why Fat Cap Thickness Matters
Not all fat caps are created equal. A thin fat cap renders quickly and offers less insulation. A thick fat cap takes longer to render but protects the meat better. For thin caps, fat side down works great because the fat renders out fast and leaves a crispy surface. For thick caps, fat side up gives the fat more time to melt and baste the meat naturally.
Best Practices For Different Meats
Every type of meat has its own ideal cooking position. What works for a whole chicken does not always work for a beef roast. Let us go through the most popular cuts and their best approaches.
Whole Chicken: Fat Side Up Or Down?
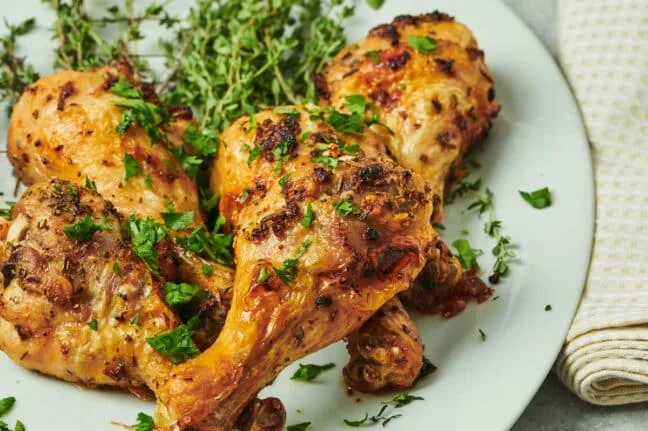
A whole chicken benefits from starting fat side down. This crisps the skin beautifully and renders out excess fat. After about 20 to 30 minutes, you can flip the chicken fat side up. This lets the fat baste the meat as it finishes cooking. The result is crispy skin on the outside and juicy meat on the inside.
If you prefer super crispy skin all over, keep it fat side down for the entire cook. Just baste the breast meat occasionally with pan juices to keep it moist.
Beef Roast: Which Position Wins?
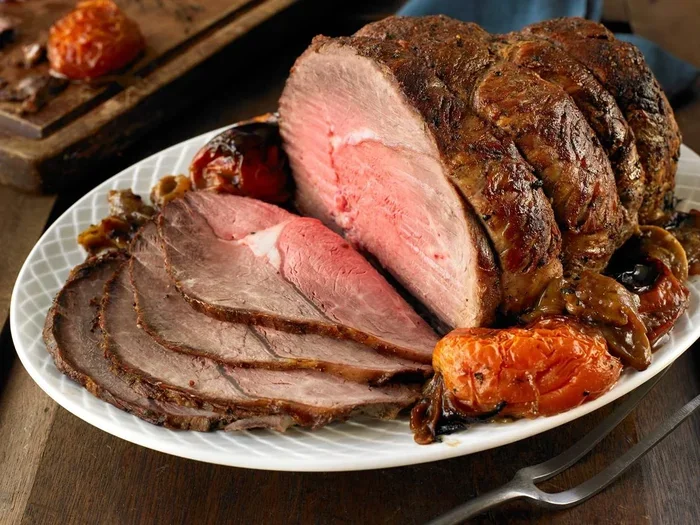
For most beef roasts, fat side up is the go-to method. The fat cap melts slowly and coats the roast as it cooks. This gives you a flavorful, tender result with even browning. A beef chuck roast or a standing rib roast benefits greatly from this approach.
However, if you want a deeply caramelized crust, try searing the roast fat side down first. Let it sit on the hot pan for 5 to 10 minutes before flipping to fat side up for the rest of the cook. This gives you the best of both worlds.
Pork Shoulder And Butt
Pork shoulder has a thick fat cap that needs time to render. Place it fat side up for most of the cook. The fat melts slowly and keeps the meat incredibly tender. In the last 30 to 45 minutes, you can flip it fat side down to crisp up the exterior.
This works beautifully for pulled pork, smoked pork shoulder, and boneless pork butt. The long, slow cook allows the fat to break down completely, leaving you with melt-in-your-mouth meat.
Lamb Roasts And Leg Of Lamb
Lamb roasts usually have a fat cap that should face up during cooking. The fat bastes the lean lamb meat and prevents it from drying out. Lamb is naturally leaner than beef or pork, so keeping the fat intact during cooking makes a big difference in juiciness.
For crispy lamb fat, score the fat cap in a crosshatch pattern before roasting. This increases the surface area and helps the fat render faster and more evenly.
Common Mistakes People Make With Fat Positioning
Even experienced cooks make mistakes when it comes to fat placement. Here are the most common ones and how to avoid them.
Skipping The Score
One of the biggest mistakes is placing meat with an un-scored fat cap in the oven. Scoring the fat allows it to render faster and more evenly. Without scoring, the fat cap can act like a shield and prevent heat from reaching the meat. The result is uneven cooking and a rubbery fat layer.
Use a sharp knife to make shallow cuts across the fat. Space them about half an inch apart. This simple step transforms your roast from good to great.
Ignoring Oven Hot Spots
Most ovens have hot spots. These are areas that run hotter than others. If your oven has a hot spot on one side, the fat side facing that area will render faster. This can cause uneven cooking and uneven crispiness.
To avoid this, rotate your roasting pan halfway through cooking. This ensures all sides of the meat get equal exposure to heat. It is a small step that makes a big difference.
Not Using A Fat Drip Pan
When you cook fat side down, all that rendered fat goes straight into the pan. Without a drip pan, the fat can cause smoke and even flare-ups. It can also make cleanup a nightmare.
Always use a roasting pan or a baking tray with a raised rack. Place a drip pan underneath to catch the rendered fat. This keeps your oven clean and your cook safe.
Opening The Oven Door Too Often
Every time you open the oven door, heat escapes. The temperature drops. Your cook time gets thrown off. And the fat rendering process slows down or speeds up unpredictably.
Resist the urge to peek. Use the oven light to check on your roast. Only open the door when you need to baste, flip, or check the internal temperature with a meat thermometer.
Forgetting To Rest The Meat
Resting meat after cooking is just as important as positioning the fat correctly. When you take the roast out of the oven, the juices inside are under pressure. If you cut into it immediately, those juices run out and the meat dries up.
Let the meat rest for 10 to 20 minutes before slicing. Tent it loosely with aluminum foil. The juices redistribute throughout the meat, giving you a tender, succulent result every time.
Expert Tips For Perfect Oven Roasting
Getting the perfect roast takes more than just choosing the right fat position. A few extra tips can elevate your cooking to the next level.
Preheat Your Oven Properly
Always preheat your oven before placing the meat inside. A properly heated oven ensures the fat starts rendering immediately. This leads to even cooking and a better crust. Give your oven at least 15 to 20 minutes to reach the target temperature.
Use The Right Oven Rack Position
Place your roasting pan on the middle oven rack. This allows heat to circulate evenly around the meat. If you place the pan too high, the top gets too much direct heat. Too low, and the bottom scorches before the fat renders properly.
Baste For Extra Flavor
Basting is one of the simplest ways to improve your roast. Every 30 to 45 minutes, spoon the pan juices over the meat. This adds flavor, keeps the surface moist, and promotes even browning. For extra richness, mix the pan juices with a little butter or olive oil before basting.
Let The Meat Come To Room Temperature
Take the meat out of the refrigerator 30 to 45 minutes before cooking. Letting it sit at room temperature ensures it cooks more evenly from edge to center. Cold meat going into a hot oven creates a temperature gradient that leads to uneven cooking.
Invest In A Good Meat Thermometer
A meat thermometer takes the guesswork out of cooking. Insert it into the thickest part of the meat, avoiding the bone or fat cap. Target temperatures vary by meat type:
- Chicken: 165 degrees Fahrenheit internally
- Beef roast: 135 degrees for medium rare, 145 for medium
- Pork shoulder: 195 to 205 degrees for pulled pork
- Lamb: 135 degrees for medium rare
Quick Tips For Getting It Right Every Time
- Score the fat cap before placing meat in the oven for faster, more even rendering.
- Start fat side down for crispy skin or crust, then flip to fat side up for the rest of the cook.
- Use a drip pan to catch rendered fat and prevent oven smoke.
- Rotate the pan halfway through to combat oven hot spots.
- Rest the meat for at least 10 minutes before slicing to lock in juices.
- Always use a meat thermometer to check doneness instead of relying on time alone.
- Pat the meat dry before seasoning. Dry skin crisps better and renders more efficiently.
Final Verdict: Which Position Is Best
There is no single best answer to whether fat should go up or down in the oven. The right position depends on the cut of meat, your oven, and your personal preferences. If you want a juicy, self-basting roast with tender meat, go fat side up. If you love crispy skin and a caramelized crust, start fat side down and consider flipping partway through.
The beauty of understanding fat side up or down in oven cooking is that you now have the knowledge to make the best choice for every roast you make. You are no longer guessing. You are cooking with purpose and confidence.
Try both methods on your next cook. Pay attention to how the meat looks, feels, and tastes. Over time, you will develop an instinct for what works best with each cut. And your roasts will be better for it.
Great cooking comes from understanding the basics and then experimenting. Now that you know the science behind fat positioning, you have a solid foundation to build on. Your oven is ready. Your meat is waiting. Go make something delicious.
Frequently Asked Questions
Should I cook chicken fat side up or down in the oven?
Start with the fat side down for the first 20 to 30 minutes to crisp the skin. Then flip it fat side up to let the fat baste the meat as it finishes cooking. This two-step approach gives you crispy skin and juicy meat.
Does fat side up make meat more juicy?
Yes, fat side up allows the melting fat to baste the meat as it cooks. This self-basting effect keeps lean cuts moist and adds rich flavor throughout the roasting process.
Can I flip the meat halfway through cooking?
Absolutely. Flipping the meat partway through is a great technique. Start fat side down for a crispy exterior, then flip to fat side up for even cooking and basting. This works well for chicken, pork shoulder, and beef roasts.
What temperature should I use for roasting meat with a fat cap?
A moderate temperature of 325 to 375 degrees Fahrenheit works best for most roasts. This allows the fat to render slowly without burning the exterior. For faster crisping, start at 425 degrees for the first 15 minutes, then reduce the heat.
How long does it take for fat to render in the oven?
Fat rendering time depends on thickness and oven temperature. A thin fat cap may render in 20 to 30 minutes at 375 degrees. A thick fat cap on a pork shoulder can take several hours at 225 to 275 degrees to render completely.
Is it better to trim the fat before roasting?
It depends on the cut. Leave at least a quarter-inch of fat on the meat for flavor and moisture. Trim away any thick, hard pieces of fat that will not render properly. Scoring the remaining fat cap helps it melt faster and more evenly during cooking.
=== CONCLUSION ===
Deciding between fat side up or down in oven does not have to be confusing. Fat side up keeps your meat moist and flavorful through self-basting. Fat side down creates a crispy, caramelized exterior that looks and tastes amazing. The best approach often combines both methods.
Now you know how different meats respond to each position. You understand the science of fat rendering. You are aware of common mistakes and how to avoid them. You have practical tips and expert insights at your fingertips.
The next time you prepare a roast, think about the fat. Think about the heat. Think about the result you want. Then place that meat in the oven with confidence. Great cooking starts with understanding the small details that make a big difference. And today, you have mastered one of the most important ones.