How To Cook Ribs In The Oven At 300 For Beginner Cooks
Learning how to cook ribs in the oven at 300 is one of the easiest ways to get restaurant-quality barbecue ribs at home. This low and slow method turns tough cuts into tender, juicy, fall off the bone ribs with minimal effort. Whether you are using pork baby back ribs or spare ribs, this oven ribs recipe delivers consistent results that your whole family will love.
Cooking ribs in the oven at 300 degrees is a game changer for home cooks. You do not need a smoker or a backyard grill to get amazing results. A standard oven, a baking sheet, and some aluminum foil are all you need. This method is perfect for beginners who want to try their hand at barbecue ribs without investing in expensive equipment.
The beauty of slow cooking ribs in the oven at 300 is that it requires very little attention once you get them in. You set the temperature, walk away, and let the oven do the work. In a few hours, you will have tender, juicy ribs with a beautiful bark and rich flavor. This oven baked ribs approach works year round, rain or shine, making it one of the most reliable ways to cook ribs at home.
Whether you are planning a weekend family dinner or a casual get-together, knowing how to cook ribs in the oven at 300 gives you confidence. You will learn the right rib cooking time, the best rib rub recipe, and simple tricks that elevate your results. This guide covers everything from selecting the meat to pulling it off the bone. By the end, you will be able to make oven roasted ribs that rival any barbecue joint.
Key Takeaways
- 300°F is the ideal rib cooking temperature: It balances moisture and flavor while breaking down collagen slowly for tender ribs.
- Remove the membrane before cooking: This small step makes a huge difference in texture and seasoning absorption.
- Foil wrapping keeps ribs moist: A foil wrap during the first half of cooking locks in steam and speeds up tenderization.
- Use a meat thermometer: Internal temperature of 195-203°F signals perfectly done ribs every time.
- Rest your ribs before slicing: Letting them rest for 15-20 minutes redistributes juices for a better bite.
- Apply sauce at the end: Adding barbecue sauce too early causes burning and bitterness.
- Patience is key: Low and slow oven ribs at 300 take time but require very little active effort.
📑 Table of Contents
- Why Cooking Ribs At 300°F Works So Well
- Choosing The Right Ribs For Oven Cooking
- Preparing Your Ribs The Right Way
- Step By Step Guide To Cooking Ribs In The Oven At 300
- Adding Sauce And Finishing Strong
- Common Mistakes And How To Avoid Them
- Expert Tips For Perfect Ribs Every Time
- Serving Suggestions For Your Oven Ribs
- Storing And Reheating Leftover Ribs
- Conclusion
Why Cooking Ribs At 300°F Works So Well
The Science Behind Low And Slow Cooking
When you cook ribs at 300 degrees, you are using a technique often called low and slow. This approach heats the meat gently and evenly. At this temperature, the collagen inside the rib connective tissue breaks down slowly. Collagen is a tough protein that makes meat chewy when it is not cooked properly. But when given enough time at a steady 300, it melts into gelatin. This is what makes ribs tender and juicy.
Higher temperatures can dry out ribs quickly. The outer layers burn before the inside has a chance to become soft. At 300, the heat penetrates evenly. The fat renders slowly, basting the meat from within. This is why oven ribs at 300 produce such consistent, delicious results compared to rushing the process at higher heat.
What Happens At 300 Degrees
Here is what goes on inside your ribs when they cook at 300 degrees Fahrenheit:
- First hour: The surface dries slightly, forming a tacky layer called the pellicle. This is where your dry rub for ribs will stick and develop flavor.
- Hours two through three: Collagen starts breaking down. Fat begins rendering. The ribs start to pull away from the bone slightly.
- Hours three through four: The meat becomes tender and pulls from the bone with gentle pressure. This is the sweet spot for fall off the bone ribs.
- Final stage: The bark forms on the outside. The interior is moist and packed with flavor.
Understanding this timeline helps you avoid opening the oven door too often. Every time you open the door, you lose heat and moisture. Trust the process and let the oven do its job.
Choosing The Right Ribs For Oven Cooking
Pork Baby Back Ribs vs Spare Ribs
Not all ribs are the same, and choosing the right cut matters for your oven ribs recipe. The two most common types are pork baby back ribs and spare ribs. Each has its own characteristics that affect how they cook and how they taste.
Pork baby back ribs come from the top of the rib cage, near the backbone. They are smaller, leaner, and more tender. They cook faster than spare ribs and are a great choice for beginners. Most oven ribs recipes call for baby backs because they are forgiving and easy to work with.
Spare ribs come from the lower belly area. They have more fat and more connective tissue. This means they need a longer rib cooking time but reward you with a richer, more intense flavor. If you prefer hearty, meaty ribs, spare ribs are an excellent choice for slow cooking in the oven at 300.
| Feature | Baby Back Ribs | Spare Ribs |
|---|---|---|
| Location on pig | Top of rib cage | Lower belly area |
| Fat content | Leaner | Higher fat |
| Cooking time at 300°F | 3-4 hours | 4-5 hours |
| Texture | Tender, lean | Rich, meaty |
| Best for beginners | Yes | Moderate |
| Bone to meat ratio | More meat, less bone | More bone, more fat |
What To Look For At The Butcher Or Store
When you go to buy ribs, look for meat that is pink and firm. Avoid ribs that have a grayish color or a slimy feel. The fat should be white, not yellow. Yellow fat can indicate the meat is older.
Check that the ribs have a good amount of meat on them. You want the bones to be covered with a decent layer of flesh. If the meat is too thin, it will dry out during the long cook. Look for ribs with a thin white membrane on the bone side. You will remove this before cooking, which is an important step in preparing oven roasted ribs the right way.
Preparing Your Ribs The Right Way
Removing The Membrane
Every rack of ribs has a thin, translucent membrane on the bone side. Many people skip this step, but removing it makes a big difference. The membrane does not soften during cooking. It can become chewy and block your dry rub from reaching the meat. Removing it allows flavors to penetrate deeply and gives you better texture.
To remove the membrane, flip the ribs bone side up. Use a butter knife to gently lift a corner of the membrane near one of the bones. Once you have a grip, use a paper towel to get a better hold and peel it off in one piece. It might take a couple tries, but it is worth the effort.
Making A Simple Dry Rub
A good rib rub recipe is the foundation of great oven baked ribs. You do not need a long list of ingredients. A simple blend works beautifully. Here is a basic dry rub for ribs that beginners can make in seconds:
- 1/4 cup brown sugar
- 2 tablespoons paprika
- 1 tablespoon garlic powder
- 1 tablespoon onion powder
- 1 teaspoon cumin
- 1 teaspoon black pepper
- 1 teaspoon salt
- 1/2 teaspoon chili powder
Mix all the ingredients together in a small bowl. Pat the ribs dry with paper towels first. This helps the rub stick. Apply the rub generously to all sides of the ribs. Press it in gently with your hands. For the best flavor, let the rubbed ribs sit in the refrigerator for at least one hour or overnight.
How Long To Let Ribs Sit Before Cooking
Ideally, you should apply the dry rub for ribs and let them rest in the fridge for a few hours or overnight. This gives the seasonings time to work into the meat. The salt in the rub draws out moisture, which then gets reabsorbed. This process, called dry brining, makes the ribs juicier and more flavorful.
If you are short on time, even 30 minutes at room temperature before cooking helps. But do not skip the resting step entirely. The difference between a quick rub and an overnight one is noticeable in the final result.
Step By Step Guide To Cooking Ribs In The Oven At 300
Setting Up Your Oven
Preheat your oven to 300 degrees Fahrenheit. While it is warming up, line a baking sheet with aluminum foil. This makes cleanup much easier. You can also place a wire rack on the baking sheet, which allows air to circulate around the ribs evenly.
If you do not have a wire rack, you can place the ribs directly on the foil. Just be aware that the bottom will steam more and may not get as crispy. The rack method is preferred for the best oven ribs recipe results.
Wrapping Ribs In Foil
Once your ribs are seasoned and ready, wrap them tightly in a double layer of aluminum foil. This is a key step for slow cooking ribs in the oven. The foil trap creates a steaming environment that keeps the ribs moist. It also speeds up the tenderizing process.
Place the wrapped ribs on the baking sheet with the seam side facing up. This prevents steam from leaking out. Some cooks add a small splash of apple cider vinegar or apple juice inside the foil before sealing. This adds a subtle tang and keeps the ribs extra moist.
How Long To Cook Ribs In The Oven
The standard rib cooking time at 300 degrees is about 3 to 4 hours for baby back ribs and 4 to 5 hours for spare ribs. Here is a general timeline to follow:
- Hour 0: Ribs go into the preheated 300-degree oven, foil wrapped.
- Hour 2: Open the foil carefully to check progress. The meat should be pulling back from the bones slightly.
- Hour 3: Remove the foil. This allows the bark to form and the surface to dry slightly.
- Hour 3.5 to 4: Check the internal temperature. You are aiming for 195 to 203 degrees Fahrenheit.
- Hour 4 to 5 (for spare ribs): Continue cooking uncovered if needed until the meat is tender.
Every oven is different, so use the internal temperature as your guide rather than the clock alone. A good meat thermometer is an essential tool for making perfect ribs in the oven at 300.
Checking For Doneness
There are three reliable ways to tell if your ribs are done:
- Internal temperature: Insert a meat thermometer into the thickest part of the meat. 195 to 203 degrees Fahrenheit is the target range.
- The bend test: Pick up the rack of ribs from one end with tongs. If the meat cracks and bends, the ribs are ready. If they still hold their shape, they need more time.
- The toothpick test: Insert a toothpick into the thickest part of the meat. If it goes in easily, the ribs are tender and done.
Do not rely on just one method. Using two or three of these checks gives you the most confidence that your oven roasted ribs are perfect.
Adding Sauce And Finishing Strong
When To Apply Barbecue Sauce
This is one of the most common mistakes beginners make. Adding barbecue sauce too early causes it to burn and turn bitter. The sugars in the sauce caramelize quickly at high heat, and at 300 degrees, that can happen before the ribs are fully cooked.
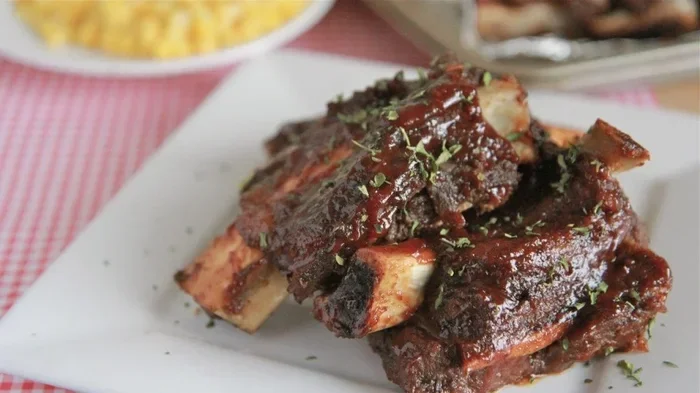
The right time to add sauce is in the last 15 to 20 minutes of cooking. Remove the foil, brush a thin layer of your favorite barbecue sauce on all sides, and return the ribs to the oven uncovered. This gives the sauce time to set without burning. You can add a second coat if you like a thicker glaze.
For the best results, warm your sauce slightly before brushing it on. Cold sauce slows down the cooking process and can create uneven coating. A simple brush of warm sauce gives your ribs a beautiful, glossy finish.
Broiling For A Nice Glaze
If you want an extra crispy, caramelized top on your ribs, you can finish them under the broiler. After applying the sauce, switch your oven to the broil setting and place the ribs about 6 inches from the top element. Watch them closely for 2 to 3 minutes. You want the sauce to bubble and darken slightly, not blacken.
This step is optional but highly recommended. It adds a professional touch and gives your ribs that sticky, glistening finish that makes barbecue ribs look as good as they taste.
Common Mistakes And How To Avoid Them
Skipping The Rest
One of the biggest mistakes people make is cutting into ribs right after they come out of the oven. Resting ribs for 15 to 20 minutes is essential. When you cut too soon, the juices run out onto the cutting board instead of staying in the meat. The result is dry, less flavorful ribs.
To rest properly, tent the ribs loosely with foil and set them on the counter. This gives the juices time to redistribute throughout the meat. When you finally slice, every piece will be moist and full of flavor.
Using Too Much Sauce Too Early
We already touched on this, but it deserves emphasis. Barbecue sauce is a finishing element, not a cooking liquid. If you drown your ribs in sauce at the start, you will end up with a burnt, sticky mess. Apply sauce lightly in the final stages only.
Opening The Oven Door Too Often
Every time you open the oven door, you lose heat and moisture. This can significantly increase your total rib cooking time and dry out the meat. Resist the urge to check on them constantly. Trust the process and only open the door when it is time to check the temperature or apply sauce.
Not Letting The Rub Work
Applying a dry rub and immediately throwing the ribs in the oven wastes a valuable opportunity. The rub needs time to penetrate the meat. Even a short rest makes a noticeable difference in flavor. If possible, rub the ribs the night before and store them in the fridge wrapped in plastic.
Expert Tips For Perfect Ribs Every Time
Here are some pro tips that will take your oven ribs to the next level:
- Use a disposable aluminum pan under the ribs: This catches drips and makes cleanup effortless. It also provides a little extra steam that keeps the ribs moist.
- Add wood chips for smoke flavor: Soak hickory or applewood chips in water for 30 minutes, wrap them in foil with a few holes poked in the top, and place the packet on the oven floor. This gives you a subtle smoky flavor without a smoker.
- Double wrap the ribs in foil: A single layer of foil can tear during the long cook. Double wrapping ensures the foil stays intact and keeps the steam trapped.
- Let ribs come to room temperature before cooking: Take them out of the fridge 30 to 45 minutes before they go in the oven. This helps them cook more evenly.
- Save the foil juices: After cooking, pour the juices from the foil into a saucepan. Simmer it down and use it as a dipping sauce or drizzle it over sliced ribs.
These small adjustments might seem minor, but they add up to a big difference in the final product. The best oven ribs recipe is the one that pays attention to details like these.
Serving Suggestions For Your Oven Ribs
Once your ribs are done and rested, it is time to serve. Here are some classic sides that pair perfectly with oven baked ribs:
- Coleslaw for a refreshing crunch
- Cornbread or honey butter biscuits
- Baked beans with a smoky flavor
- Grilled corn on the cob
- Mac and cheese for a comforting side
- Pickles and raw onions for a tangy contrast
Slice the ribs between the bones to serve individual portions. Use a sharp knife and follow the bone line. This gives you clean cuts and makes it easy for guests to eat.
Storing And Reheating Leftover Ribs
If you have leftovers, store them in an airtight container in the refrigerator within two hours of cooking. Cooked ribs keep well for up to four days in the fridge. To reheat, wrap them in foil and warm them in the oven at 250 degrees for about 20 minutes. This keeps them moist and prevents the meat from drying out.
You can also freeze cooked ribs for up to three months. Wrap them tightly in plastic wrap and foil before freezing. Thaw overnight in the refrigerator before reheating.
Conclusion
Learning how to cook ribs in the oven at 300 is a skill that every home cook should have. It is simple, reliable, and produces incredible results. From selecting the right cut to applying the perfect dry rub for ribs, every step matters. The low and slow approach at 300 degrees turns even budget-friendly cuts into tender, juicy, fall off the bone ribs that everyone will love.
Remember to remove the membrane, give the rub time to work, wrap the ribs in foil for the first half of cooking, and add sauce only at the end. Use a meat thermometer to check for doneness, and always let your ribs rest before serving. These fundamentals apply whether you are cooking pork baby back ribs or spare ribs.
The next time you are planning a meal and want to try something new, give this oven ribs recipe a try. You will be amazed at how easy it is to achieve barbecue quality ribs right in your own kitchen. With a little patience and the right technique, you will be serving ribs that rival your favorite restaurant. Happy cooking!
Frequently Asked Questions
Can I cook ribs at 275 instead of 300?
Yes, you can cook ribs at 275 degrees. It will just add about 30 to 60 minutes to the total rib cooking time. The lower temperature still works well for slow cooking ribs in the oven and can produce even more tender results. Just adjust your timing accordingly.
Do I need to wrap ribs in foil when cooking in the oven?
Wrapping ribs in foil is highly recommended for oven ribs at 300. The foil creates a steaming effect that keeps the meat moist and tender. You can cook ribs without foil, but they may dry out faster. If you prefer not to use foil, check the internal temperature more frequently and consider spritzing the ribs with apple juice every hour.
What is the best barbecue sauce for oven ribs?
The best sauce is the one you enjoy most. For oven baked ribs, a thick, tomato-based sauce works well because it can handle the longer cooking time. Apply it in the last 15 to 20 minutes to prevent burning. You can also try a mustard-based or vinegar-based sauce for a different flavor profile.
How do I know if my ribs are done without a meat thermometer?
You can use the bend test or the toothpick test. Pick up the rack from one end and see if the meat cracks and bends. Or insert a toothpick into the thickest part of the meat. If it goes in smoothly with little resistance, the ribs are done. However, a meat thermometer is the most reliable method and should be used whenever possible.
Can I use this method for beef ribs?
Yes, you can use the same oven ribs at 300 method for beef ribs. Beef ribs are larger and fattier, so they may need an extra 30 to 60 minutes of cooking time. The low and slow approach works beautifully for beef ribs as well. Just use a meat thermometer and aim for an internal temperature of 200 to 205 degrees Fahrenheit.
Should I season ribs the night before cooking?
Seasoning ribs the night before is one of the best things you can do for flavor. The dry rub for ribs needs time to penetrate the meat and work its magic. Overnight seasoning in the refrigerator allows the salt to draw out moisture and reabsorb, making the ribs juicier. If you cannot do overnight, even a few hours helps significantly.