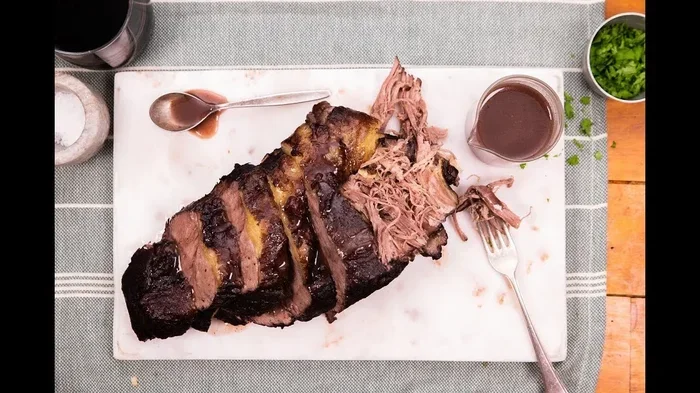
How To Cook Bolar Roast In Oven With This Simple Guide
Cooking bolar roast in oven is easier than you think and this guide walks you through every step with clear, simple instructions. You will learn the right bolar roast oven temperature, cooking time, seasoning tricks, and how to tell when your roast is perfectly done. Whether you are a beginner or a seasoned home cook, this guide will help you serve a restaurant-quality beef roast that your whole family will love.
There is something magical about a bolar roast slow-cooking in the oven. The kitchen fills with a rich, savory aroma, and the house feels warm and inviting. If you have been wondering how to cook bolar roast in oven, you have come to the right place. This simple guide breaks down every step so you can achieve a juicy, tender roast with confidence.
A bolar roast is a popular cut of beef known for its deep flavor and versatility. It comes from the shoulder area of the animal, which means it has just the right amount of marbling. When cooked slowly in the oven, the fat melts into the meat, making every bite succulent and full of taste. Whether you are planning a Sunday dinner or a holiday feast, this oven roast beef recipe will not disappoint.
What makes this guide different from others? It keeps things simple. You do not need fancy equipment or years of cooking experience. Just follow the steps, and you will have a perfect bolar roast on your table. Let us get started.
Key Takeaways
- Pick the right cut: A well-marbled bolar roast gives you the best flavor and juiciness when cooked in the oven.
- Sear before roasting: Searing locks in moisture and adds a beautiful brown crust to your bolar roast.
- Use a meat thermometer: Internal temperature is the most reliable way to know your roast is done to perfection.
- Rest the roast: Letting your bolar roast rest for 15-20 minutes keeps the juices inside the meat.
- Low and slow works best: A moderate oven temperature of 325°F to 350°F produces tender, flavorful results.
- Season generously: Simple salt, pepper, garlic, and herbs go a long way in bringing out the natural beef flavor.
📑 Table of Contents
- What Is Bolar Roast and Why Is It Great for Oven Cooking?
- How To Prep Your Bolar Roast for the Oven
- The Best Oven Temperature and Cooking Time for Bolar Roast
- Seasoning and Flavor Tips for a Perfect Bolar Roast
- How To Know When Bolar Roast Is Done
- Slicing, Resting, and Serving Your Bolar Roast
- Expert Insights on Cooking Bolar Roast
- Frequently Asked Questions
- Conclusion
What Is Bolar Roast and Why Is It Great for Oven Cooking?
A bolar roast is a beef cut taken from the shoulder or chuck region. It is a tougher piece of meat, but that is actually a good thing for slow cooking. The connective tissue breaks down over time, turning a tough cut into something melt-in-your-mouth tender. This is exactly why oven roast beef from the bolar section works so well.
When you cook a bolar roast in the oven, the dry heat surrounds the meat evenly. Unlike stovetop cooking, where hot spots can cause uneven results, the oven wraps the roast in consistent warmth. This makes it one of the best methods for preparing a slow roast beef dinner. The oven does most of the work for you, so you can focus on other things while your roast cooks.
Here are some reasons why bolar roast is a favorite for oven cooking:
- Affordable cut: Bolar roast is usually cheaper than premium steaks, making it budget-friendly.
- Forgiving meat: Even if you slightly overcook it, the marbling keeps the roast moist.
- Feeds a crowd: A single bolar roast can serve 6 to 8 people easily.
- Leftovers taste great: The next day, the roast makes amazing sandwiches and salads.
- Minimal prep: You need just a few ingredients and a little patience.
Understanding Different Sizes of Bolar Roast
Bolar roasts come in various sizes, typically ranging from 2 to 5 pounds. A smaller roast around 2 pounds will cook in about 2 to 2.5 hours. A larger roast of 4 to 5 pounds may need 3 to 4 hours. When choosing your roast, think about how many people you are serving. A good rule of thumb is half a pound of raw meat per person. Keep in mind that the roast will lose some weight during cooking as the juices render out.
How To Prep Your Bolar Roast for the Oven
Preparation is the secret to a great roast. Taking the time to prep your bolar roast properly sets the stage for a delicious meal. Here is exactly what you need to do before the roast goes into the oven.
Step 1: Take the Roast Out of the Fridge Early
Remove your bolar roast from the refrigerator about 30 to 45 minutes before cooking. Letting it sit at room temperature helps the meat cook more evenly. When you place a cold roast directly into a hot oven, the outside can overcook while the inside stays cold. This simple step makes a big difference in your final result.
Step 2: Pat the Roast Dry
Use paper towels to pat the bolar roast dry on all sides. Moisture on the surface creates steam instead of a nice brown crust. A dry surface means better searing, and better searing means more flavor. Do not skip this step, even if it feels like an extra chore.
Step 3: Season Generously
Seasoning is where you can get creative. A basic bolar roast seasoning includes coarse salt, black pepper, and garlic powder. But you can also add paprika, onion powder, dried rosemary, or thyme. Rub the seasoning into every side of the roast. The more surface area you cover, the more flavorful your crust will be.
Step 4: Sear the Roast
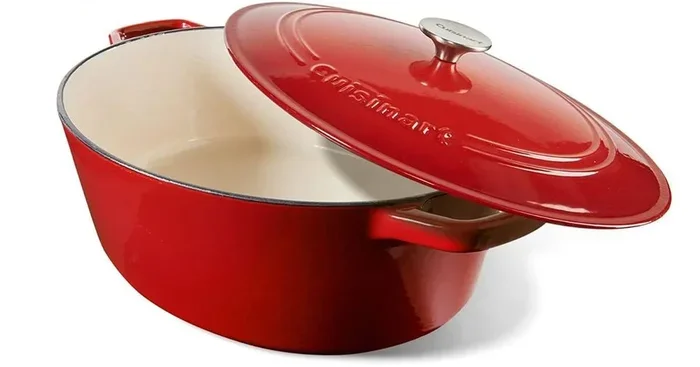
Searing is an optional but highly recommended step. Heat a tablespoon of oil in a large oven-safe skillet or Dutch oven over medium-high heat. Place the seasoned bolar roast in the hot pan and let it brown on each side. This takes about 2 to 3 minutes per side. Searing does not cook the roast all the way through. It creates a flavorful crust that locks in juices and adds depth to the final dish.
After searing, transfer the roast to a roasting pan or baking dish. If you used a Dutch oven, you can simply put the lid on and place it in the oven. This saves you from doing extra dishes, which is always a win.
Quick Prep Tips
- Use a wire rack: Placing the roast on a wire rack inside the pan allows hot air to circulate underneath, cooking the bottom evenly.
- Add vegetables: Toss chopped onions, carrots, and potatoes around the roast. They will absorb the drippings and become a delicious side dish.
- Add liquid for moisture: Pour a cup of beef broth, red wine, or water into the bottom of the pan. This creates steam and prevents the roast from drying out.
The Best Oven Temperature and Cooking Time for Bolar Roast
Getting the bolar roast oven temperature right is the most important factor in achieving a tender, juicy result. Too hot and the outside burns before the inside is cooked. Too cool and the roast takes forever and may turn out gray and tough. The sweet spot lies in a moderate temperature range.
Recommended Oven Temperature
Set your oven to 325°F to 350°F for cooking bolar roast. This range allows the meat to cook slowly and evenly. The fat has time to render, and the connective tissue breaks down into gelatin. This is what gives a slow roast beef its tender, fall-apart texture. If you prefer a slightly faster cook, you can go up to 375°F, but keep a close eye on the internal temperature.
How Long to Cook Bolar Roast
The cooking time depends on the size of your roast and how well done you like your meat. Here is a general guide for how long to cook bolar roast:
- 2-pound roast: 2 to 2.5 hours for medium doneness
- 3-pound roast: 2.5 to 3 hours for medium doneness
- 4-pound roast: 3 to 3.5 hours for medium doneness
- 5-pound roast: 3.5 to 4 hours for medium doneness
These times are based on an oven temperature of 325°F. If you increase the temperature, the cooking time will decrease. Always use a meat thermometer to check the internal temperature rather than relying on time alone.
Understanding Roast Doneness Temperatures
The internal temperature of your bolar roast determines how done it is. Here is what the numbers mean:
- 125°F: Rare. The center is bright red and very soft.
- 135°F: Medium Rare. The center is pink and juicy. Most experts recommend this for bolar roast.
- 145°F: Medium. The center is pink but firmer.
- 155°F: Medium Well. Very little pink left, but still moist.
- 160°F and above: Well Done. The meat is gray throughout and can be dry.
For a bolar roast, medium rare to medium is the sweet spot. This range gives you the best balance of flavor and juiciness. Remember that the temperature will rise by about 5 to 10 degrees after you take the roast out of the oven. This is called carryover cooking, and it is an important factor to keep in mind.
Seasoning and Flavor Tips for a Perfect Bolar Roast
Seasoning is what transforms a plain roast into a memorable meal. While a bolar roast has great natural flavor, the right seasoning takes it to the next level. Here are some ideas to elevate your oven roast beef.
Classic Herb Seasoning
The simplest and most reliable seasoning blend for bolar roast includes:
- 1 tablespoon coarse salt
- 1 teaspoon black pepper
- 1 teaspoon garlic powder
- 1 teaspoon onion powder
- 1 teaspoon dried rosemary
- 1 teaspoon dried thyme
Mix these together and rub them all over the roast. This combination works beautifully every time. The herbs infuse the meat as it cooks, creating a rich and aromatic flavor profile.
Marinade Options for Extra Flavor
If you have more time, marinating your bolar roast overnight can add even more depth of flavor. Try one of these simple marinades:
- Red wine marinade: Combine red wine, olive oil, minced garlic, and fresh herbs. Let the roast soak for 8 to 12 hours.
- Soy sauce and garlic marinade: Mix soy sauce, minced garlic, brown sugar, and a splash of sesame oil. Marinate for at least 4 hours.
- Yogurt-based marinade: Use plain yogurt, lemon juice, ginger, and turmeric. This tenderizes the meat while adding a subtle tang.
After marinating, pat the roast dry before seasoning and searing. This ensures you get a good crust rather than steaming the meat.
Adding Aromatics for Extra Flavor
Tossing aromatics into the roasting pan adds another layer of flavor to your bolar roast. Try adding:
- Whole garlic cloves, peeled and slightly crushed
- Fresh rosemary and thyme sprigs
- Halved onions and celery stalks
- A bay leaf or two
As these aromatics cook alongside the roast, they release their oils and fragrance into the juices. When you later make gravy from the pan drippings, these aromatics create an incredible base flavor.
How To Know When Bolar Roast Is Done
Knowing when your bolar roast is done is one of the most important skills in oven cooking. There are several methods you can use, and some are more reliable than others.
Use a Meat Thermometer
A meat thermometer is the single best tool for checking doneness. Insert it into the thickest part of the roast, avoiding any bones or fat pockets. The thermometer gives you an accurate reading every time. Without one, you are essentially guessing, and guessing can lead to overcooked or undercooked meat.
The Fork Test
If you do not have a meat thermometer, you can use the fork test. Insert a fork into the thickest part of the roast and twist gently. If the meat pulls apart easily and the fork slides in with little resistance, the roast is likely done. However, this method is less precise than using a thermometer.
The Press Test
Press the top of the roast with your finger or the back of a spoon. A rare roast will feel very soft and squishy. A medium roast will feel firm but give slightly. A well-done roast will feel very firm with no give. This method takes practice, and it is not as reliable as a thermometer.
For the best results, always use a meat thermometer. It removes all the guesswork and takes the stress out of cooking a bolar roast in oven.
Common Mistakes When Cooking Bolar Roast
Even experienced cooks sometimes make mistakes with roast beef. Here are a few to avoid:
- Skipping the sear: Searing adds flavor and a beautiful crust. Do not skip this step if you want the best results.
- Cooking at too high a temperature: A very hot oven will burn the outside while leaving the inside undercooked.
- Not resting the roast: Cutting into the roast immediately causes all the juices to run out, leaving the meat dry.
- Using a small pan: The roast needs room for air to circulate. Use a pan that is large enough.
- Opening the oven door too often: Every time you open the door, heat escapes and the cooking time increases.
Slicing, Resting, and Serving Your Bolar Roast
Once your bolar roast reaches the right internal temperature, it is time to take it out of the oven. But the work is not quite done yet. How you handle the roast after it comes out of the oven matters just as much as the cooking process itself.
Why Resting Is Essential
Resting your roast for at least 15 to 20 minutes is a non-negotiable step. During cooking, the juices in the meat get pushed toward the center. If you cut into the roast immediately, those juices will spill out onto the cutting board instead of staying in the meat. Resting allows the juices to redistribute evenly throughout the roast, resulting in a much juicier and more flavorful slice.
While the roast rests, tent it loosely with aluminum foil. This keeps the roast warm without trapping too much steam, which could make the crust soggy. Place the roast on a cutting board and let it sit undisturbed for the full 15 to 20 minutes.
How To Slice Bolar Roast Properly
Slicing against the grain is the key to tender pieces of beef. Look at the meat and identify the direction of the muscle fibers. Then cut perpendicular to those fibers. This shortens the muscle strands and makes each bite easier to chew. Use a sharp carving knife and cut slices about a quarter-inch thick for the best texture.
Making Gravy from the Pan Drippings
Do not throw away the pan drippings. They are liquid gold. Here is a quick way to make simple gravy:
- Place the roasting pan on the stovetop over medium heat.
- Add a cup of beef broth and scrape up all the browned bits from the bottom of the pan.
- Mix a tablespoon of flour with a tablespoon of butter and stir it into the liquid.
- Let the gravy simmer for 3 to 5 minutes until it thickens.
- Season with salt and pepper to taste.
This homemade gravy pairs perfectly with your bolar roast and any roasted vegetables you cooked alongside it. Your family and guests will be impressed.
Serving Suggestions
Here are some great side dishes to serve with your oven roast beef:
- Roasted potatoes and carrots
- Steamed green beans with butter
- Creamy mashed potatoes
- A fresh green salad with vinaigrette
- Crusty bread for soaking up the gravy
- Roasted Brussels sprouts with bacon
The beauty of a bolar roast dinner is that it pairs well with almost any vegetable or starch. Keep the sides simple and let the roast be the star of the show.
Storing and Reheating Leftover Bolar Roast
If you have leftovers, store them in an airtight container in the refrigerator within two hours of cooking. The roast will keep well for up to 4 days. To reheat, place slices in a covered dish with a splash of beef broth and warm them in the oven at 300°F for about 15 to 20 minutes. This gentle reheating method keeps the meat moist and tender. Avoid microwaving, which can dry out the roast quickly.
Expert Insights on Cooking Bolar Roast
Professional chefs and experienced home cooks share a few tips that can take your bolar roast to the next level. These insights come from years of trial and error in the kitchen.
Bring the Roast to Room Temperature
This cannot be stressed enough. A roast that starts at room temperature cooks more evenly than one straight from the fridge. The difference can be as much as 20 minutes of cooking time saved, and the results are noticeably better throughout the meat.
Invest in a Good Meat Thermometer
A digital instant-read thermometer costs very little and takes the guesswork out of cooking. It is the one tool that every home cook should own. When checking the temperature, insert the probe into the center of the thickest part, away from any bone or fat.
Do Not Be Afraid of Low and Slow
Some recipes call for higher temperatures, but low and slow cooking at 325°F gives you the most tender results. The collagen in the bolar roast breaks down slowly over several hours, creating a texture that is hard to achieve any other way. Patience is your best friend here.
Save the Drippings
The pan drippings from a bolar roast are incredibly flavorful. Freeze them in ice cube trays for future use. A few cubes of beef fat can add instant depth to soups, stews, and gravies throughout the week.
Frequently Asked Questions
Can I Cook Bolar Roast in a Convection Oven?
Yes, you can cook bolar roast in a convection oven. Reduce the temperature by about 25°F from the standard recipe and check the roast about 15 minutes earlier than the suggested time. Convection ovens circulate hot air more efficiently, which speeds up the cooking process slightly.
What Is the Best Internal Temperature for Bolar Roast?
The best internal temperature for a juicy bolar roast is 135°F for medium rare. This temperature gives you a pink, tender center with maximum flavor. Always let the temperature rise by 5 to 10 degrees during resting, so pull the roast out at 125°F to 130°F for medium rare.
How Long Should I Let Bolar Roast Rest Before Slicing?
Let your bolar roast rest for at least 15 to 20 minutes before slicing. This resting period allows the juices to redistribute throughout the meat. Tent the roast loosely with foil during this time to keep it warm without overcooking it.
Can I Use a Slow Cooker Instead of the Oven?
While this guide focuses on oven cooking, you can absolutely use a slow cooker for bolar roast. Cook on low for 8 to 10 hours or on high for 4 to 6 hours. The slow cooker method produces very tender results, but it lacks the flavorful crust that oven roasting provides.
What Vegetables Pair Best with Bolar Roast?
Root vegetables like potatoes, carrots, and parsnips pair wonderfully with bolar roast. You can roast them in the same pan for easy cleanup. Onions, celery, and garlic also cook beautifully alongside the roast and add flavor to the pan drippings for gravy.
How Do I Know If My Bolar Roast Is Tough or Done?
A properly cooked bolar roast should be tender and easy to pull apart with a fork. If the roast is tough, it likely needs more cooking time. The collagen in this cut of beef requires slow, gentle heat to break down fully. Use a meat thermometer and be patient with the cooking process.
Conclusion
Learning how to cook bolar roast in oven is one of the most rewarding skills you can build in the kitchen. With the right temperature, proper seasoning, and a little patience, you can turn an affordable cut of beef into a show-stopping meal. The key is to keep things simple and trust the process. Sear the roast, cook it low and slow at 325°F to 350°F, and use a meat thermometer to check for doneness. Let the roast rest before slicing, and save those pan drippings for homemade gravy.
Whether you are cooking for a family dinner, a holiday gathering, or just treating yourself to a hearty meal, this bolar roast recipe delivers every time. The beauty of oven-roasted beef is that it brings people together. The aroma fills the house, the flavors satisfy every palate, and the leftovers make great meals for days afterward.
So go ahead, grab a bolar roast from your local butcher or grocery store, and give this guide a try. You will be surprised at how simple and satisfying it is to cook a perfect bolar roast in oven. Your family will ask you to make it again and again, and that is the best compliment any cook can receive. Happy roasting!