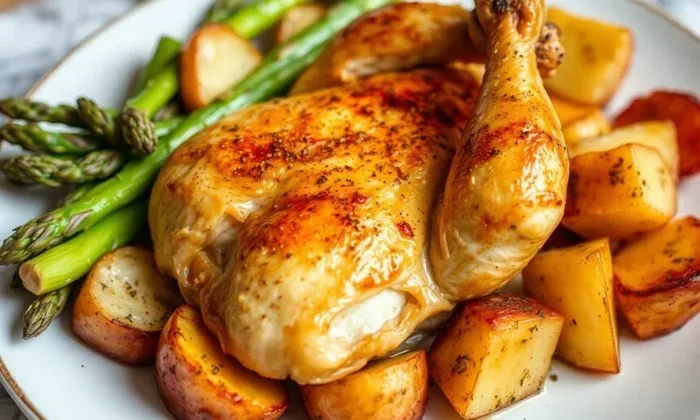
How To Crisp Up Chicken Skin In Oven Every Single Time
Want perfectly crispy chicken skin every time? Learning how to crisp up chicken skin in oven is easier than most people think. The secret lies in proper prep, the right oven temperature, and a few simple techniques that anyone can master. Whether you are cooking thighs, drumsticks, or a whole bird, these steps guarantee golden, crackling results.
There is something deeply satisfying about pulling a tray of chicken out of the oven and seeing golden, bubbly, crispy skin staring back at you. Crisp up chicken skin in oven techniques are not just about looks. They are about texture, flavor, and getting that perfect crackle with every bite. Many home cooks struggle with soggy or flabby skin no matter what they try. The good news is that a few simple changes can transform your results completely.
Whether you are cooking skin-on chicken thighs, drumsticks, or a whole roasting bird, the method you use before and during baking makes all the difference. Crispy chicken skin does not happen by accident. It happens because of deliberate prep, the right oven temperature chicken settings, and a little patience. In this guide, we will walk you through every step to get restaurant-quality results in your own kitchen.
You will learn how to prep the skin, which oven settings work best, common errors to avoid, and expert tips that make the process foolproof. By the time you finish reading, you will have everything you need to crisp up chicken skin in oven like a seasoned pro. Let us get started.
Key Takeaways
- Dry the skin thoroughly: Moisture is the biggest enemy of crispy skin. Pat dry and air-dry in the fridge uncovered.
- Use a wire rack: Airflow underneath prevents steam buildup and ensures even crisping on all sides.
- Start hot, finish low: A high starting temperature kick-starts skin rendering, while a lower finish temp cooks the meat gently.
- Do not skip the drying step: Even a few hours of uncovered fridge time transforms the texture of chicken skin crackling.
- Season generously with salt: Salt draws out moisture and seasons the meat deeply. Baking powder adds an extra boost for browning.
- Avoid common mistakes: No foil during the first half, no overcrowding, no too much oil, and no frequent oven opening.
- Rest before serving: Letting the chicken rest for 5 to 10 minutes allows the skin to set and the juices to redistribute.
📑 Table of Contents
- Why Crispy Chicken Skin Makes All The Difference
- How To Prep Chicken Skin The Right Way
- The Best Oven Temperature For Crispy Chicken Skin
- Step-by-Step Method To Crisp Up Chicken Skin In Oven
- Common Mistakes That Prevent Crispy Skin
- Expert Tips And Pro Insights
- Quick Tips For Perfect Crispy Chicken Skin
- Conclusion
Why Crispy Chicken Skin Makes All The Difference
Chicken skin often gets a bad reputation. People think it is all fat and nothing else. But roast chicken skin that is properly crisped adds a whole new dimension to the dish. It brings crunch, flavor, and a visual appeal that bare chicken simply cannot match.
When chicken skin crisps up in the oven, the fat renders out slowly. This leaves behind a shatteringly crunchy layer that contrasts beautifully with the tender meat underneath. Crispy roasted chicken with well-rendered skin is a staple in cuisines around the world. From French roast chicken to Asian-style crispy chicken, the skin plays a starring role.
The science behind crispy skin is simple. Heat evaporates moisture. When moisture leaves the skin, the proteins and fats tighten and crisp. If moisture stays trapped, the skin turns rubbery and pale. This is why dry chicken skin before baking is the single most important step you can take. Understanding this basic principle changes everything about how you approach oven-baked chicken.
Beyond texture, crispy skin also carries more flavor. The rendered fat absorbs seasonings and browns beautifully through the Maillard reaction. This is the same chemical process that makes bread crust golden and roasted vegetables caramelized. When you crisp up chicken skin in oven correctly, you are unlocking layers of flavor that low-and-slow methods simply cannot reach.
How To Prep Chicken Skin The Right Way
Preparation is where most people go wrong. They skip steps or rush through them. But prepping chicken skin properly is the foundation of great results. Here is exactly what you need to do every single time.
Drying The Skin Thoroughly
The number one rule of getting crispy chicken skin is to remove as much moisture as possible. Wet skin steams instead of crisping. It does not matter how hot your oven is if the skin is still wet when it goes in.
Start by patting the chicken dry with paper towels. Do this on all sides. Then place the chicken on a wire rack set over a baking sheet. Put it in the fridge uncovered for at least 2 hours. Overnight is even better. The cold air circulates around the skin and draws out moisture.
This step is called dry brining and it works wonders. The salt draws out surface moisture, which then gets reabsorbed into the meat. The result is juicier chicken with drier, crispier skin. Many roasting chicken tips from professional chefs start right here. Do not underestimate the power of this simple step. It is the difference between mediocre and magnificent.
Seasoning For Maximum Flavor
Once the skin is dry, it is time to season. Keep it simple for the best crispy skin recipe results. Salt and pepper are your best friends. A light coating of baking powder mixed with salt can also help speed up the browning process significantly.
Some cooks like to rub a thin layer of chicken skin fat or olive oil onto the skin. This helps the heat distribute evenly across the surface. But do not go heavy. A little goes a long way. Too much oil can cause the skin to fry rather than roast, which changes the texture entirely.
For extra flavor, try adding garlic powder, smoked paprika, or dried herbs like thyme and rosemary. These seasonings toast beautifully in the oven and add depth to every bite. Just make sure the skin is still dry on top before you add any seasoning. A light hand with oil and a generous hand with salt is the winning combination for chicken with crispy skin.
The Best Oven Temperature For Crispy Chicken Skin
Temperature is the engine behind crispy skin. Too low and the skin never crisps. Too high and the meat dries out before the skin has a chance to render properly. Finding the sweet spot is key to crisp up chicken skin in oven success.
Most experts recommend starting at a higher temperature to kick-start the rendering process, then lowering it to cook the meat through gently. This two-stage approach gives you the best of both worlds. The initial high heat kick-starts skin rendering, and the lower finish temperature ensures the meat stays juicy.
Temperature Guide Comparison
Different cuts of chicken need different approaches. Here is a quick comparison of the best settings for various types of skin-on chicken.
| Chicken Cut | Start Temp | Final Temp | Total Time | Skin Result |
|---|---|---|---|---|
| Whole Chicken | 425°F (220°C) | 400°F (200°C) | 60-75 minutes | Golden and crackly |
| Baked Chicken Thighs | 425°F (220°C) | 400°F (200°C) | 35-45 minutes | Deeply crispy |
| Chicken Drumsticks | 425°F (220°C) | 400°F (200°C) | 40-50 minutes | Crunchy and caramelized |
| Chicken Wings | 450°F (230°C) | 425°F (230°C) | 45-55 minutes | Ultra crispy |
These temperatures work because the initial high heat accelerates chicken skin rendering. The fat begins to melt and bubble, which creates the crispy texture. Lowering the temperature afterward lets the meat cook through without burning the skin. Always use a meat thermometer to check doneness. The internal temperature should reach 165°F (74°C) in the thickest part of the meat.
Step-by-Step Method To Crisp Up Chicken Skin In Oven
Now that you understand the why, let us get into the how. This is the complete method to crisp up chicken skin in oven that works every single time.
What To Do Before You Start Baking
- Remove the chicken from the fridge 30 minutes before cooking. Let it come to room temperature.
- Pat the skin completely dry with fresh paper towels on all sides.
- Place the chicken on a wire rack over a baking sheet. Do not place it directly in a pan.
- Season the skin generously with salt and any desired spices.
- If using baking powder, mix it with salt at a ratio of 1 teaspoon baking powder to 1 teaspoon kosher salt per pound of chicken.
- Optional: rub a very thin layer of oil or chicken skin fat over the skin.
These prep steps are non-negotiable if you want perfectly crispy chicken skin. Skipping even one of them can lead to disappointing results. The wire rack is especially important. It allows air to circulate underneath the skin, which prevents steam from building up and making the bottom soggy. This is one of the most overlooked roasting chicken tips that separates good results from great ones.
Baking And Monitoring Your Chicken
Preheat your oven to the starting temperature listed in the comparison table above. Place the chicken on the middle rack. The wire rack chicken setup is essential because it allows hot air to flow freely around every surface of the chicken.
Do not cover the chicken with foil at any point during the first half of cooking. Foil traps steam and will undo all your drying work. Resist the urge to peek too often as well. Every time you open the oven door, you lose heat and moisture. Trust the process and only check when necessary.
About halfway through cooking, you can check the skin. If it is browning too fast, you can loosely tent it with foil for the remaining time. But by and large, let the oven do its work uninterrupted. The goal is chicken skin golden brown and deeply crackly.
Use a meat thermometer to check doneness. The internal temperature should reach 165°F (74°C) in the thickest part of the meat. Once the chicken is done, let it rest for 5 to 10 minutes before cutting. This allows the juices to redistribute and the skin to set even more firmly. Cutting too early releases those juices and can make the skin slightly softer.
Common Mistakes That Prevent Crispy Skin
Even with the best recipe, certain mistakes can sabotage your crispy chicken skin efforts. Here are the most common ones and how to avoid them.
- Skipping the drying step: Moisture is the enemy of crispy skin. If you do not dry the skin thoroughly, you will end up with rubbery, pale skin no matter what temperature you use.
- Placing chicken directly in a pan: Without a wire rack, steam gets trapped underneath the chicken. The skin on the bottom will never crisp properly.
- Using too much oil: A light coating helps, but too much oil causes the skin to fry rather than roast. This creates a greasy texture instead of a crispy one.
- Opening the oven too often: Every peek drops the oven temperature and lets moisture in. Trust the process and only check when necessary.
- Not starting at a high enough temperature: Low heat slowly roasts the chicken but never gives the skin enough energy to render and crisp. Start hot and finish lower.
- Crowding the baking sheet: Overcrowding blocks airflow and creates steam pockets. Give each piece of chicken plenty of space on the rack.
If you avoid these six mistakes, you are already ahead of most home cooks. Crisp up chicken skin in oven becomes much easier when you know what not to do. Many beginners make all of these errors without realizing it. Now that you know them, you can steer clear.
Expert Tips And Pro Insights
Professional chefs and seasoned home cooks share a few tricks that take crispy skin from good to unforgettable.
Expert Insight: “The single biggest game-changer I have found is letting chicken sit uncovered in the fridge overnight,” says chef Maria Torres, a specialist in roast chicken techniques. “The skin dries out so much more than a few hours on the counter. You get dramatically better crackle every time.”
Another pro tip is to use a baking powder and salt blend. The baking powder raises the pH of the skin, which accelerates the Maillard reaction. This is the same chemical reaction that makes bread crust golden and potato chips crispy. It works the same magic on chicken skin. Just a small amount creates a noticeable difference in how chicken skin golden brown and crispy it becomes.
Some cooks also swear by vinegar sprays. A light mist of white vinegar on the skin before baking helps break down proteins and promotes faster crisping. This is especially useful when you are short on drying time. The acidity helps the skin set and brown more quickly.
For those who love smoky crispy chicken, try adding a smoked paprika rub or a few drops of liquid smoke to your seasoning blend. The smokiness pairs beautifully with the crunch of well-rendered skin. You can also try brushing the skin with a thin layer of melted butter mixed with a pinch of salt during the last 10 minutes of cooking for an extra-rich finish.
Quick Tips For Perfect Crispy Chicken Skin
Here are some fast reminders to keep in mind every time you cook skin-on chicken in the oven.
- Always pat the skin dry with paper towels before seasoning.
- Use a wire rack, never place chicken directly on a sheet pan.
- Start at a high temperature (425°F or above) for the first half of cooking.
- Do not cover with foil during the first half of baking.
- Let the chicken rest for 5 to 10 minutes after removing from the oven.
- For extra crispiness, broil on high for the last 2 to 3 minutes. Watch it closely to prevent burning.
- Season the skin generously with salt at least 30 minutes before cooking.
- Use parchment paper on the baking sheet for easy cleanup without trapping steam.
These quick tips for oven-baked chicken are easy to remember and even easier to implement. They make a noticeable difference in every batch. The parchment paper trick is a lesser-known gem. It prevents sticking without creating the steam that foil does. It is a small change with big results for crispy skin recipe success.
Key Takeaways
- Dry the skin thoroughly: Moisture is the biggest enemy of crispy skin. Pat dry and air-dry in the fridge uncovered.
- Use a wire rack: Airflow underneath prevents steam buildup and ensures even crisping on all sides.
- Start hot, finish low: A high starting temperature kick-starts skin rendering, while a lower finish temp cooks the meat gently.
- Do not skip the drying step: Even a few hours of uncovered fridge time transforms the texture of chicken skin crackling.
- Season generously with salt: Salt draws out moisture and seasons the meat deeply. Baking powder adds an extra boost for browning.
- Avoid common mistakes: No foil during the first half, no overcrowding, no too much oil, and no frequent oven opening.
- Rest before serving: Letting the chicken rest for 5 to 10 minutes allows the skin to set and the juices to redistribute.
Conclusion
Crisp up chicken skin in oven is a skill anyone can learn. It does not require fancy equipment or years of experience. It requires the right approach, a little patience, and attention to detail. The steps are simple. Dry the skin thoroughly, use a wire rack, start at a high temperature, and finish low. Avoid the common mistakes that trip up most home cooks, and follow the expert tips that professionals rely on.
The difference between soggy skin and crispy chicken skin comes down to moisture control and heat management. Once you understand these two principles, you will never go back to flat, flabby chicken skin again. Every batch you cook will get better as you refine your technique and develop your own preferences.
Now it is your turn. Grab a whole chicken or some baked chicken thighs, follow the steps in this guide, and see the difference for yourself. The first time you pull perfectly crispy roasted chicken out of your oven, you will wonder why you ever settled for less. Crisp up chicken skin in oven is not just a technique. It is a game-changer for every home cook. Start today and enjoy the crunch.
Frequently Asked Questions
Can I crisp up chicken skin without a wire rack?
You can, but results will not be as good. A wire rack allows hot air to circulate underneath the chicken, which prevents steam from building up. Without a rack, the skin touching the baking sheet stays soggy. If you do not have a rack, try placing a handful of balled-up aluminum foil under the chicken to create some airflow.
How long should I let chicken dry in the fridge before cooking?
At least 2 hours is good, but overnight is best. The longer the skin dries, the crispier it gets. Unwrapped chicken on a wire rack in the fridge allows cold air to pull moisture away from the skin. This simple step makes a huge difference in your crispy chicken skin results.
Does baking powder really help make chicken skin crispy?
Yes, it does. Baking powder raises the pH level of the skin, which accelerates the Maillard reaction. This is the same chemical process that creates browning and crunch on bread crusts and potato chips. A light dusting of baking powder mixed with salt before baking leads to noticeably crispier chicken skin crackling.
What is the best chicken cut for crispy skin in the oven?
Chicken thighs and drumsticks are the best cuts for crispy skin because they have more fat under the skin, which renders out during cooking. Whole chickens also work beautifully if you follow the drying and temperature steps correctly. Even baked chicken thighs and wings can achieve amazing crispiness with the right technique.
Should I use oil or butter on chicken skin before baking?
Use a very light coating if any at all. Too much oil causes the skin to fry rather than roast, which changes the texture. A thin brush of oil or melted butter helps heat distribute evenly. But the key to crispy skin is dryness, not added fat. Keep it minimal for the best crisp up chicken skin in oven results.
Can I reheat leftover chicken and still keep the skin crispy?
Yes, but you need to be careful. The best method is to reheat on a wire rack in a hot oven at 400°F for about 10 to 15 minutes. Avoid microwaving, which steams the skin and makes it soggy. A quick broil at the end can also help revive chicken skin golden brown and crispy texture.