How Long To Cook Boneless Chicken Tenders In Oven Today
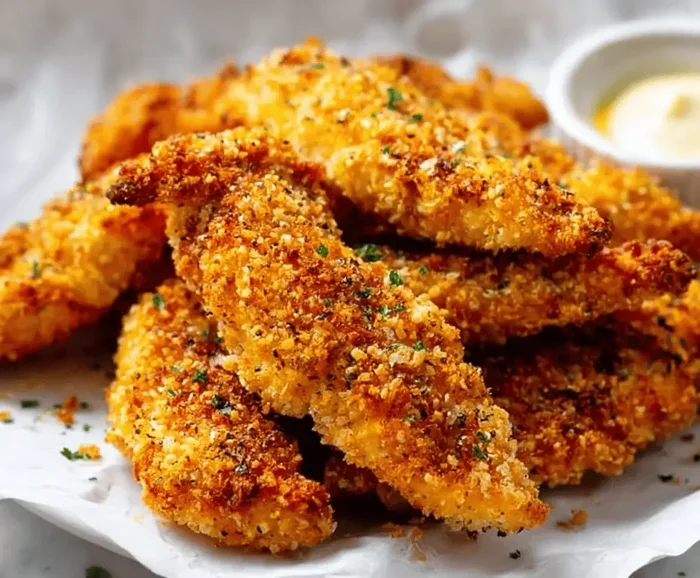
Cooking boneless chicken tenders in the oven is simple when you know the right temperature and time. Most boneless chicken tenders need about 20 to 25 minutes at 400°F to turn out perfectly crispy and fully cooked. Whether you are baking fresh or frozen tenders, this guide covers everything you need to know for perfect oven-baked chicken tenders every single time.
There is something deeply satisfying about pulling a batch of golden, crispy chicken tenders out of the oven. The smell alone can make the whole house feel warm and welcoming. If you have ever wondered how to get restaurant-quality results in your own kitchen, you are in the right place.
How long to cook boneless chicken tenders in oven is a question many home cooks ask. The good news is that baking chicken tenders is one of the easiest meals you can make. With the right temperature and timing, you get tender, juicy meat with a perfectly golden crust. No deep frying required. No mess. Just simple, delicious chicken tenders that the whole family will love.
In this guide, we walk you through everything you need to know. We cover the best oven temperature, exact cooking times for fresh and frozen tenders, step-by-step instructions, and pro tips for getting the crispiest results. Whether you are a beginner or a seasoned cook, this article has practical advice you can use right away.
Key Takeaways
- Ideal Temperature: Bake boneless chicken tenders at 400°F for the best balance of crispiness and juiciness.
- Cooking Time: Fresh tenders take 20 to 25 minutes, while frozen tenders need 25 to 30 minutes.
- Internal Temperature: Always check that chicken tenders reach 165°F internally for food safety.
- Crispy Finish: Use a wire rack and light oil spray for the crispiest baked chicken tenders.
- Avoid Overcooking: Check tenders early and often to keep them moist and tender.
- Seasoning Matters: Simple seasoning blends can elevate store-bought or homemade chicken tenders greatly.
- Resting Time: Let chicken tenders rest for 3 to 5 minutes after baking for the best texture.
📑 Table of Contents
The Best Oven Temperature for Chicken Tenders
Why Temperature Matters So Much
Getting the oven temperature right is the single most important factor in baking chicken tenders. Too low, and your tenders will dry out before they get crispy. Too high, and the outside burns while the inside stays raw. Finding the sweet spot makes all the difference.
Most oven-baked chicken tenders recipes call for 400°F. This temperature is hot enough to crisp up the outside quickly while cooking the inside evenly. It also helps render any fat from the chicken, adding flavor and texture. At 400°F, the chicken cooks fast enough to retain moisture but slowly enough to cook through completely.
If you set your oven too low, say 350°F, the tenders will take longer to cook. This extra time can dry out the meat. On the other hand, cranking the heat to 450°F or higher risks burning the breading before the chicken is fully cooked inside. Stick with 400°F for the most reliable results.
Recommended Temperature Settings
Here is a quick look at common temperature settings and what they mean for your chicken tenders oven recipe:
- 375°F: Slower cook, good for thicker tenders. May need 25 to 30 minutes. Results are slightly less crispy.
- 400°F: The sweet spot for most chicken tenders. Cooks in 20 to 25 minutes with a great crispy finish.
- 425°F: Faster cook, excellent crispiness. Best for thinner tenders. Check early to avoid overcooking.
- 450°F: Very fast. Only recommended for thin, pre-breaded tenders. Risk of burning is higher.
For most home cooks, 400°F is the go-to choice. It gives you a forgiving window where the chicken cooks through without drying out. This is why so many baking chicken tenders recipes use this temperature.
How Long To Cook Boneless Chicken Tenders In Oven
Cooking Times for Fresh Chicken Tenders
When you are working with fresh boneless chicken tenders, the chicken tender cooking time is relatively short. At 400°F, most fresh tenders need between 20 and 25 minutes. This assumes the tenders are about a quarter-inch to half-inch thick, which is standard for most store-bought and homemade tenders.
Here is a general breakdown of fresh tender cooking times:
- Thin tenders (quarter-inch): 18 to 22 minutes at 400°F
- Standard tenders (half-inch): 20 to 25 minutes at 400°F
- Thick tenders (three-quarter inch): 25 to 30 minutes at 400°F
The thickness of the tender matters a lot. Thicker pieces need more time in the oven, but they also have a higher risk of drying out. If you are using very thick chicken breast tenders, consider pounding them to an even thickness before baking. This helps them cook more evenly and reduces the overall chicken tenders bake time.
Always use a meat thermometer to check the internal temperature. The chicken tenders internal temperature should reach 165°F at the thickest part. This is the safest temperature for eating chicken, according to food safety guidelines.
Cooking Times for Frozen Chicken Tenders
Frozen chicken tenders need a bit more time in the oven. The extra moisture from the ice coating slows down the cooking process. At 400°F, frozen tenders typically need 25 to 30 minutes. Some brands may require slightly longer, so always check the package instructions too.
Here is a helpful comparison table:
| Type | Temperature | Cooking Time | Internal Temp |
|---|---|---|---|
| Fresh Thin Tenders | 400°F | 18 to 22 min | 165°F |
| Fresh Standard Tenders | 400°F | 20 to 25 min | 165°F |
| Fresh Thick Tenders | 400°F | 25 to 30 min | 165°F |
| Frozen Standard Tenders | 400°F | 25 to 30 min | 165°F |
| Frozen Thick Tenders | 400°F | 30 to 35 min | 165°F |
One of the biggest advantages of baking frozen chicken tenders is convenience. You do not need to thaw them first. Just pat them dry with a paper towel, season them, and pop them in the oven. The extra few minutes of cooking time is a small price to pay for the ease.
Pro tip: If you are cooking frozen tenders, do not skip the step of patting them dry. Surface moisture is the enemy of crispy breading. The drier the outside, the crispier the result. This is one of the most overlooked chicken tenders tips that makes a huge difference.
Step-by-Step Guide to Baking Chicken Tenders
What You Need to Get Started
Before you start, gather your ingredients and tools. Here is what you will need for a basic chicken tenders recipe:
- Boneless chicken tenders (fresh or frozen)
- Olive oil or cooking spray
- Salt and pepper
- Garlic powder
- Smoked paprika
- Baking sheet
- Wire cooling rack
- Meat thermometer
You do not need many ingredients to make great oven-baked chicken. The simplicity is part of the beauty. A few basic seasonings bring out the natural flavor of the chicken without overwhelming it.
The Baking Process
Follow these simple steps for perfect how to bake chicken tenders every time:
- Preheat your oven to 400°F. Give it at least 10 minutes to reach the right temperature. A properly preheated oven cooks more evenly.
- Prepare the baking sheet. Line a baking sheet with parchment paper or foil for easy cleanup. Place a wire rack on top of the sheet.
- Pat the tenders dry. Use paper towels to blot away excess moisture. This step is crucial for crispy skin and breading.
- Season the tenders. Lightly brush or spray the tenders with oil, then sprinkle with salt, pepper, garlic powder, and paprika. Even a simple seasoning blend works wonderfully.
- Arrange on the rack. Place tenders in a single layer with space between each piece. Overcrowding traps steam and prevents crispiness.
- Bake for 20 to 25 minutes. Flip the tenders halfway through for even browning. Check the internal temperature at the 20-minute mark.
- Rest before serving. Remove from the oven and let the tenders rest for 3 to 5 minutes. This helps the juices redistribute for a more tender bite.
That is really all there is to it. The process is straightforward, and the results are impressive. Cooking chicken in oven this way gives you hands-off cooking time while you prepare sides or set the table.
Tips for Crispy and Juicy Chicken Tenders
Why Your Tenders Might Not Be Crispy
If your baked crispy chicken tenders come out soggy or soft, a few common culprits are usually to blame. Overcrowding the baking sheet is the number one mistake. When tenders sit too close together, steam gets trapped. Steam makes the breading soft instead of crispy.
Another reason is too much moisture on the surface of the chicken. Always pat your tenders dry before seasoning. If you are using frozen tenders, make sure to let them thaw slightly or at least blot them thoroughly. Surface water turns to steam in the oven, and that steam prevents crisping.
Skipping the wire rack is another mistake. Placing tenders directly on a baking sheet traps steam underneath. A wire rack allows air to circulate around the entire tender, which promotes even browning and crunch.
Pro Tips for the Best Results
Here are some expert chicken tenders tips that take your baking from good to great:
- Use a wire rack: This is the single best upgrade for crispy baked chicken tenders. Air flows underneath, so no soggy bottoms.
- Spray, do not soak: A light coat of oil helps browning. Too much oil makes the breading greasy.
- Flip halfway through: This ensures both sides get golden and crispy. Use tongs for a quick flip.
- Do not skip preheating: A hot oven from the start sets the breading immediately and creates that satisfying crunch.
- Season generously: Underseasoned chicken tenders taste bland. Salt and spices make a big difference in flavor.
- Let them rest: Resting after baking keeps the juices inside the meat instead of losing them on the cutting board.
These small adjustments add up to a big difference. You will notice the texture and flavor improve immediately. Crispy baked chicken does not happen by accident. It happens with the right technique.
Frozen vs Fresh Chicken Tenders
Which One Should You Choose?
Both frozen and fresh chicken tenders work well in the oven. The choice mostly comes down to convenience and your schedule. Fresh tenders cook faster and tend to have a slightly better texture, but frozen tenders are incredibly handy for quick weeknight meals.
Fresh chicken tenders from the butcher or grocery deli section often have a better texture right out of the package. They absorb seasoning more readily and brown more evenly. If you have the time to plan ahead, fresh is the way to go for a special meal or dinner party.
Frozen tenders are a different story. They are perfect for busy nights when you need dinner on the table fast. Most frozen breaded chicken tenders are designed to go straight from the freezer to the oven. The cooking time is only 5 to 10 minutes longer than fresh tenders, and the end result is still delicious.
Adjusting Your Recipe for Frozen
When cooking frozen chicken tenders, there are a few adjustments to keep in mind:
- Add 5 to 10 minutes to the cooking time. The frozen center takes longer to reach the safe internal temperature.
- Pat them dry before seasoning. Remove as much surface frost as possible for better browning.
- Check the internal temperature carefully. The thickest part of the tender must reach 165°F. Frozen tenders can look done on the outside but still be cold in the center.
- Consider increasing the temperature slightly. Some cooks find that 425°F works better for frozen tenders because it cooks the outside faster while the inside catches up.
For most people, keeping a bag of frozen chicken tenders in the freezer is a smart move. They are a reliable backup for quick dinners, lunchboxes, or unexpected guests. Knowing how long to cook them properly makes all the difference.
How to Tell When Chicken Tenders Are Done
The Internal Temperature Test
The most reliable way to know if your chicken tenders temperature is safe is with a meat thermometer. Insert the probe into the thickest part of the tender, making sure it does not touch the bone or the baking sheet. The reading should be 165°F.
This is not just a suggestion. The USDA recommends cooking all poultry to an internal temperature of 165°F to kill harmful bacteria. A meat thermometer takes the guesswork out of cooking chicken. It is an inexpensive tool that every kitchen should have.
Visual and Texture Clues
Even without a thermometer, there are signs that your chicken tenders recipe is done:
- The outside should be golden brown with a slight crispiness.
- The juices should run clear, not pink or cloudy.
- The meat should feel firm, not rubbery or squishy.
- If you cut into the thickest piece, there should be no pink spots.
These visual cues are helpful, but they are not as accurate as a thermometer. Always use a meat thermometer when possible, especially if you are new to how to bake chicken in the oven. Over time, you will develop a feel for when tenders are done just by looking at them.
What Happens If You Overcook Chicken Tenders
Overcooked chicken tenders are dry, tough, and flavorless. The moisture gets squeezed out of the meat, leaving behind something that is hard to enjoy. This is why timing matters so much. Even five extra minutes in the oven can make the difference between juicy and dry.
If you accidentally overcook your tenders, do not throw them away. Shred the chicken and use it in salads, wraps, soups, or casseroles. Overcooked chicken still has protein and flavor, it just needs a little help from sauces or dressings. Learning to watch the clock and check temperatures early is the best way to avoid this common mistake.
Serving Ideas and Side Dishes
Once your crispy chicken tenders are done, the fun part is serving them. There are so many great sides that pair well with oven-baked chicken tenders. Here are some ideas to round out your meal:
- Ranch dipping sauce: The classic pairing that never gets old.
- Honey mustard: A sweet and tangy option that complements the savory chicken.
- French fries or sweet potato fries: A natural pairing for a complete comfort food meal.
- Fresh salad: A light side that balances the richness of the chicken.
- Coleslaw: Crunchy and refreshing, it adds great texture to the plate.
- Mac and cheese: For a indulgent, crowd-pleasing dinner.
Baked chicken tenders are versatile enough to work for lunch, dinner, or even snacks. Pack them in lunchboxes, serve them at parties, or enjoy them as a quick weeknight dinner. The possibilities are truly endless with chicken tenders oven recipe ideas.
Conclusion
How long to cook boneless chicken tenders in oven is a simple question with a straightforward answer. At 400°F, fresh tenders need 20 to 25 minutes, and frozen tenders need 25 to 30 minutes. The key is reaching an internal temperature of 165°F while keeping the outside golden and crispy.
Baking chicken tenders in the oven is one of the easiest and most reliable cooking methods you can use. It requires minimal effort, very little cleanup, and delivers consistent results. Once you master the basics, you can experiment with different seasonings, dipping sauces, and serving styles to keep things interesting.
Remember to pat your tenders dry, use a wire rack, do not overcrowd the pan, and always check the internal temperature. These small habits make a big difference in the final result. With the tips and techniques in this guide, you are well equipped to make perfect oven-baked chicken tenders every single time.
So preheat that oven, grab your chicken tenders, and get cooking. You will have a delicious, crispy, and juicy meal ready in less than half an hour. Enjoy!
Frequently Asked Questions
Can I cook boneless chicken tenders at 350°F instead of 400°F?
Yes, you can cook chicken tenders at 350°F, but it will take longer. At this lower temperature, expect fresh tenders to need 25 to 30 minutes. The trade-off is less crispiness on the outside. If you choose the lower temperature, just be sure to check the internal temperature to make sure the chicken reaches 165°F.
How do I know if frozen chicken tenders are fully cooked?
The only foolproof way is to use a meat thermometer. Insert it into the thickest part of the tender. The chicken tenders internal temperature must read 165°F. Frozen tenders can look done on the outside but still be undercooked in the center, so always verify with a thermometer for food safety.
Can I use aluminum foil when baking chicken tenders?
You can line your baking sheet with foil for easier cleanup, but avoid covering the tenders with foil while they bake. Trapping steam under the foil will make the breading soft instead of crispy. For the crispiest crispy baked chicken, leave the tenders uncovered and use a wire rack on the baking sheet.
What is the best seasoning for oven-baked chicken tenders?
A simple blend of salt, black pepper, garlic powder, and smoked paprika works beautifully for most chicken tenders seasoning needs. You can also add onion powder, a pinch of cayenne for heat, or dried herbs like thyme and oregano. The beauty of oven-baked tenders is that you can customize the seasoning to match your personal taste.
How long can I store leftover baked chicken tenders?
Cooked chicken tenders stay safe in the refrigerator for 3 to 4 days when stored in an airtight container. For the best texture, reheat them in the oven at 350°F for about 5 to 8 minutes. Avoid microwaving if possible, as it can make the breading soggy. Proper storage keeps your leftover chicken tenders tasting almost as good as fresh.
Can I make crispy chicken tenders without deep frying?
Absolutely. Baking in a hot oven at 400°F on a wire rack produces surprisingly crispy results without the grease of deep frying. The key is to pat the tenders dry, use a light coating of oil, and avoid overcrowding the pan. For extra crunch, you can also broil the tenders for the last 1 to 2 minutes of cooking. This gives you crispy chicken tenders with far less oil and fewer calories.