How To Make A Taco Salad Shell In The Oven At Home
Learn how to make a crispy taco salad shell in the oven with this simple, step-by-step recipe. You’ll discover the secret to a perfectly crunchy, golden shell that holds all your favorite toppings. This easy method works every time, giving you a healthier, homemade alternative to fried shells.
Ever wanted a crunchy taco salad shell without the mess of deep frying? Making a taco salad shell in the oven is easier than you think. This method uses simple ingredients and your home oven to create a golden, crispy shell that holds all your favorite toppings. You can whip up a batch in under 15 minutes, and the results are far superior to anything from a box.
Store-bought fried shells often taste greasy and break apart the moment you add a spoonful of salad. A homemade oven-baked taco shell stays crisp longer and gives you full control over the salt, oil, and seasoning. It’s a simple upgrade that transforms your taco night into a healthier, more satisfying meal.
In this guide, I’ll walk you through every step, from mixing the dough to shaping and baking. You’ll learn pro tips for the perfect crunch, creative ways to use your shell, and how to avoid common mistakes. By the end, you’ll have a flawless taco salad shell ready to fill with all the fixings.
Key Takeaways
- Quick and easy: You can whip up a taco salad shell in under 15 minutes using just a few pantry staples.
- Crispy every time: The oven method gives you a perfectly crunchy shell without any deep frying.
- Customizable: Use the baked shell for a classic taco salad, loaded nachos, or a crunchy bowl for your favorite toppings.
- Healthier option: Homemade baked shells use less oil than store-bought fried versions.
- Great for meal prep: Make a batch ahead and store them for quick taco nights all week long.
- Kid-friendly: Kids love helping shape the shells, and they enjoy the fun, crispy texture.
📑 Table of Contents
Why Homemade Oven-Baked Taco Shells Are a Game-Changer
There’s something special about biting into a warm, crunchy taco salad shell you made yourself. The aroma fills your kitchen, and the texture is perfectly crisp. Store-bought shells can be limp and oily. A homemade version uses just a few ingredients and your trusty oven.
Let’s compare the two methods side by side.
| Method | Oil Used | Prep Time | Texture | Health Factor |
|---|---|---|---|---|
| Deep Fried | Lots of oil | 5 minutes | Very crunchy, greasy | High in fat and calories |
| Oven-Baked | Light spray or brush | 12-15 minutes | Evenly crispy, lighter | Lower in fat, customizable |
As you can see, baking wins for a healthier taco salad shell. You get the same satisfying crunch without the guilt. Plus, you can bake a large batch at once. The oven method is also safer because there’s no hot oil to handle. Kids can even help with the spraying and shaping.
The Crispy Difference
Oven-baked shells develop a light, even crunch. They don’t get soggy as fast as fried ones. You can bake them in batches and keep them ready for guests. The slight browning on the edges adds a nutty flavor that pairs perfectly with taco salad ingredients. A baked tortilla shell holds its shape better than a fried one, especially when loaded with juicy toppings.
A Healthier Twist
Frying adds a lot of oil. Baking uses just a light spray of cooking spray or a brush of olive oil. This makes your taco salad shell lower in fat. It’s a great way to enjoy tacos without the heavy feeling. You can also use whole wheat tortillas for extra fiber. For a dairy-free taco shell, simply skip the cheese toppings or use a plant-based alternative.
Why It’s Perfect for Taco Night
Taco night is a family favorite. Kids love helping shape the shells. The smell of baking tortillas makes everyone hungry. A homemade taco salad shell becomes the centerpiece of the table. You can set up a toppings bar and let everyone build their own bowl. This interactive meal encourages kids to try new vegetables and flavors.
Everything You Need to Get Started
Gathering everything before you start makes the process smooth. You likely already have most of these items in your kitchen. No special equipment is required, though a taco shell mold helps.
The Right Tortilla Matters
Corn tortillas are the traditional choice for a taco salad shell. They have a sturdy texture that crisps up beautifully. Look for 6-inch tortillas made with just masa harina, water, and salt. Avoid tortillas with added preservatives, as they can taste slightly off when baked. If you prefer a softer shell, flour tortillas can work too, but they won’t be as crunchy.
For a gluten-free taco shell, corn tortillas are naturally gluten-free. Just check the label to ensure no wheat flour is added. A gluten-free taco shell made from corn is a safe option for most people with celiac disease or gluten sensitivity. Popular reliable brands include Guerrero, La Tortilla Factory, and 365 Everyday Value. Avoid brands with added sugars or preservatives for the cleanest flavor.
Pantry Staples
- Corn tortillas (6-inch size works best for a standard shell)
- Cooking spray or a light drizzle of neutral oil like canola or avocado oil
- Salt (fine sea salt or kosher salt)
- A pinch of chili powder
- A tiny bit of garlic powder
These basics create a simple, classic taco salad shell. You can use them as-is or add extra seasonings.
Optional Flavor Boosters
Want to take your taco salad shell to the next level? Try these add-ins:
- A teaspoon of cumin for earthy warmth
- A dash of smoked paprika for a subtle kick
- A sprinkle of lime zest for brightness
- A pinch of onion powder for depth
- A tiny pinch of cayenne for heat
- A little dried oregano for a Mediterranean twist
These simple seasonings make your baked tortilla shell taste restaurant-quality. You can adjust them to your family’s preferences. Even a light brush of lime juice before baking adds a fresh zing that complements the spices.
Tools You’ll Need
- Baking sheets
- Parchment paper or silicone baking mat
- A taco shell mold (optional but helpful)
- Oven mitts
- A wire cooling rack
- A pastry brush (for oil or lime juice)
Having these ready ensures you won’t be scrambling when the timer goes off. The mold is especially useful for shaping the shell while it’s still warm and flexible. A silicone baking mat makes cleanup a breeze and promotes even browning. An oven thermometer is also a small tool that ensures your oven is truly at the right temperature.
The Step-by-Step Process for a Perfect Taco Salad Shell
Now let’s get into the fun part. Follow these steps for a perfect taco salad shell every time. The process is simple and forgiving, so don’t worry about being perfect.
Preparing the Shells
Preheat your oven to 375°F (190°C). Lightly spray both sides of each corn tortilla with cooking spray. Place them flat on a baking sheet lined with parchment paper. You can spray a second baking sheet or use a silicone mat for easy cleanup. Leave a small gap between each tortilla so air can circulate. Overcrowding the pan leads to uneven crisping.
If you’re using a taco salad shell mold, place it on the baking sheet first, then set the tortilla inside the mold. This helps the shell hold its classic curved shape. If you don’t have a mold, you can shape the shell by hand after baking. Just make sure the tortillas are spaced out so they don’t touch.
Baking to Perfection
Bake the tortillas for 8 to 10 minutes. Watch them closely after 7 minutes. You want them golden and crisp, not brown. The edges should curl slightly. If you prefer a darker crunch, bake for 11 minutes max. Keep an eye on them because ovens vary. A crispy taco shell should sound hollow when you tap it.
For a taco salad shell that holds up to heavy toppings, make sure the tortillas are completely dry before baking. Pat them with a paper towel if they feel damp. A dry surface promotes even crisping and prevents steaming. You can also leave the tortillas out on the counter for 10 minutes before baking to air-dry them slightly. The science behind this is simple: moisture is the enemy of crispness. When the oven heats the tortilla, water evaporates quickly, leaving behind a rigid, crispy structure. The Maillard reaction then causes the sugars and proteins to brown, creating that appealing golden color and nutty flavor.
Cooling and Shaping
Remove the shells from the oven. While they’re still warm and flexible, gently fold them in half and press the edges together. You can use a taco shell mold or simply hold them with oven mitts. Let them cool completely on a wire rack. They’ll firm up as they cool. Resist the urge to taste them right away, though they are delicious warm.
A taco salad shell is ready to fill once it reaches room temperature. If it cracks while shaping, it’s too cold. Just pop it back in the oven for 1 minute to soften it slightly. If it breaks apart, you can still use the pieces as a crunchy topping for salads or soups.
Party-Size Batch
For a crowd, double or triple the recipe. Use multiple baking sheets and rotate them halfway through baking. You can bake up to 24 shells at once if your oven has enough space. Keep an eye on them as they can bake faster in crowded pans. This makes hosting a breeze.
Pro Tips for a Crispy, Golden Finish
A few small tweaks make a huge difference in texture. These tips come from years of baking tortillas and testing recipes.
Temperature and Timing
Don’t skip preheating your oven. A hot oven from the start ensures even crisping. If your shells turn out soft, they need more time. Return them to the oven for 1-2 extra minutes. Let them cool fully before storing.
The ideal oven temperature for a taco salad shell is 375°F. This is hot enough to crisp the tortilla quickly without burning it. If you have a convection oven, reduce the temperature by 25°F and check a minute earlier. Convection fans circulate hot air, which can brown the shells faster. An oven thermometer is a small tool that ensures your 375°F is truly 375°F. This can make a big difference in your baking results.
Storing Your Shells
Keep your homemade taco salad shell in an airtight container at room temperature. They stay crispy for up to 3 days. Avoid refrigerating them, as moisture will soften the shell. If they lose their crunch, pop them back in the oven for 2 minutes at 350°F. A paper towel inside the container can absorb any residual moisture.
Make-Ahead Tips
Bake shells on Sunday and store in an airtight container. You can also pre-make seasoned tortillas and freeze them before baking. Thaw and bake straight from frozen, adding 1-2 extra minutes. A well-stored taco salad shell is a lifesaver on busy weeknights. You can bake a batch on Sunday and have ready-made shells all week. Just fill them with fresh toppings each day.
Quick Tips
- Use a silicone mat: It prevents sticking and promotes even browning.
- Brush with lime juice: A light brush adds flavor and helps the salt stick.
- Make a double batch: Shells freeze well for up to a month. Freeze them flat in a single layer, then transfer to a freezer bag.
- Add cheese in the last minute: Sprinkle shredded cheese on the shell while it’s still hot for a melty layer. Cheddar or Monterey Jack works great.
- Sprinkle salt immediately: Salt sticks best to the hot shell right out of the oven.
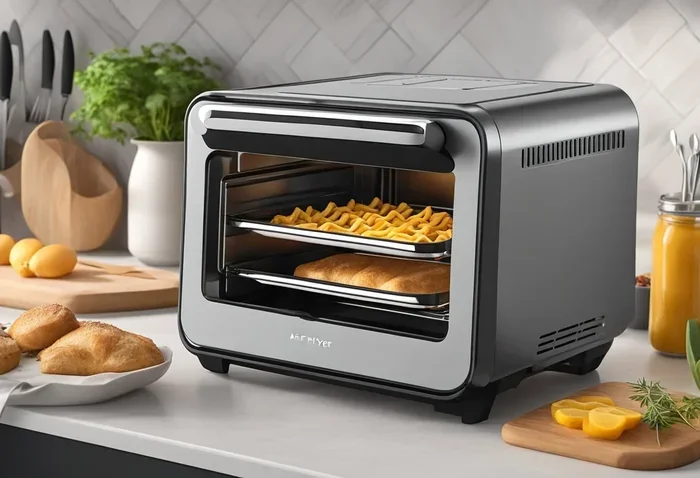
- Air fryer alternative: If you have an air fryer, bake at 350°F for 5-7 minutes. The results are
Frequently Asked Questions
What is How To Make A Taco Salad Shell In The Oven?
How To Make A Taco Salad Shell In The Oven is an important topic with many practical applications.