How to Make Toast in Oster Toaster Oven the Easy Way
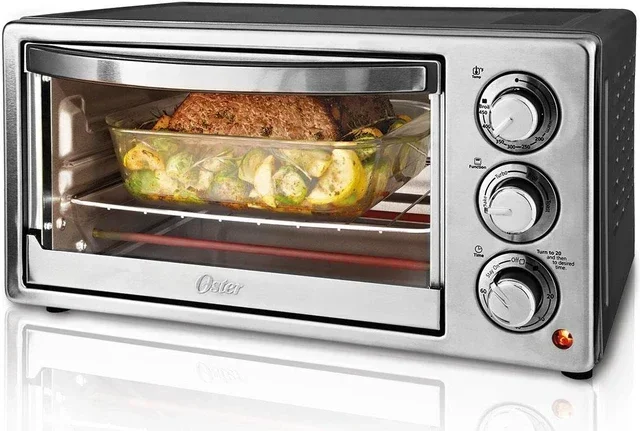
Making toast in an Oster toaster oven is simple, fast, and gives you better results than a regular toaster. You get even browning, crispy edges, and the flexibility to toast different types of bread. This guide walks you through every step so you can enjoy perfect toast with your Oster oven.
There is nothing quite like the smell of warm, crispy toast in the morning. Whether you prefer a light golden finish or a deep golden-brown crunch, your Oster toaster oven can deliver amazing results every single time. Many people don’t realize just versatile their Oster toaster oven really is. It can do so much more than just reheat pizza leftovers.
Learning how to make toast in Oster toaster oven is one of the simplest skills you can pick up. It takes just a few minutes, and the results are far better than what you get from a standard pop-up toaster. The heating elements in an Oster oven surround the bread more evenly, which means no more burnt edges with a cold center. You also get the freedom to toast bagels, English muffins, thick-cut artisan bread, and even frozen waffles.
In this guide, we will walk you through everything you need to know. From setting the right temperature to choosing the perfect rack position, we have got you covered. By the end, you will be making restaurant-quality toast in your own kitchen with total confidence.
Key Takeaways
- Use the right setting: The bagel or toast function on your Oster toaster oven gives the best results for golden bread.
- Preheat for crispiness: A quick 2-minute preheat ensures even toasting and a crispy finish.
- Position matters: Placing bread on the center rack promotes even browning on both sides.
- Watch the time: Most slices take 3 to 5 minutes, but thickness and bread type affect timing.
- Keep it clean: Regularly empty the crumb tray to prevent smoke and maintain performance.
- Experiment with settings: Try the convection mode for faster, more uniform toasting.
- Safety first: Always use oven mitts and never leave the toaster oven unattended while toasting.
📑 Table of Contents
- Why Use an Oster Toaster Oven for Toast?
- Step-by-Step Guide to Making Toast in Oster Toaster Oven
- Oster Toaster Oven Toast Settings Explained
- Common Mistakes to Avoid When Toasting in an Oster Toaster Oven
- Quick Tips for Perfect Toast Every Morning
- How to Clean Your Oster Toaster Oven After Toasting
- Expert Tips from Professional Chefs
- Oster Toaster Oven vs Regular Toaster: Which Is Better for Toast?
- Frequently Asked Questions
- Conclusion
Why Use an Oster Toaster Oven for Toast?
A lot of people wonder why they should bother using an Oster toaster oven instead of their everyday pop-up toaster. The answer is simple. An Oster toaster oven gives you more control, more space, and more consistent results. Let us break down the main reasons why this appliance is a toast-making champion.
Even Heat Distribution
One of the biggest advantages of using an Oster toaster oven is the way it heats. Unlike a pop-up toaster that uses narrow slots, the Oster oven wraps heat around the bread from multiple directions. This means your toast gets browned evenly on both sides. You will notice the difference right away, especially with thicker slices of bread.
More Control Over Browning
Most Oster toaster ovens come with adjustable browning controls. You can choose exactly how dark or light you want your toast. Some models even have digital displays that let you set the exact temperature and time. This level of control is something a basic toaster simply cannot match. Whether you like your toast barely warm or deeply crispy, you have the power to dial it in perfectly.
Toast More Than Just Bread
Your Oster toaster oven can handle a wide variety of items. You can toast bagels with the cut side facing inward for a crispy exterior and soft interior. English muffins get wonderfully crisp when toasted on the oven rack. Frozen items like waffles and hash browns come out perfectly cooked when you use the right settings. This versatility makes the Oster toaster oven a true everyday kitchen tool.
Step-by-Step Guide to Making Toast in Oster Toaster Oven
Now let us get into the actual process. Making toast in your Oster toaster oven is straightforward, but there are a few tips that will take your results from good to great. Follow these steps each morning and you will wonder how you ever managed with a regular toaster.
Step 1: Plug In and Preheat
Start by plugging in your Oster toaster oven and placing it on a flat, stable surface. Make sure there is at least a few inches of clearance on all sides for proper airflow. Set the oven to toast mode or bake mode at around 375°F to 400°F. Let it preheat for about 2 minutes. This small step makes a big difference. Preheating ensures the bread starts crisping the moment it goes in, which gives you a more even and golden result.
Step 2: Choose Your Bread
The type of bread you use matters more than you might think. Thin sliced bread toasts quickly and can burn fast. Thicker artisan loaves need a bit more time but reward you with a satisfying crunch on the outside and a soft interior. Here are some great options:
- White sandwich bread: Classic and fast to toast. Great for a quick breakfast.
- Whole wheat bread: Takes a little longer but has a nuttier flavor that pairs well with butter.
- Sourdough: Toasts beautifully with a tangy crisp edge. A favorite among toast lovers.
- Bagels: Use the bagel setting if your Oster model has one. It toasts the cut side more intensely.
- Frozen waffles: Use the defrost setting first, then toast for a crispy finish.
Step 3: Place Bread on the Center Rack
Rack position plays a big role in how evenly your toast cooks. Always place your bread slices on the center rack. This spot allows hot air to circulate around the bread evenly. If you place bread too close to the top element, the top will burn while the bottom stays pale. Too close to the bottom, and you get the opposite problem. The center rack is the sweet spot for perfect toast every time.
Step 4: Set the Time and Temperature
For most standard slices of bread, set the timer for 3 to 5 minutes. Start with 3 minutes and check the progress. You can always add more time, but you cannot undo a burnt slice. Here is a quick reference table to help you get started:
| Bread Type | Temperature | Time | Result |
|---|---|---|---|
| White Sandwich Bread | 375°F | 3-4 min | Light to medium golden |
| Whole Wheat Bread | 375°F | 4-5 min | Medium golden, crispy |
| Sourdough | 385°F | 3-4 min | Crispy edges, soft center |
| Bagels (cut side up) | 400°F | 2-3 min | Crispy exterior, chewy inside |
| Frozen Waffles | 350°F | 4-5 min | Crispy and heated through |
| English Muffins | 375°F | 3-4 min | Evenly toasted on both sides |
Step 5: Flip Halfway Through
This is the secret most people skip. About halfway through the cooking time, open the oven and flip your bread slices. This simple move ensures both sides get equal browning. Use a pair of tongs or oven mitts to safely turn the bread. Flipping is especially important for thicker slices where one side might cook faster than the other.
Step 6: Remove and Enjoy
Once the toast reaches your preferred level of brownness, pull it out immediately. Use oven mitts or tongs to avoid burns. Place the toast on a plate and add your favorite toppings. The toast will continue to crisp slightly as it cools, so keep that in mind when judging doneness. Serve right away for the best texture and flavor.
Oster Toaster Oven Toast Settings Explained
Modern Oster toaster ovens come packed with features that make toasting easier than ever. Understanding what each setting does will help you get the most out of your machine. Let us walk through the most common settings you will find on an Oster toaster oven.
Toast Mode
The toast mode is specifically designed for making bread crispy. It uses the top and bottom heating elements together to brown bread evenly. Most Oster models have a browning dial that lets you choose from light to dark. Turn the dial to your preferred level, insert the bread, and the oven handles the rest. When the timer is up, the toast pops up automatically on some models.
Bagel Mode
If you are a bagel person, the bagel mode is a game changer. This setting focuses more heat on the cut side of the bagel while keeping the outer crust warm but not overly toasted. It uses the top element more aggressively to crisp the inside while the bottom element provides gentle heat to the outside. Always place the bagel with the cut side facing inward toward the heat source.
Convection Mode
Convection mode uses a fan to circulate hot air inside the oven. This creates a more uniform cooking environment. When toasting bread in convection mode, the result is incredibly even browning with no hot spots. Convection toasting also tends to be faster, so reduce your cooking time by about 30 seconds when using this mode. It is especially great when you are toasting multiple slices at once.
Defrost Mode
Do you reach for frozen bread in the morning? The defrost setting is perfect for this. It gently warms the bread first and then toasts it, preventing the outside from burning before the inside is thawed. Simply place your frozen slices in the oven, select defrost, and let the Oster toaster oven work its magic. You get perfectly toasted bread without any ice crystals left inside.
Common Mistakes to Avoid When Toasting in an Oster Toaster Oven
Even though making toast in an Oster toaster oven is simple, there are a few mistakes that can ruin your results. Avoiding these common errors will help you get better toast every single time.
Skipping the Preheat
Some people skip preheating to save a minute or two. This is a mistake. Without preheating, the bread sits in a cold oven and starts to dry out before it begins to crisp. The result is pale, uneven toast with a tough texture. A quick 2-minute preheat makes a noticeable difference in the final product.
Overcrowding the Rack
It is tempting to fit as many slices as possible onto the rack at once. But overcrowding blocks airflow and leads to uneven toasting. The slices on top may burn while the ones underneath stay pale. For best results, toast no more than 2 to 3 slices at a time, depending on the size of your Oster oven.
Using the Wrong Rack Position
We mentioned this earlier, but it is worth repeating. Placing bread too high or too low in the oven causes uneven browning. The center rack is always the best choice for toast. If you only have one rack in the oven, make sure it is positioned in the middle slot.
Forgetting to Flip the Bread
Flipping your bread halfway through is one of the easiest ways to improve your toast. Without flipping, the side facing up gets significantly more heat than the side facing down. This leads to one side dark brown and the other side barely golden. A quick flip solves this problem completely.
Leaving Crumbs in the Oven
Crumbs that build up at the bottom of the toaster oven can smoke or even catch fire. This is not just a fire hazard. It also affects the taste of your toast by adding a burnt, smoky flavor. Make it a habit to empty the crumb tray after every few uses. Your Oster toaster oven will last longer and perform better with regular cleaning.
Quick Tips for Perfect Toast Every Morning
Want to take your toast game to the next level? These quick tips will help you get consistent, delicious results with your Oster toaster oven. Bookmark this section and try a few of these suggestions during your next breakfast routine.
- Brush butter on before toasting: This creates a golden, crispy butter coating that tastes amazing. The butter melts and browns slightly as the toast cooks, adding incredible flavor.
- Add cinnamon and sugar before toasting: Sprinkle a mix of cinnamon and sugar on buttered bread before it goes in the oven. You get a sweet, crunchy treat that kids love.
- Use a pastry brush for even spreading: A small pastry brush helps you spread butter or olive oil evenly across the bread surface. This promotes uniform browning and flavor.
- Toast garlic bread in the Oster oven: Slice a baguette, spread garlic butter on each slice, and toast for 3 to 4 minutes. You get restaurant-style garlic bread in minutes.
- Reheat leftover toast in the oven: Day-old toast can be revived by placing it in the Oster toaster oven for 1 to 2 minutes at 300°F. It comes out almost as good as fresh.
- Experiment with different breads: Try rye, pumpernickel, multigrain, or ciabatta. Each bread type toasts differently and offers a unique flavor experience.
- Keep a small spray bottle of water nearby: If your toast is getting too dark too fast, a light mist of water on the surface can slow down the browning process.
How to Clean Your Oster Toaster Oven After Toasting
Keeping your Oster toaster oven clean is essential for maintaining its performance and extending its lifespan. A clean oven toasts better, smells better, and lasts longer. Here is a simple cleaning routine you should follow.
Daily Maintenance
After each use, let the oven cool down completely before cleaning. Pull out the crumb tray and dump the crumbs into the trash. Wipe the inside of the oven with a damp cloth to remove any loose crumbs or food particles. Never use water on the heating elements directly. A dry or slightly damp cloth is all you need for the interior.
Weekly Deep Clean
Once a week, give your Oster toaster oven a more thorough cleaning. Remove the crumb tray and wash it with warm soapy water. Let it dry completely before putting it back. Use a soft brush or a damp cloth to clean the heating elements gently. If there are stubborn food spots, make a paste of baking soda and water, apply it to the spot, let it sit for 10 minutes, and wipe it away with a damp cloth.
Monthly Maintenance
Once a month, check the door seal for any buildup of grime or food residue. A clean door seal ensures the oven maintains proper temperature during toasting. You should also inspect the cord and plug for any signs of wear or damage. Keeping up with this monthly routine helps your Oster toaster oven run smoothly for years to come.
Expert Tips from Professional Chefs
Professional chefs know a thing or two about getting the perfect toast. Here are a few expert tips that apply directly to using your Oster toaster oven.
Let the bread come to room temperature first. Cold bread from the fridge takes longer to toast and can result in uneven cooking. Take the bread out 10 to 15 minutes before you plan to toast it. This small step makes a noticeable difference in the final texture.
Use the convection setting for multiple slices. If you are making toast for the whole family, the convection mode is your best friend. The fan circulates hot air evenly around all the slices, so every piece comes out the same level of golden perfection. Just remember to reduce the time slightly since convection cooks faster.
Do not press down on the bread. Some people press the bread flat with a spatula while it toasts. This squeezes out moisture and prevents the bread from developing that satisfying crispy texture. Let the bread toast freely without any pressure.
Rest the toast for 30 seconds after removing it. This brief rest allows the heat to distribute evenly through the slice. The center warms up while the crust stays crispy. It is a small step that makes a big difference in the eating experience.
Oster Toaster Oven vs Regular Toaster: Which Is Better for Toast?
Many people ask whether an Oster toaster oven is really better than a regular toaster for making toast. The answer depends on what you value most in your morning routine. Let us compare the two side by side.
| Feature | Oster Toaster Oven | Regular Toaster |
|---|---|---|
| Even Toasting | Excellent, surrounds bread with heat | Good, but can have hot spots |
| Capacity | 2 to 6 slices at once | 2 to 4 slices at once |
| Browning Control | Very precise, digital or dial options | Limited, usually 1 to 6 settings |
| Versatility | Toast, bake, broil, defrost, reheat | Toast only |
| Speed | Slightly slower due to larger cavity | Fast, 1 to 3 minutes |
| Cleanup | Removable crumb tray, easy to wipe | Removable crumb tray |
| Price | Higher upfront cost | Lower upfront cost |
| Best For | Variety and precision | Speed and simplicity |
If you already own an Oster toaster oven, there is no reason not to use it for toast. The results are superior, and you get the added benefit of a multi-purpose appliance. If you are in the market for a new toaster and only plan to toast bread, a regular toaster might be the more budget-friendly choice. But for versatility and quality, the Oster toaster oven wins hands down.
Frequently Asked Questions
Can I toast frozen bread directly in the Oster toaster oven?
Yes, you can toast frozen bread directly in your Oster toaster oven. Use the defrost setting first if your model has one. If it does not, set the temperature to 350°F and increase the toasting time by about 1 to 2 minutes. The bread will thaw and toast at the same time. Just keep an eye on it so it does not burn.
What is the best temperature for making toast in an Oster toaster oven?
The ideal temperature for toast in an Oster toaster oven is between 375°F and 400°F. This range provides enough heat to crisp the bread without burning it. For thinner bread, stick to 375°F. For thicker slices or bagels, you can go up to 400°F for a crispier result.
How long does it take to make toast in an Oster toaster oven?
Most slices of bread take between 3 and 5 minutes to toast in an Oster toaster oven. The exact time depends on the bread type, thickness, and your preferred level of brownness. Start checking at the 3-minute mark and add time as needed. Remember that flipping the bread halfway through helps both sides toast evenly.
Can I use aluminum foil in my Oster toaster oven for toasting?
It is best to avoid using aluminum foil on the bottom of the toaster oven, as it can block airflow and cause uneven heating. You can use a small piece of foil under the bread if needed, but do not cover the heating elements. Always refer to your Oster oven manual for specific guidance on safe materials and usage.
How do I prevent my toast from burning in the Oster toaster oven?
To prevent burning, start with a lower time setting and check frequently. Use the center rack position for even heat distribution. Avoid placing bread too close to the top heating element. If your model has a toast shade or browning dial, start in the middle setting and adjust from there based on your results.
Is it safe to leave the Oster toaster oven unattended while toasting?
It is not recommended to leave any toaster oven unattended while it is in use. Although modern Oster models have safety features like auto shut-off timers, accidents can still happen. Stay nearby and keep an eye on your toast, especially during the first few minutes of cooking. This ensures the best results and keeps your kitchen safe.
Conclusion
Learning how to make toast in Oster toaster oven is one of the simplest and most rewarding kitchen skills you can develop. With the right settings, rack position, and a little attention to timing, you can enjoy toast that is crispy on the outside, warm on the inside, and perfectly golden every single time.
Your Oster toaster oven gives you more control and better results than a standard toaster ever could. From the bagel setting to the convection mode, there are so many ways to customize your toast to match your personal preference. Whether you prefer a light toast with butter or a deeply crispy slice of sourdough, your Oster oven has you covered.
Remember to preheat, flip halfway through, and keep your oven clean for the best results. Try different breads, experiment with toppings, and make toast time something you actually look forward to each morning. Once you get the hang of it, you will never go back to a regular toaster again.
Start applying these tips today and enjoy the perfect toast every single morning. Your Oster toaster oven is ready to deliver amazing results, and now you have all the knowledge you need to make the most of it. Happy toasting!