How To Cook Microwave Popcorn In The Oven For Perfect Snacks
Cooking microwave popcorn in the oven is a simple hack that gives you crunchy, flavorful snacks without a microwave. This guide shows you the exact steps, temperatures, and seasoning ideas to make oven-baked popcorn that tastes even better than the bag. Whether you want homemade popcorn for movie night or a healthy snack time treat, this method works perfectly every time.
There is something magical about a big bowl of warm, crunchy popcorn. It is the kind of snack that makes any movie night, game day, or quiet evening feel special. Most people reach for the microwave bag, but there is another way that works just as well. You can cook microwave popcorn in the oven and get even better results.
This method is simple, fast, and gives you more control over what goes into your snack. Want less salt? Easy. Want more butter? Just add it. Making oven-baked popcorn at home means you skip the preservatives and artificial flavors found in store-bought bags. Plus, it smells amazing while it bakes.
In this guide, we walk you through everything you need to know. From the right oven temperature to the best seasoning ideas, you will find all the tips you need. By the end, you will wonder why you ever relied on a microwave bag again.
Key Takeaways
- Oven popcorn is easy: You just need a baking sheet, oil, and kernels to get started.
- Temperature matters: Baking at 400-425°F gives you the best kernel popping results.
- Seasoning is the fun part: Try sweet, salty, or spicy flavors to match your mood.
- No special tools needed: A regular oven and a few household items are all you need.
- It is healthier: You control the oil and salt, making it a better choice than store-bought bags.
- Quick and affordable: A batch takes less than 15 minutes and costs very little.
📑 Table of Contents
- Why Cook Microwave Popcorn In The Oven?
- What You Will Need To Get Started
- Step-By-Step Guide To Making Oven Popcorn
- Best Oven Temperatures And Timing For Perfect Popcorn
- Delicious Seasoning Ideas For Your Popcorn
- Common Mistakes And How To Avoid Them
- Expert Tips For The Best Oven Popcorn Every Time
- Conclusion
Why Cook Microwave Popcorn In The Oven?
You might be thinking, “Why not just use the microwave?” That is fair. Microwaves work fine for popcorn kernels, but the oven gives you a few big advantages. First, you get more control over the cooking process. Second, the results are often crunchier and more even. Third, you can make a larger batch at once.
Many people love homemade popcorn because they know exactly what is in it. No weird chemicals. No mystery ingredients. Just real food that tastes great. If you are curious about trying this method, here are some reasons it is worth your time.
Better Flavor And Texture
When you bake popcorn in the oven, the kernels pop more evenly. The heat surrounds each kernel, which helps create a lighter, crispier texture. The oven-baked popcorn also has a more toasted flavor that many people prefer over microwaved versions.
Microwave popcorn often has a slightly chewy or soft spot in the middle of the bag. The oven method avoids this problem entirely. Every piece comes out light and airy, with that satisfying crunch you love.
Healthier Snacking Option
Store-bought microwave popcorn bags often contain trans fats, sodium, and artificial flavors. When you make your own, you decide what goes in. You can use a small amount of popcorn oil or skip it altogether. This makes it a great option for people who want a lighter snack time treat.
If you are watching your calorie intake, air-popped popcorn made in the oven is one of the best choices. It has very few calories and no added fat. You can still add flavor with herbs, spices, or a light drizzle of melted butter.
What You Will Need To Get Started
One of the best things about making oven popcorn is that you do not need any fancy equipment. Most people already have everything in their kitchen. Here is a simple list of what you need before you start.
Essential Ingredients
- Popcorn kernels: These are the base of your snack. You can use white, yellow, or mushroom kernels depending on your preference.
- Cooking oil: A small amount of coconut oil, vegetable oil, or avocado oil works great for kernel popping.
- Salt: Fine salt or sea salt helps bring out the natural flavor of the corn.
- Butter (optional): Melted butter adds richness and a classic movie-style taste.
Tools You Will Use
- Baking sheet: A standard rimmed baking sheet works perfectly. It keeps the popcorn contained while it bakes.
- Parchment paper or foil: This makes cleanup easy and prevents the popcorn from sticking.
- A mixing bowl: For tossing the kernels with oil and seasoning before baking.
- A spatula: You will need this to spread the kernels in a single layer on the sheet.
Optional Extras For Flavor
Once you master the basic method, you can get creative with popcorn seasoning. Some popular additions include nutritional yeast, smoked paprika, garlic powder, cinnamon sugar, or even ranch powder. These turn simple oven popcorn into a gourmet treat.
Step-By-Step Guide To Making Oven Popcorn
Now that you have your ingredients and tools ready, let us get into the process. Making microwave popcorn in the oven is straightforward and takes only a few minutes of prep time.
Step 1: Preheat Your Oven
Start by preheating your oven to 400°F (200°C). This is the sweet spot for popcorn temperature that ensures even kernel popping. Let the oven heat up fully before you place anything inside. A properly preheated oven is key to getting the best texture.
While the oven warms up, line your baking sheet with parchment paper or aluminum foil. This small step saves you time during cleanup and keeps your popcorn from sticking to the pan.
Step 2: Mix The Kernels With Oil
In a mixing bowl, combine your popcorn kernels with a small amount of oil. You do not need much. About one tablespoon of popcorn oil for every quarter cup of kernels is enough. Toss the mixture gently until every kernel is lightly coated.
The oil serves two purposes. It helps the kernels pop more effectively and it adds a subtle richness to the final product. If you prefer a lighter result, you can skip the oil entirely and go with air-popped popcorn instead.
Step 3: Spread The Kernels On The Baking Sheet
Pour the coated kernels onto your prepared baking sheet. Use a spatula to spread them out in a single, even layer. This is an important step. If the kernels are piled on top of each other, they will not pop evenly.
Leave some space between each kernel. The heat needs to reach every piece for the best results. A single layer of kernels gives you the most uniform oven-baked popcorn with fewer unpopped pieces.
Step 4: Bake And Listen
Place the baking sheet in the preheated oven. Set a timer for about 5 to 8 minutes. You will hear the kernels start to pop within the first minute or two. Keep an ear on the oven and listen for the popping to slow down.
When the popping slows to about 2 to 3 seconds between pops, it is time to take the tray out. Overbaking can burn the popcorn, so watch carefully. The whole kernel popping process usually takes less than 10 minutes.
Step 5: Season And Serve
Once the popcorn is out of the oven, let it cool for a minute. Then transfer it to a large bowl. Add your favorite popcorn seasoning while the popcorn is still warm. The warmth helps the flavors stick better.
Toss the popcorn gently to distribute the seasoning evenly. Serve it in a big bowl, grab a seat, and enjoy your homemade popcorn creation. It is that simple!
Best Oven Temperatures And Timing For Perfect Popcorn
Getting the oven temperature right is one of the most important parts of this process. Too low and the kernels will not pop well. Too high and you risk burning them. Here is a closer look at the best settings for different results.
The 400°F Method
Baking at 400°F is the most popular approach for oven popcorn. It gives you a good balance of speed and even popping. Most batches are done in 5 to 8 minutes at this temperature. The popcorn comes out light, fluffy, and perfectly crunchy.
This temperature works well for both oil-coated and air-popped versions. If you are using a small amount of oil, 400°F helps it heat quickly and crisp up the kernels without burning them.
The 425°F Method For Extra Crunch
If you like your crispy popcorn extra crunchy, try 425°F. This higher temperature speeds up the popping process and creates a slightly more robust texture. Keep a close eye on the popcorn, as it can go from perfectly popped to slightly overdone quickly at this heat.
The 425°F method works best for people who want a more toasted flavor. It is especially good with savory seasonings like parmesan or chili powder. The higher heat brings out a deeper, richer taste in the corn.
Timing Guidelines By Batch Size
The size of your batch affects the cooking time. Here is a quick reference:
- Small batch (1/4 cup kernels): 5 to 6 minutes at 400°F
- Medium batch (1/2 cup kernels): 6 to 8 minutes at 400°F
- Large batch (1 cup kernels): 8 to 10 minutes at 400°F
Remember that these are guidelines. Every oven is slightly different, so use your ears as the best guide. The moment the popping slows down, pull the tray out.
Delicious Seasoning Ideas For Your Popcorn
One of the best things about making homemade popcorn is that you can customize the flavors. Store-bought bags offer limited options, but your oven gives you endless possibilities. Here are some ideas to try.
Savory Flavors
- Classic salted butter: Melted butter and a sprinkle of fine salt. Simple and satisfying.
- Cheesy parmesan: Mix grated parmesan with a pinch of garlic powder for a savory kick.
- Ranch style: Ranch powder or dried dill with a touch of onion salt creates a tangy flavor.
- Spicy kick: Add cayenne pepper, smoked paprika, and a bit of chili powder for heat.
Sweet Flavors
- Cinnamon sugar: A mix of cinnamon and brown sugar makes a sweet, dessert-style treat.
- Chocolate drizzle: Melted dark chocolate drizzled over warm popcorn adds a rich, indulgent twist.
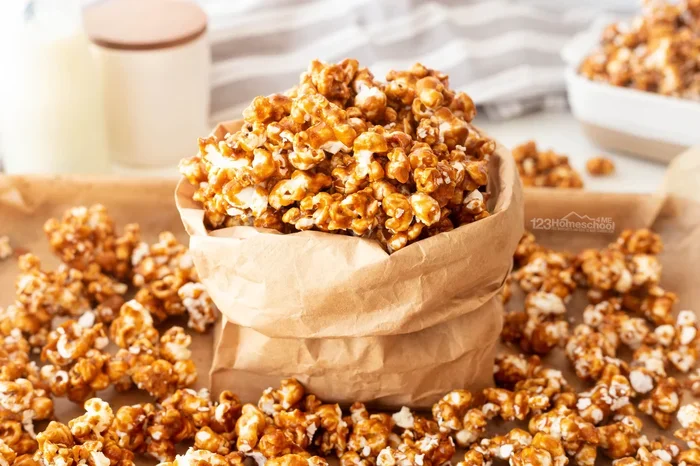
- Caramel corn: A light caramel sauce tossed with popcorn gives you a candy-like snack time option.
Healthy Flavor Combos
- Nutritional yeast: This gives a cheesy, nutty flavor without any dairy or calories.
- Everything bagel seasoning: A sprinkle of this blend adds a savory, well-rounded taste.
- Lemon and herbs: Dried oregano, basil, and a squeeze of lemon create a fresh, light flavor.
Experiment with different combinations to find your favorite. Once you start making gourmet popcorn at home, store-bought bags will never compare.
Common Mistakes And How To Avoid Them
Even though making oven popcorn is simple, there are a few common mistakes that can affect the results. Here are the pitfalls to watch out for and how to avoid them.
Overcrowding The Baking Sheet
One of the biggest mistakes is piling too many kernels on the sheet. When kernels overlap, they do not pop evenly. Some will pop fine while others stay unpopped. Spread them out in a single layer for the best kernel popping results.
Using Too Much Oil
It is tempting to add extra oil to make the popcorn taste richer. But too much oil makes the popcorn greasy and heavy. Stick to the recommended amount. A light coating is all you need for flavor and proper popping.
Not Watching The Oven
Oven popcorn can go from perfect to burnt in seconds. Do not walk away and forget about it. Stay nearby and listen for the popping to slow down. This is the best way to catch the perfect moment to pull the tray out.
Seasoning Too Early Or Too Late
Adding seasoning before baking can cause it to burn or fall off. Adding it after the popcorn has cooled means it will not stick well. The sweet spot is to season while the popcorn is still warm but not hot. Toss gently and the flavors will cling perfectly.
Expert Tips For The Best Oven Popcorn Every Time
Want to take your popcorn recipe to the next level? Here are some pro tips that make a big difference.
- Use a deep baking sheet: This prevents popped kernels from flying out of the oven.
- Shake the tray halfway through: Gently shake the baking sheet to move unpopped kernels to the bottom where the heat is strongest.
- Let the popcorn rest for one minute: After baking, let it sit in the oven with the door slightly open. This helps excess steam escape and keeps the popcorn crispy.
- Store leftovers properly: Keep any extra oven-baked popcorn in an airtight container. It stays fresh and crunchy for up to three days.
- Try different kernel types: Mushroom kernels are great for caramel corn, while butterfly kernels work best for savory seasonings.
These small tips can transform your popcorn in the oven from good to outstanding. The more you practice, the more you will develop your own perfect method.
Conclusion
Making microwave popcorn in the oven is one of the easiest and most rewarding snack projects you can try at home. It gives you better flavor, healthier ingredients, and total control over every batch. Whether you prefer it salty, sweet, or spicy, the oven method delivers consistent, satisfying results every single time.
The process is simple. Preheat to 400°F, coat your kernels with a little oil, spread them on a baking sheet, and bake until the popping slows. Then season to your liking and enjoy. It really is that easy. Once you start making homemade popcorn this way, you will never go back to the microwave bag.
So next time you are looking for a quick snack time treat or a movie night essential, give this method a try. Your taste buds will thank you. Grab some popcorn kernels, preheat the oven, and make the best bowl of popcorn you have ever had.
Frequently Asked Questions
Can I use any type of popcorn kernels for oven popcorn?
Yes, you can use white, yellow, or specialty kernels. Each type pops a little differently, but all work well in the oven. Yellow kernels tend to be larger and fluffier, while white kernels are smaller and more tender. Mushroom kernels are best if you plan to coat the popcorn with caramel or chocolate.
Is oven popcorn healthier than microwave popcorn?
Yes, oven popcorn is generally healthier because you control the ingredients. You can skip artificial flavors, reduce salt, and use minimal oil. Air-popped popcorn made in the oven has very few calories and no added fat, making it one of the best snack choices available.
How do I keep oven popcorn crispy after it comes out?
Let the popcorn cool completely before storing it. Use an airtight container to keep moisture out, which is the main cause of soggy popcorn. Avoid sealing the container while the popcorn is still warm, as trapped steam will make it lose its crunch.
Can I make oven popcorn without any oil?
Absolutely. You can make oil-free popcorn by skipping the oil and just using dry kernels. The popcorn will be lighter and less rich. You may get slightly fewer popped kernels, but the result is still delicious and very healthy for snack time.
What is the best way to clean a baking sheet after making popcorn?
Line your baking sheet with parchment paper or foil before you start. This makes cleanup a breeze. If any kernels stick, soak the sheet in warm soapy water for a few minutes, then wipe clean. The oil and residue will come off easily with a soft sponge.
Can I add butter to oven popcorn after baking?
Yes, adding melted butter after baking is a great way to keep the popcorn crispy. Toss the warm popcorn with a small amount of melted butter, then add your seasoning. The butter coats the kernels lightly without making them soggy, giving you that classic movie-style flavor.