How Long Do You Bake Polymer Clay In The Oven Correctly
Baking polymer clay correctly depends on your oven temperature and the thickness of your piece. Most brands require a bake at 275°F for 15 to 30 minutes per quarter inch of thickness. This guide walks you through the exact timing, temperature settings, and common mistakes so your polymer clay projects come out perfect every single time.
Polymer clay is one of the most fun and versatile craft materials out there. You can make jewelry, figurines, ornaments, and so much more. But here is the thing that trips up almost every beginner. How long do you bake polymer clay in the oven? The answer is not as simple as “just pop it in for 30 minutes.” Getting the bake time and temperature right makes the difference between a durable finished piece and a crumbly mess.
This guide covers everything you need to know about polymer clay baking time, oven temperature settings, and the mistakes most people make. Whether you are working on your first project or you have been crafting for years, these tips will help you get better results every time you turn on your oven.
Key Takeaways
- Standard baking temperature: Most polymer clay cures at 275°F (130°C). Always check your brand’s specific instructions.
- Time depends on thickness: Plan for 15 minutes per quarter inch of clay thickness for a fully cured piece.
- Use an oven thermometer: Built-in oven dials are often inaccurate and can lead to underbaking or overbaking.
- Avoid common mistakes: Don’t overbake, don’t skip the baking surface, and always let pieces cool completely before handling.
- Different brands vary: Sculpey, Fimo, and Kato each have slightly different curing requirements and recommended times.
- Safety matters: Never exceed 300°F and always ventilate your kitchen when baking polymer clay.
📑 Table of Contents
- Understanding Polymer Clay Baking Basics
- How Long Do You Bake Polymer Clay In The Oven
- Step-by-Step Guide to Baking Polymer Clay
- Common Mistakes People Make When Baking Polymer Clay
- How to Tell If Polymer Clay Is Fully Baked
- Tips for Perfect Polymer Clay Baking Results
- Can You Use a Toaster Oven for Polymer Clay?
- Safety Tips for Baking Polymer Clay
- Final Thoughts on Baking Polymer Clay
Understanding Polymer Clay Baking Basics
Before you set a timer, it helps to understand what is actually happening inside that oven. Polymer clay curing is a chemical process. Heat causes the PVC particles in the clay to bond together and harden. This is different from air-dry clay, which dries through evaporation. With polymer clay, the heat is what makes the material solid and durable.
The standard oven temperature for polymer clay across most brands is 275°F, which is about 130°C. However, some brands like Kato Clay recommend slightly higher temperatures around 300°F. Always read the package instructions first. That small step saves a lot of frustration later.
Why Temperature Matters So Much
If your oven runs too hot, you risk burning the clay. Burnt polymer clay turns brown, gives off fumes, and becomes brittle. If your oven runs too cool, the clay stays soft and crumbly no matter how long you bake it. This is why using a separate oven thermometer is one of the best investments you can make as a crafter.
Most home ovens have temperature swings of plus or minus 25 degrees. That might sound small, but it can seriously affect your curing process. A cheap oven thermometer from the hardware store solves this problem for just a few dollars.
How Long Do You Bake Polymer Clay In The Oven
This is the big question, and the answer comes down to three factors. The brand of clay you are using, the thickness of your piece, and your oven’s actual temperature. Let us break it down.
The General Rule of Thumb
The most widely accepted guideline for baking polymer clay is 15 minutes per quarter inch of thickness at 275°F. So if your piece is half an inch thick, you would bake it for 30 minutes. One inch thick means about 60 minutes. This rule works well for most brands and most projects.
Here is a quick reference chart to help you plan:
- Quarter inch (6mm): 15 minutes at 275°F
- Half inch (12mm): 30 minutes at 275°F
- Three quarter inch (18mm): 45 minutes at 275°F
- One inch (25mm): 60 minutes at 275°F
Brand-Specific Baking Instructions
Not all polymer clay brands are the same. Each one has its own recommended temperature and time. Here is a quick look at the most popular brands and what they suggest.
Sculpey Original and Premo: These are the most widely available brands in craft stores. Both cure at 275°F. Sculpey Original needs about 15 minutes per quarter inch, while Premo is similar but can handle slightly longer bake times without issues.
Fimo Professional: Fimo recommends 265°F and 30 minutes per quarter inch. The slightly lower temperature helps prevent color changes in the clay. Fimo tends to be firmer out of the package, so it sometimes needs a bit longer to fully cure.
Kato Polyclay: This brand is different. Kato recommends a higher temperature of 300°F and shorter bake times. It cures quickly and produces a very hard, durable finish. Always follow Kato’s specific instructions since it behaves differently from other brands.
Cernit: Cernit cures at 266°F and generally follows the same 15-minutes-per-quarter-inch rule. It is known for its smooth texture and vibrant colors.
Step-by-Step Guide to Baking Polymer Clay
Now that you know the basics, let us walk through the actual process. Following these steps every time will give you consistent, professional-quality results.
Step 1: Preheat Your Oven
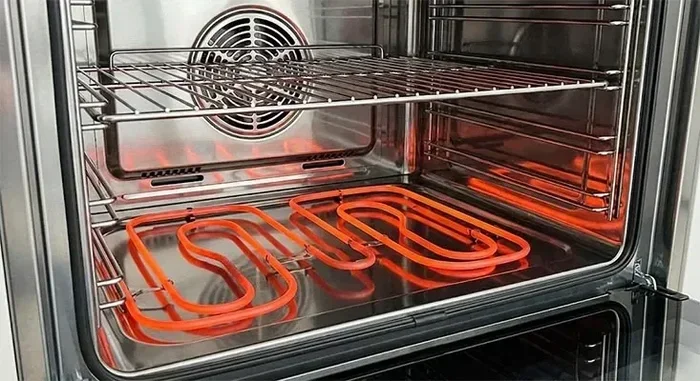
Start by preheating your oven to the correct temperature for your clay brand. Do not skip this step. Putting clay into a cold oven leads to uneven curing. Use an oven thermometer to confirm the actual temperature matches what your dial says.
Step 2: Prepare Your Baking Surface
Place your clay piece on a piece of cardstock, a ceramic tile, or a dedicated polymer clay baking sheet. Avoid using cardboard directly for long baking sessions, as it can scorch. Parchment paper works great too. The key is to have a flat, heat-safe surface that won’t stick to your clay.
Step 3: Set Your Timer
Set your timer based on the thickness chart above. Use a kitchen timer or your phone. Do not rely on your sense of time. Even a few extra minutes can make a difference in the final hardness of your piece.
Step 4: Monitor the Oven
Keep an eye on your oven while the clay is baking. If you notice smoke or a strong chemical smell, your oven is too hot. Turn it down immediately. Properly baked polymer clay should not smoke or produce strong odors.
Step 5: Cool Completely
Once the timer goes off, take the clay out of the oven. Let it cool on the baking surface for at least 15 to 20 minutes. Polymer clay is still soft when hot and can dent or warp if you handle it too soon. Patience during the cooling phase is just as important as the baking itself.
Common Mistakes People Make When Baking Polymer Clay
Even experienced crafters sometimes make mistakes in the polymer clay baking process. Here are the most common ones and how to avoid them.
Overbaking the Clay
More time does not mean better results. Overbaked polymer clay becomes brittle, discolored, and can release harmful fumes. Stick to the recommended times and temperatures. If you are unsure, it is better to slightly underbake and re-bake than to overbake.
Using the Wrong Oven Temperature
This is the number one mistake. Many ovens run hot or cold, and the built-in thermostat is not always accurate. A dedicated oven thermometer takes the guesswork out of the equation. Spend five dollars on one and your polymer clay projects will thank you.
Baking on the Wrong Surface
Never bake polymer clay directly on aluminum foil. The foil reflects heat unevenly and can cause shiny spots on the bottom of your piece. Cardstock, ceramic tiles, and parchment paper are much better choices.
Skipping the Test Piece
If you are trying a new brand or a new oven, make a small test piece first. Bake a scrap of the same clay at the recommended temperature and time. Check the hardness after it cools. This simple step prevents wasted projects and wasted materials.
How to Tell If Polymer Clay Is Fully Baked
Knowing when your piece is done is a skill that comes with practice. Here are some reliable signs that your polymer clay baking was successful.
A fully cured piece of polymer clay should feel hard when you press it gently with your fingernail. It should not flex or bend. If it still feels soft or squishy, it needs more time in the oven. Put it back for another 5 to 10 minutes and check again.
The color should remain consistent with what it looked like before baking. If it has darkened significantly or turned brown, the oven was too hot. A slight color change is normal for some brands, but a dramatic shift means you need to lower the temperature next time.
Another good test is the scratch test. Use a thumbnail or a craft knife to scratch the surface lightly. A properly cured piece will not show an easily visible scratch. If the scratch fills back in, the clay needs more baking time.
Tips for Perfect Polymer Clay Baking Results
Here are some extra tips that will take your polymer clay crafts to the next level.
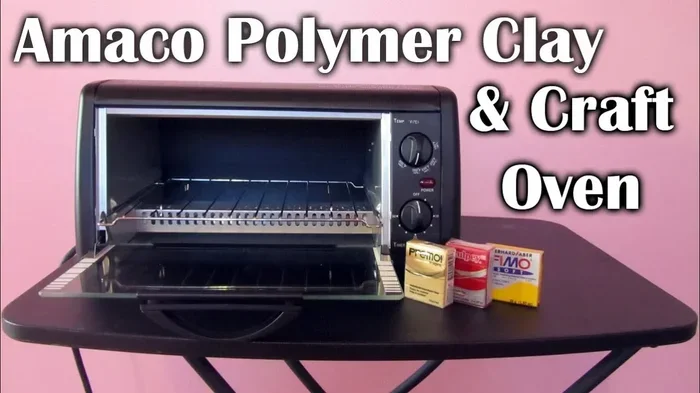
- Use a dedicated oven: If possible, use a small toaster oven for polymer clay. Your kitchen oven may have residual food smells that can transfer to the clay. A separate oven keeps your clay smelling clean and fresh.
- Ventilate your workspace: Even though polymer clay is non-toxic when baked properly, good ventilation is always a good idea. Open a window or turn on a fan while baking.
- Condition your clay first: Kneading the clay before baking removes air bubbles and ensures an even cure. Soft, well-conditioned clay bakes more evenly.
- Bake on a low rack: Place your clay on the middle or lower rack of the oven. This ensures heat circulates evenly around the piece.
- Let pieces cool fully before handling: Polymer clay is still pliable when warm. Give it at least 15 minutes to cool before you touch or move it.
- Re-bake if needed: If you add details after the first bake, you can re-bake the piece. Just make sure you do not exceed the maximum recommended temperature.
Can You Use a Toaster Oven for Polymer Clay?
Yes, you can absolutely use a toaster oven for baking polymer clay. In fact, many crafters prefer toaster ovens because they preheat faster and maintain a more consistent temperature. They also reduce the chance of food odors transferring to your clay.
Just make sure your toaster oven has an accurate temperature setting. Small toaster ovens can be less precise than full-size ovens, so an oven thermometer is even more important here. Also, make sure the toaster oven is clean and free of food residue before you use it for crafts.
The same time and temperature rules apply. Bake at 275°F for 15 minutes per quarter inch of thickness. The only difference is that a toaster oven may heat up faster, so keep a close eye on your pieces the first few times you use one.
Safety Tips for Baking Polymer Clay
Polymer clay is considered non-toxic when used and baked according to the manufacturer’s instructions. That said, it is still a chemical product, and a few safety precautions go a long way.
- Never exceed 300°F. Higher temperatures can release harmful fumes.
- Do not use your polymer clay baking tools for food afterward. Dedicate specific baking sheets and tools to your craft.
- Always bake in a ventilated area. Open a window or use a fan.
- Do not leave the oven unattended while baking clay, especially the first few times.
- Wash your hands after handling raw clay and before eating.
Final Thoughts on Baking Polymer Clay
Getting the polymer clay baking time and temperature right is the foundation of every successful project. It is not complicated, but it does require attention to detail. Use an oven thermometer, follow the thickness guidelines, and always check your specific brand’s instructions.
The difference between a good piece and a great piece often comes down to how carefully you handle the baking step. Take your time, follow these guidelines, and you will see a noticeable improvement in the quality and durability of your polymer clay crafts. Happy baking, and enjoy the creative process!
Frequently Asked Questions
Can you overbake polymer clay?
Yes, overbaking is possible and it damages the clay. Overbaked polymer clay becomes brittle, discolored, and may release unpleasant fumes. Always follow the recommended time and temperature for your specific brand to avoid this problem.
What happens if you bake polymer clay at the wrong temperature?
Baking at too high a temperature burns the clay and creates toxic fumes. Baking at too low a temperature leaves the clay soft and crumbly. Using an oven thermometer helps ensure your oven is at the correct temperature before you put the clay in.
Do you need to bake polymer clay on a specific surface?
Yes, you should avoid baking directly on aluminum foil or bare metal. Use cardstock, ceramic tiles, or parchment paper instead. These surfaces provide even heat distribution and prevent shiny spots or scorching on the bottom of your piece.
Can you re-bake polymer clay if it is not fully cured?
Absolutely. If your piece feels soft after the first bake, you can put it back in the oven for additional time. Just make sure you do not exceed the maximum recommended temperature. Re-baking is a common practice when adding details or layers to a project.
Is polymer clay safe to bake in a kitchen oven?
Yes, polymer clay is non-toxic when baked at the recommended temperature. However, it is a good idea to dedicate a separate oven or toaster oven for crafts, especially if you also use your oven for food. This prevents any potential smell transfer and keeps your crafting tools separate from kitchen items.
How can I tell if my polymer clay is fully cured?
A fully cured piece of polymer clay feels hard when pressed with a fingernail. It should not flex or bend. You can also perform a scratch test by gently marking the surface. If the scratch does not fill back in, the clay is fully cured and ready for your next step.
=== CONCLUSION ===
Getting the polymer clay baking time right is simpler than it looks. The key is to follow the 15-minutes-per-quarter-inch rule at 275°F, use an oven thermometer, and avoid the common mistakes most beginners make. Whether you are using Sculpey, Fimo, or Kato, these guidelines apply across the board. Your polymer clay projects will turn out stronger, more durable, and better looking when you take the baking step seriously. Start applying these tips on your next craft session and enjoy the satisfaction of a perfectly cured piece every single time.