How To Put In Oven Racks A Complete Step By Step Guide
Learning how to put in oven racks correctly makes a huge difference in your cooking results. This guide walks you through every step, from removing old racks to placing them at the perfect height. You will discover the best rack positions for baking, broiling, and roasting, along with pro tips to keep your oven shelves in great shape.
Have you ever stood in front of your oven wondering where exactly those metal shelves go? You are not alone. Many home cooks find how to put in oven racks confusing, especially when they switch between different oven models. The good news is that it is much simpler than it looks. Once you understand the basic mechanics, you will never second-guess yourself again.
Getting your oven rack placement right affects everything from browning to rising. A rack placed too high can burn the top of your cookies. A rack set too low might leave the bottom of your casserole undercooked. This guide covers every detail you need to know. By the end, you will feel confident adjusting your oven rack height for any recipe.
Key Takeaways
- Correct rack placement ensures even cooking: Proper positioning prevents hot spots and burned food.
- Adjusting racks is simple and quick: Most ovens use a slide-in rail system that anyone can master.
- Different recipes need different rack levels: Baking usually calls for the center position, while broiling works best on the top.
- Safety matters: Always handle racks with care and let them cool before adjusting.
- Maintenance extends rack life: Regular cleaning and inspection keep your oven shelves working smoothly.
- Common mistakes are easy to avoid: Knowing what to skip saves time and prevents damage.
📑 Table of Contents
- Understanding Your Oven Rack System
- How to Remove Oven Racks Safely
- Step by Step Guide to Putting In Oven Racks
- Best Rack Positions for Different Cooking Methods
- Common Mistakes When Putting In Oven Racks
- Maintenance Tips for Long Lasting Oven Racks
- Expert Insights on Oven Rack Placement
- Key Takeaways
- Frequently Asked Questions
- Conclusion
Understanding Your Oven Rack System
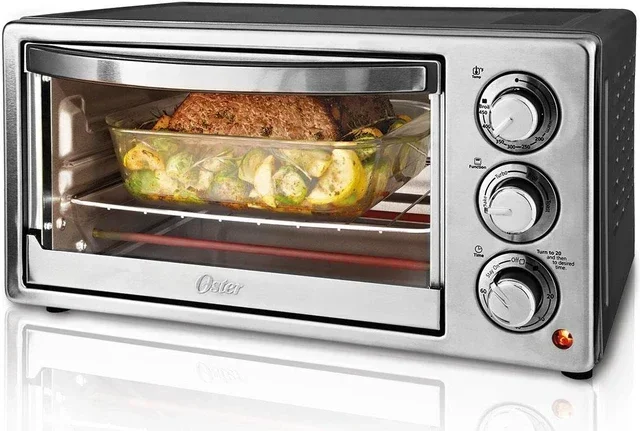
Before you start sliding shelves in and out, it helps to understand what you are working with. Most standard ovens use a simple rail or glide system. The racks rest on metal clips or rails attached to the inner walls of the oven cavity. Some models use a clip-in design, while others rely on a slide-through mechanism.
Knowing your specific oven rack type makes the whole process easier. Check your oven manual if you are unsure. You can also look inside the oven and observe how the current rack sits. The rails usually have small notches or grooves that lock into position. These notches are what let you adjust the height.
Types of Oven Rack Systems
Not all oven racks are the same. Here are the most common types you will encounter:
- Standard slide-in racks: These are the most common. They slide into grooves on the oven walls and stay in place through friction and clips.
- Clip-in racks: These have metal clips that snap onto the oven walls. You simply press the rack into the clips at your desired height.
- Wire racks with chrome coating: These are lightweight and easy to move. Most everyday ovens use this style.
- Cast iron racks: Heavier and more durable. Often found in older or high-end ovens.
- Convection rack systems: Designed for convection ovens with a fan. These racks may have specific placement requirements.
Each type works slightly differently, but the basic idea remains the same. You slide or clip the rack into position at the height you need. The center rack position is the most versatile and works for most everyday cooking tasks.
How to Remove Oven Racks Safely
Before you can put in new racks, you often need to remove the existing ones first. This is especially true when cleaning or rearranging your oven layout. Always let the oven cool completely before touching any racks. Hot metal can cause serious burns.
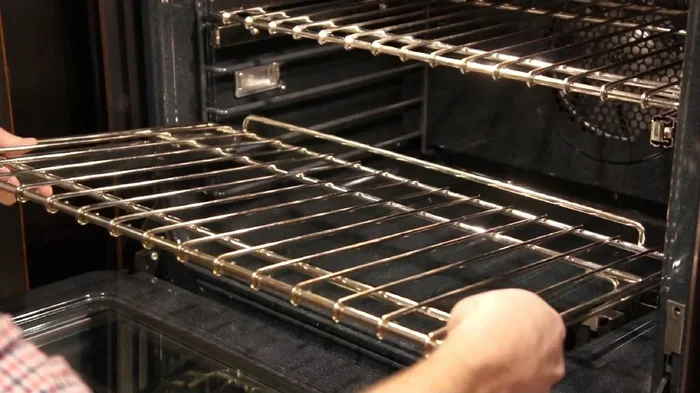
Start by opening the oven door fully. Look at how the rack sits on the rails. Most racks pull straight out with a gentle tug. If the rack feels stuck, try wiggling it slightly from side to side. Do not force it. Forcing a stuck rack can damage the rails or the rack itself.
Once the rack is free, lift it slightly and tilt it toward you. This lets you clear the back of the oven cavity. Set the rack on a safe, flat surface like a countertop or stovetop. If you have a large rack, lay it across two stable surfaces to avoid bending it.
Tips for Stubborn Racks
Sometimes racks get stuck due to grease buildup or rust. Here is what you can do:
- Clean the rails and clips with warm soapy water before trying again.
- Spray a small amount of cooking oil on the rails to reduce friction.
- Use a rubber grip or oven mitt for better handle traction.
- If the rack is severely rusted, consider replacing it with a new one.
Removing racks safely is the first step in learning how to put in oven racks properly. A smooth removal means you can inspect the rails and clips for any damage before reinserting.
Step by Step Guide to Putting In Oven Racks
Now that you have removed the old rack or are starting fresh, here is the full process for putting in your oven racks correctly. Follow these steps for a safe and secure fit every time.
Step 1: Check the Rack and Rails
Before inserting anything, inspect the rack and the oven rails. Look for any debris, food residue, or grease. Wipe everything down with a damp cloth. Check the rails for bends or damage. Straight rails are essential for smooth rack placement.
Also, make sure the rack itself is not warped. A bent rack will not sit properly on the rails. You can check this by placing the rack on a flat surface and seeing if it wobbles. If it does, it may need to be replaced.
Step 2: Choose Your Desired Rack Position
Think about what you are cooking and decide on the oven rack height you need. Here are the standard positions and what they are best for:
- Bottom position: Great for deep-dish pizzas and casseroles that need strong bottom heat.
- Lower-middle position: Ideal for bread baking and dishes that need even heat from below.
- Center position: The most versatile spot. Works for cakes, cookies, roasts, and most everyday recipes.
- Upper-middle position: Good for dishes that need extra top heat, like lasagna with a bubbly cheese crust.
- Top position: Best for broiling and getting a crispy finish on casseroles or gratins.
Most ovens have three to five rack positions. The notches or grooves on the inner walls mark each position. You will want to slide the rack into the rails at the height that matches your cooking plan.
Step 3: Insert the Rack Into the Rails
Hold the rack with both hands. Align the rack’s rails with the grooves or clips inside the oven. Slide the rack in gently until you feel it click or lock into place. Make sure it sits evenly and does not tilt to one side.
If your oven uses clips, you will hear a slight snap when the rack locks onto the clip. Give it a gentle tug to confirm it is secure. A rack that is not fully seated can shift during cooking, which affects heat distribution and cooking results.
Step 4: Test the Rack Movement
After inserting the rack, try sliding it in and out slightly. It should move smoothly without catching. If it feels rough or uneven, pull it out and check the alignment. Sometimes a rack looks seated but is slightly off to one side.
Once you confirm the rack moves freely and sits level, close the oven door. You are ready to start cooking. This simple check helps prevent accidents and ensures your baking racks perform their best.
Best Rack Positions for Different Cooking Methods
One of the most important things to understand is that rack position oven settings change depending on what you are cooking. Using the wrong position can lead to uneven results. Here is a detailed breakdown of the best oven rack placement for common cooking methods.
Baking Cakes and Cupcakes
Always bake cakes on the center rack. This position allows hot air to circulate evenly around the cake pan. It prevents the top from burning while ensuring the middle cooks through. Placing a cake too high can cause the top to dome and crack. Placing it too low can result in a burnt bottom.
Baking Cookies and Biscuits
For cookies, the center rack position works best in most cases. If you are baking multiple trays at once, you can use the upper and lower third positions. Rotate the trays halfway through baking for even results. This is one of the most common oven rack adjustments home bakers make.
Roasting Meat and Vegetables
Roasts benefit from the lower-middle rack position. This gives the meat enough space from the top heating element while still allowing strong heat from below. For vegetables that you want crispy, try the lower third position. The closer proximity to the bottom element creates more caramelization.
Broiling
When broiling, always move the rack to the top position. Broiling uses direct high heat from the top element. Placing food too far from the heat source will not give you the char and crisp you want. Watch your food closely when broiling, as it can go from perfectly browned to burnt very quickly.
Pizza and Flatbreads
For crispy pizza and flatbreads, use the bottom rack position. This puts the pizza as close to the heat source from below, creating a crispy crust. If your oven has a pizza stone or steel, place it on the bottom rack and cook on that surface.
Common Mistakes When Putting In Oven Racks
Even experienced cooks make mistakes with oven rack installation. Being aware of these common errors can save you time, frustration, and even safety hazards.
Forcing a Rack Into Place
This is the number one mistake people make. If a rack does not slide in easily, forcing it can bend the rails or crack the clips. Stop and check what is blocking the path. Usually, it is a simple alignment issue. Take the rack out, realign it, and try again gently.
Ignoring Rack Weight Limits
Every oven rack has a weight limit. Overloading a rack with heavy cookware can cause it to sag or even collapse. Check your oven manual for the recommended weight capacity. Use lighter baking sheets and pans when possible, and avoid stacking heavy items on the same rack.
Placing Racks Too Close Together
Crowding racks blocks airflow inside the oven. This leads to uneven cooking and longer bake times. Leave at least a few inches of space between racks. Good air circulation is key to consistent oven rack performance and even cooking evenly results.
Skipping Rack Maintenance
Many people forget that oven racks need regular cleaning and care. Built-up grease and food residue can make racks sticky and difficult to adjust. Over time, this buildup can also cause rust. Clean your racks regularly with warm soapy water or a dedicated oven cleaner.
Adjusting Racks While the Oven Is Hot
This is a safety risk that many people overlook. Always wait for the oven to cool before adjusting racks. Hot racks and rails can cause burns, and sudden temperature changes can warp metal. Make all rack adjustments before preheating or after the oven has fully cooled down.
Maintenance Tips for Long Lasting Oven Racks
Your oven racks are a long term investment. With proper care, they can last for many years without needing replacement. Here are some simple maintenance tips to keep your racks in excellent condition.
Clean Racks After Every Use
Wipe down your racks after each cooking session. A quick wipe with a damp cloth removes loose crumbs and spills before they harden. For deeper cleaning, remove the racks and soak them in warm soapy water. Use a non abrasive scrubber to avoid scratching the coating.
Check for Rust and Wear
Inspect your racks regularly for signs of rust or wear. Small spots of rust can be treated with a gentle abrasive or rust remover. If rust has spread across a large area, it is time to replace the rack. Using a damaged rack can affect cooking performance and even pose a safety risk.
Lubricate Rails Occasionally
A light application of food safe lubricant on the oven rails helps racks slide in and out smoothly. This is especially helpful for older ovens where rails may have developed friction over time. Use a small amount of cooking oil and wipe off any excess before inserting the rack.
Store Racks Properly When Not in Use
If you remove racks for cleaning or storage, keep them in a dry place. Moisture and humidity accelerate rust formation. Avoid leaning racks against sharp edges that could bend or scratch them. A flat storage space works best.
Expert Insights on Oven Rack Placement
Professional chefs and baking experts agree that rack position is one of the most overlooked factors in cooking success. According to baking experts, the center rack is the default position for about 80 percent of all recipes. This is because it provides the most balanced heat distribution in a standard home oven.
Expert bakers also recommend understanding your oven’s hot spots. Every oven has areas that run hotter than others. To identify yours, place a piece of bread on the rack and bake it at 350 degrees Fahrenheit for about 10 minutes. The side that toasts first indicates your oven’s hot zone. Adjust your rack height and pan position accordingly.
Another expert tip is to avoid opening the oven door frequently when baking. Each time you open the door, heat escapes and the temperature drops. This affects how your food cooks, regardless of where the rack is positioned. Trust the process, set your timer, and let the oven do its job.
Quick Tips for Perfect Rack Placement
- Always preheat your oven before placing food on the rack.
- Use an oven thermometer to verify accurate temperature.
- Rotate pans halfway through baking for even results.
- Keep the oven door closed as much as possible during baking.
- Match the rack position to the cooking method, not just the recipe.
- Clean racks and rails regularly for smooth operation.
Key Takeaways
- Correct rack placement ensures even cooking: Proper positioning prevents hot spots and burned food.
- Adjusting racks is simple and quick: Most ovens use a slide-in rail system that anyone can master.
- Different recipes need different rack levels: Baking usually calls for the center position, while broiling works best on the top.
- Safety matters: Always handle racks with care and let them cool before adjusting.
- Maintenance extends rack life: Regular cleaning and inspection keep your oven shelves working smoothly.
- Common mistakes are easy to avoid: Knowing what to skip saves time and prevents damage.
Frequently Asked Questions
Can I put oven racks in while the oven is still warm?
It is best to wait until the oven is completely cool before adjusting racks. Hot metal can cause burns, and sudden temperature changes may warp the rack or rails. Always let the oven cool down fully, then adjust the oven rack height as needed for your next cooking session.
How do I know which rack position to use for baking?
The center rack position is the default choice for most baking recipes. It provides balanced heat from all sides. For recipes that need extra browning on top, move the rack higher. For dishes that need strong bottom heat, use the lower position. Always check your recipe for specific guidance on oven rack placement.
What should I do if my oven rack is stuck?
If a rack is stuck, do not force it. First, check the rails and clips for grease buildup or debris. Clean them with warm soapy water and dry thoroughly. Apply a small amount of cooking oil to the rails to reduce friction. Then try sliding the rack out gently. If it still does not move, the rack or rails may need professional inspection or replacement.
How often should I clean my oven racks?
You should wipe down your racks after every use and perform a deeper cleaning at least once a month. Regular cleaning prevents grease buildup, which can make racks sticky and difficult to adjust. Clean racks also promote better cooking evenly and help maintain proper oven rack performance over time.
Can I use foil on oven racks?
Yes, you can line racks with foil, but do not cover the entire rack. Blocking airflow with foil can affect how heat circulates inside the oven. Use foil to catch drips and spills, but leave enough open space for air to flow freely. This keeps your baking racks working efficiently and helps food cook evenly.
Do all ovens use the same rack system?
No, different ovens use different rack systems. Most standard ovens use a slide-in or clip-in rail design. Convection ovens may have specific rack requirements because of the internal fan. Always refer to your oven manual to understand your specific oven rack type and how to properly adjust oven racks for safe and effective use.
Conclusion
Learning how to put in oven racks is one of the simplest yet most valuable skills you can develop in the kitchen. It takes just a few minutes to understand, but it makes a real difference in how your food turns out every time. From choosing the right rack position oven setting to maintaining your shelves for long term use, this guide covers everything you need.
Remember that the center rack position works for most recipes, but adjusting your oven rack height based on what you are cooking will take your results to the next level. Avoid common mistakes like forcing racks or adjusting them while hot. Keep your racks clean and well maintained, and they will serve you reliably for years.
Now that you know the ins and outs of oven rack installation, put this knowledge to work. The next time you preheat your oven, take a moment to set the rack at the right height. Your food will thank you with better browning, more even cooking, and that perfect golden finish you have been aiming for. Happy cooking!