How To Cook Ribs In The Oven Low And Slow Perfectly
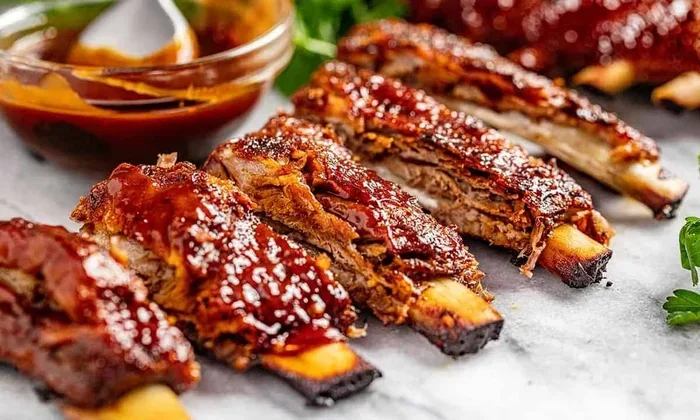
Cooking ribs in the oven low and slow is the easiest way to get tender, juicy, fall-off-the-bone pork ribs at home. This method uses a low oven temperature and patience to break down tough connective tissue, creating rich flavor and a beautiful caramelized bark. Whether you choose spare ribs or baby back ribs, this guide walks you through every step with simple tips and tricks.
There is something magical about how to cook ribs in the oven low and slow. The kitchen fills with a rich, smoky aroma. The meat slowly transforms from tough and chewy to impossibly tender. And when you bite into that first piece, the bone practically slides out on its own.
If you have been wondering whether you can get restaurant-quality ribs without a smoker, the answer is a confident yes. Your regular oven can do wonders when you give it time and the right technique. This guide covers everything you need to know about baking ribs in the oven the right way, from choosing the meat to pulling it off the heat at the perfect moment.
Low and slow cooking is more than just a method. It is a philosophy. By keeping the oven temperature low, you allow the collagen in the rib meat to break down gradually. This creates a texture that is soft, moist, and incredibly flavorful. No special equipment is needed. Just a good oven, a bit of patience, and a great recipe for rib rub.
Key Takeaways
- Low and slow cooking at 275°F to 300°F is the sweet spot for tender oven-baked ribs
- Remove the membrane from the back of the ribs for better seasoning absorption and texture
- Use a rib rub or dry rub at least one hour before cooking, or overnight for deeper flavor
- Wrap ribs in foil partway through to retain moisture and speed up the tenderizing process
- A meat thermometer is essential — aim for an internal temperature of 195°F to 203°F
- Glaze or sauce in the last 15 to 20 minutes to build a sticky, flavorful bark
- Rest ribs for 10 to 15 minutes before slicing to lock in the juices
📑 Table of Contents
Why Oven-Baked Ribs Are a Game Changer
Many people think ribs must be cooked on a grill or smoker to taste great. While outdoor cooking has its charm, oven-baked ribs offer advantages that are hard to ignore. The oven gives you consistent heat, precise temperature control, and protection from wind or unpredictable weather.
When you cook ribs low and slow in the oven, the results are remarkably even. Every piece cooks at the same rate. You do not have to worry about hot spots or flare-ups. This makes the oven method ideal for beginners and seasoned cooks alike.
Consistency You Can Count On
A smoker can be tricky to manage. The temperature can swing up and down. Wind changes everything. Your oven, on the other hand, holds a steady temperature with minimal effort. This consistency is the foundation of great oven-baked ribs. You set it, you forget it, and you let the heat do the work.
Perfect for Any Weather or Season
Rain, snow, or a scorching summer day — it does not matter. Your oven works the same in every season. This means you can enjoy slow cooked ribs any time of year without firing up an outdoor grill. Weeknight dinners and holiday gatherings both benefit from this hands-off approach.
Choosing the Right Ribs for Low and Slow Cooking
Not all ribs are created equal. The type of pork ribs you choose has a big impact on the final result. Understanding the differences helps you pick the best cut for your oven recipe.
Spare Ribs vs Baby Back Ribs
Spare ribs come from the belly area of the pig. They are larger, fattier, and very forgiving when cooked low and slow. Their higher fat content keeps them moist during long cooking times. If you want a rich, meaty flavor, spare ribs are an excellent choice.
Baby back ribs come from the top of the ribcage near the spine. They are leaner, smaller, and cook a bit faster. They have a slightly more delicate texture and are a favorite for those who prefer less fat. Both types work beautifully for low temperature ribs in the oven.
St. Louis Style Ribs
St. Louis style ribs are spare ribs that have been trimmed into a neat, rectangular shape. They cook evenly and look professional when served. Many pitmasters prefer this cut for oven baking because of the uniform size. They absorb rubs well and deliver consistent results every time.
Bone-In vs Boneless Ribs
Bone-in ribs are the standard choice for most cooks. The bone adds flavor during the long cooking process and helps protect the meat from drying out. Boneless rib chops can also be used, but they tend to cook faster and may dry out more easily. Stick with bone-in for the best texture when you cook ribs in the oven low and slow.
| Rib Type | Cooking Time | Fat Content | Best For |
|---|---|---|---|
| Spare Ribs | 4 to 5 hours | High | Rich, meaty flavor |
| Baby Back Ribs | 3 to 4 hours | Medium | Leaner, faster cook |
| St. Louis Style | 4 to 5 hours | High | Even cooking, presentation |
| Boneless Rib Chops | 2.5 to 3.5 hours | Medium | Quick meals, easy slicing |
Preparing Your Ribs for the Oven
Preparation is where the magic begins. Taking the time to prep your ribs properly sets the stage for a perfect result. Skipping steps here can lead to tough, bland meat, so do not rush through this stage.
Removing the Membrane
The membrane on the back of the ribs is a thin, translucent layer. It does not soften during cooking and can become tough and chewy. Removing it is one of the most important steps in making great oven-baked ribs.
To remove it, flip the ribs bone-side up. Find the thin membrane on the back. Use a butter knife to gently lift one corner. Once you have a grip, use a paper towel for traction and pull it off in one smooth motion. It might take a try or two, but it is worth the effort.
Applying the Rib Rub
A good rib rub recipe is the soul of great oven ribs. You can buy a pre-made dry rub or make your own. A simple blend of brown sugar, paprika, garlic powder, onion powder, salt, black pepper, and a pinch of cayenne works beautifully.
Pat the ribs dry with paper towels. Apply the rub generously on all sides. For the best flavor, wrap the ribs in plastic wrap and refrigerate them overnight. If you are short on time, at least let the rub sit for one hour at room temperature before cooking.
Quick Tips for Prep
- Always pat ribs dry before applying any rub. Dry surfaces create a better bark.
- Use about 2 tablespoons of rub per rack for balanced flavor.
- Let ribs come to room temperature for 30 minutes before they go in the oven.
- Preheat your oven to 275°F before placing the ribs inside.
The Best Oven Temperature and Timing
The secret to how to cook ribs in the oven low and slow lies in the temperature. Low heat over a long period is what transforms tough ribs into tender, juicy perfection. The standard range is between 275°F and 300°F.
Why Low Temperature Matters
At low temperatures, the collagen in the connective tissue slowly converts into gelatin. This is what gives slow cooked ribs their signature melt-in-your-mouth texture. If you crank the heat too high, the outside burns before the inside has time to tenderize.
Cooking at 275°F is the sweet spot for most cooks. It takes a bit longer, but the results are worth it. At 300°F, the cook time shortens slightly, but you need to watch the ribs more carefully to prevent drying out.
General Timing Guide
Here is a rough guide for rib cooking time at different temperatures:
- 275°F: 4 to 5 hours for spare ribs, 3 to 4 hours for baby back ribs
- 300°F: 3.5 to 4.5 hours for spare ribs, 2.5 to 3.5 hours for baby back ribs
- 325°F: 3 to 4 hours for spare ribs, 2 to 3 hours for baby back ribs (not ideal but workable)
These times are approximate. The real indicator of doneness is the internal temperature and the feel of the meat. A meat thermometer is your best friend in this process.
Using a Meat Thermometer
Insert the thermometer into the thickest part of the meat, avoiding the bone. You are aiming for an internal temperature between 195°F and 203°F. At this range, the collagen has fully broken down, and the meat should be tender and juicy.
Another test is the bend test. Pick up the rack of ribs from one end with tongs. If the meat cracks and bends slightly, it is done. If it still feels stiff, give it more time.
Wrapping, Glazing, and Finishing Your Ribs
The final stages of cooking make or break your ribs. This is where you build flavor, create texture, and get that beautiful sticky glaze on the outside.
The Texas Crutch: Wrapping in Foil
Many pitmasters use a technique called the Texas Crutch. About halfway through the cooking time, you wrap the ribs tightly in heavy-duty aluminum foil. This traps steam, speeds up the tenderizing process, and keeps the meat from drying out.
Some cooks add a splash of apple cider vinegar, apple juice, or butter to the foil before wrapping. This adds moisture and a subtle flavor boost. The ribs finish cooking in a moist environment, which makes them incredibly tender.
If you prefer a drier, chewier bark, skip the foil wrap entirely. Unwrapped ribs lose more moisture during cooking, which concentrates the flavor and creates a firmer exterior. Both approaches have their fans, so choose the one that suits your style.
Applying the Glaze or Sauce
The last 15 to 20 minutes of cooking is the time to add your glaze or BBQ sauce. Apply it thinly with a brush. The sugar in the sauce caramelizes quickly under the oven’s heat, creating a sticky, glossy finish.
Do not add sauce too early. The sugars in most sauces will burn at high heat over a long period. Keep it for the final stretch only. If you prefer a dry rub finish, skip the sauce altogether. A good dry rub with brown sugar naturally creates a caramelized bark on the ribs.
Quick Tips for the Final Stage
- Unwrap the ribs for the last 10 minutes if you want a crispier bark.
- Apply glaze in thin layers — two to three coats work better than one thick layer.
- Watch carefully during glazing to prevent burning.
- Let the ribs rest for 10 to 15 minutes after removing from the oven.
Serving and Storing Your Ribs
You have put in the time and effort. Now it is time to enjoy the fruits of your labor. Proper serving and storage ensure that every bite is as good as the first.
How to Slice and Serve
Place the ribs on a cutting board bone-side down. Use a sharp knife to cut between the bones, separating individual ribs. Each piece should have a good amount of meat attached. Serve with extra sauce on the side, coleslaw, cornbread, or baked beans for a complete meal.
Storing Leftover Ribs
Leftover oven-baked ribs store well in the refrigerator for up to four days. Place them in an airtight container or wrap tightly in plastic wrap. To reheat, warm them in the oven at 250°F for about 15 to 20 minutes. This keeps the meat moist without overcooking it.
You can also freeze cooked ribs for up to three months. Wrap them tightly in foil and then place them in a freezer bag. Thaw overnight in the refrigerator before reheating.
Common Mistakes to Avoid
- Skipping the membrane removal leads to a chewy, unpleasant texture.
- Cooking at too high a temperature dries out the meat before it tenderizes.
- Adding sauce too early causes it to burn and turn bitter.
- Not letting ribs rest before cutting causes the juices to run out.
- Opening the oven door too often drops the temperature and slows cooking.
Expert Insights and Pro Tips
Over the years, experienced cooks and pitmasters have shared tips that can elevate your low and slow ribs from good to outstanding. Here are some insights that make a real difference.
Use Apple Wood Chips for Subtle Smoke Flavor
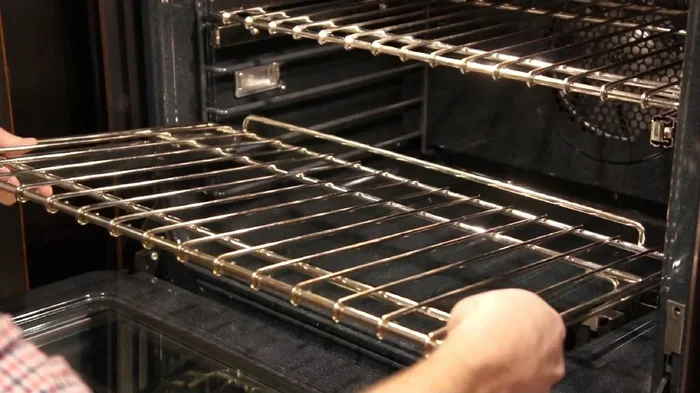
Even though you are cooking in the oven, you can add a hint of smoke. Soak apple wood chips in water for 30 minutes. Spread them on a baking sheet and place them on the lowest oven rack. The chips will smolder and infuse a gentle smoky flavor into the ribs. This is a great trick for smoky ribs oven recipes without a smoker.
The 3-2-1 Method for Spare Ribs
A popular method among pitmasters is the 3-2-1 method for spare ribs. You smoke or bake the ribs for 3 hours unwrapped, then wrap them in foil for 2 hours, and finish unwrapped for 1 hour with sauce applied. While this method was designed for smokers, it works well in the oven too. Adjust the times based on your oven’s temperature.
Balance Sweet and Savory
The best dry rub ribs have a balance of sweet, salty, and spicy flavors. Brown sugar adds sweetness. Salt brings out the meat’s natural flavor. Paprika adds color and a mild warmth. Cayenne or chili powder provides the heat. Adjust the ratios to match your taste preferences.
Key Takeaways for Perfect Ribs
- Patience is the most important ingredient. Do not rush the process.
- A low oven temperature of 275°F delivers the best texture.
- Remove the membrane for a better eating experience.
- Use a meat thermometer to check for doneness at 195°F to 203°F.
- Rest the ribs before slicing to keep the juices inside.
- Experiment with rubs and glazes to find your signature flavor.
Conclusion
How to cook ribs in the oven low and slow is a skill that anyone can learn. The process is simple, the results are impressive, and the method is forgiving. Whether you are cooking for a family dinner, a holiday gathering, or a weekend treat, oven-baked ribs deliver every time.
The key is to keep the temperature low, give the ribs enough time, and pay attention to the details. Remove the membrane. Apply a flavorful rub. Cook at 275°F to 300°F until the meat is tender and pulls easily from the bone. Glaze in the final minutes and let the ribs rest before serving.
Once you master this technique, you will never go back to overcooked, dry ribs again. The oven method gives you restaurant-quality fall-off-the-bone ribs in the comfort of your own kitchen. So grab a rack of pork ribs, preheat your oven, and enjoy the process. Great ribs are just a few hours away.
Frequently Asked Questions
Can I cook ribs at 350°F instead of low and slow?
You can, but the results will be different. Higher temperatures cook ribs faster, but they are more likely to dry out. The low and slow method at 275°F to 300°F breaks down connective tissue more effectively, creating a tender texture that is hard to achieve at higher temperatures.
How do I know when ribs are done in the oven?
Use a meat thermometer to check the internal temperature. It should read between 195°F and 203°F in the thickest part of the meat. You can also perform the bend test — gently lift one end of the rack with tongs. If the meat cracks and bends, the ribs are ready.
Do I need to wrap ribs in foil when oven cooking?
Wrapping in foil is optional, but it is highly recommended for tender results. The foil traps steam and keeps the meat moist during the middle phase of cooking. If you prefer a drier, chewier bark, you can skip the foil entirely.
What is the best rib rub recipe for oven ribs?
A simple and effective rub includes brown sugar, smoked paprika, garlic powder, onion powder, salt, black pepper, and a pinch of cayenne. Mix them together and apply generously to the ribs at least one hour before cooking, or overnight for the deepest flavor.
Can I use baby back ribs for low and slow oven cooking?
Absolutely. Baby back ribs are leaner and cook faster than spare ribs. They work well at 275°F and typically need 3 to 4 hours. Their smaller size makes them a great choice for quicker low and slow sessions.
How long do cooked ribs keep in the refrigerator?
Cooked ribs stay fresh in the refrigerator for up to four days when stored in an airtight container. Reheat them gently in the oven at 250°F for 15 to 20 minutes to keep the meat moist. Avoid microwaving, which can dry out the ribs quickly.